DIY Auto Service: Cooling System Operation and Testing
Antifreeze
Safety
CAUTION:
Opening a HOT cooling system could cause severe burns from scalding coolant. Always let the cooling system cool down before opening. Check the upper radiator hose for coolant temperature.
Cooling System Introduction
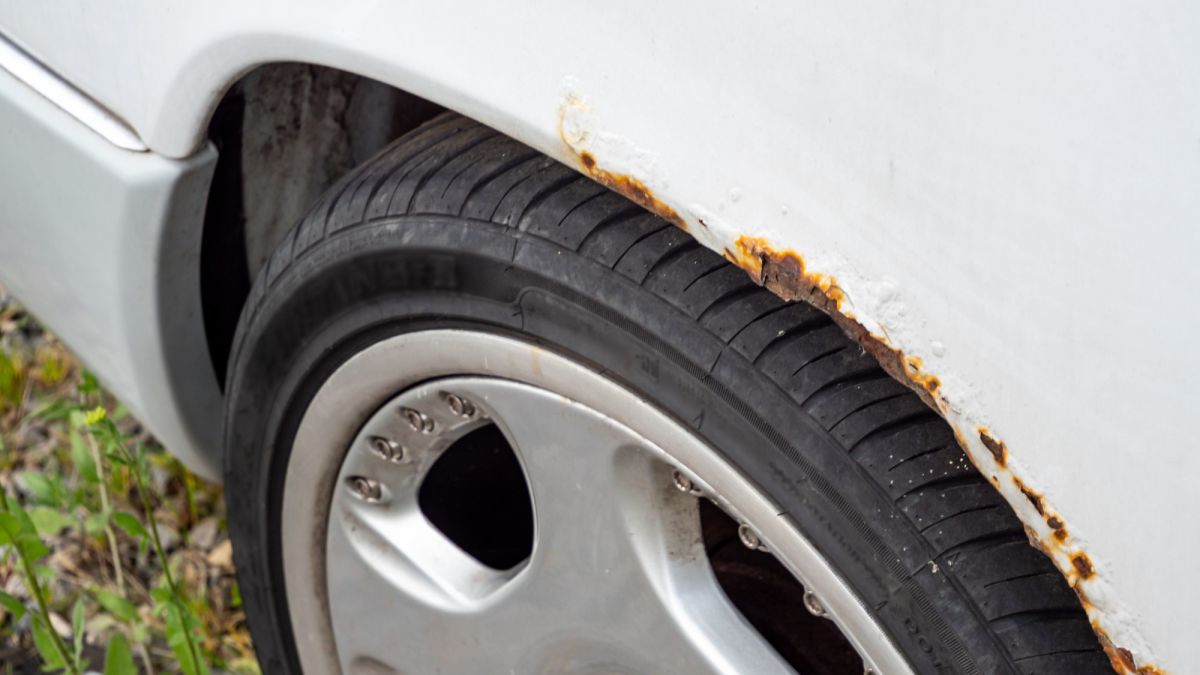
The cooling system is responsible for maintaining engine temperature. If the engine runs too hot; pistons could melt, parts could warp and the engine would be severely damaged. Water could be used as a coolant but, the iron parts would quickly rust and corrode. Engine coolant typically is referred to as anti-freeze but is does more than keeping the coolant from freezing. Maintaining the coolant protection, involves testing and replacing the coolant at given intervals. A poorly maintained cooling system can cause an engine to fail.
The components in the cooling system; pump the coolant around the system, regulate the temperature, remove heat from the cylinders, remove heat from the engine oil, intake air and heat the cabin area as needed.
The engine cooling system works by removing heat from the cylinder walls in the engine, transferring it to the engine coolant and circulating it to the radiator to be given off to the atmosphere. All three types of heat transfer are used to accomplish this. Conduction is used at the cylinder walls to conduct the heat thru the metal. Convection is used by pumping the coolant to the radiator. Conduction is used again to transfer the heat thru the copper or aluminum radiator. Finally radiation is used to give off the heat to the atmosphere.
Engine Coolant Types
Engine coolant is also referred to as anti-freeze. The mixture performs more functions than keeping the coolant from freezing. The coolant is a mixture of anti-freeze and water. Typically a 50/50 mix is the recommended ratio. Pure 100% ethylene glycol anti-freeze will freeze at about -5°F and water freezes at 32°F but the mixture is good to about -34°F.
Three types of anti-freeze are available:
-
Ethylene Glycol has been the standard coolant used for many years. This coolant has a high toxicity level and when drained from the system is considered a hazardous waste and needs to be dealt with accordingly. Ethylene glycol is poisonous to humans and animals and should be store in closed containers. A 50/50 mix is good to about -34°F but a 60/40% mix will freeze at about -62°F.
-
Propylene glycol is less toxic than ethylene glycol and has been used in applications that are in much colder climates due to its lower freeze point and in applications such as RV’s. Propylene glycol has a 50/50 mix freeze point at about -27°F but, at 100% it has a freeze point of about -76°F. Propylene glycol hasn’t been very popular as a vehicle anti-freeze.
-
Extended life coolants (ELC’s) are very popular today and are usually an ethylene glycol based coolant. ELC’s are regarded as more environmentally safe only because the extended life in the cooling system is longer and less coolant services mean less coolant to be dealt with. The improved service life also helps keep the corrosion and scaling at lower levels for an extended period. Since they are ethylene glycol based they are required to be treated as a hazardous waste. Most ELC anti-freeze generally will last 5 years . Follow the OEM guidelines to protect the cooling system.
Service Tip: Do not mix ethylene glycol and propylene glycol together as they will react to each other and form a gel that may plug up the cooling system passages in the radiator and heater core.
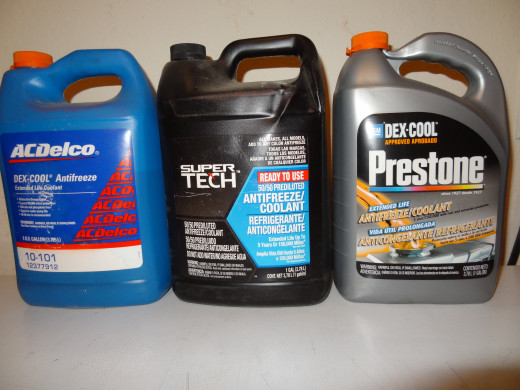
Antifreeze
Anti-freeze color used to be all green but, today most of the manufacturers of ELC have their own colors. The common colors of ELC anti-freeze are green, yellow, orange, pink, blue and red. Many of these coolants come with a premix of anti-freeze and water. The water added to the mix is as important as the mix itself. Hard water with a lot of minerals will react in the system and create an acid. Distilled water or De-ionized water is recommended.
Coolant Additives
Coolant is a mixture of additives that provide a variety of functions in the cooling system. Water by itself will cause rust and corrosion to form in the cooling system and can damage metal parts, corrode hoses and plug up passageways. The anti-freeze contains:
-
Corrosion protection with the addition of corrosion inhibitors.
-
Freeze protection by lowering the freezing point.
-
Acidity protection by raising the pH (percent of hydrogen) in the mixture.
-
Anti-scale protection to prevent mineral deposits on critical heat transfer surfaces.
-
Anti-foam additives to prevent the aeration of the coolant.
-
Anti-dispersants to keep insoluble material from clogging passageways.
Note: SCA (Supplemental Coolant Additive) or DCA (Diesel Coolant Additive) is an additive to protect diesel cylinder liners against cavitation erosion or liner pitting.
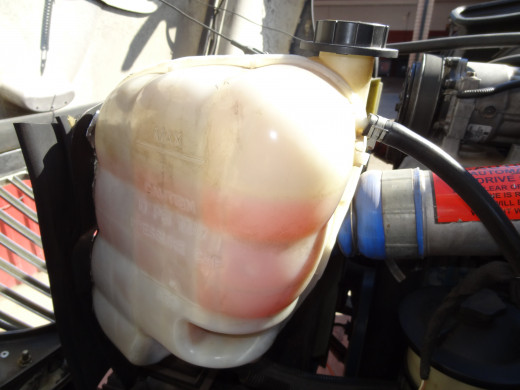
Engine Coolant (De-aeration) Bottles
Testing Coolant
Testing the coolant is a regular part of a PMI (Preventive Maintenance Inspection) and is usually part of an annual inspection. The following coolant tests should be performed to evaluate the coolant.
Freeze Protection
Freeze protection is evaluating the mix ratio of the coolant. The 50/50 mix rate will protect to -34°F. Two types of tools can be used to check the freeze protection.
-
A hydrometer uses a squeeze ball to siphon a sample of fluid into a gauge cylinder. An indicator floats in the coolant and is read at the level of the coolant.
-
A refractometer is the preferred tool because of its increased accuracy. A small sample of coolant is placed on a view window and as the technician looks thru the tool, a line shows up on a gauge. The refractometer has a gauge in it for battery acid, ethylene glycol and propylene glycol.
Hydrometer
A hydrometer uses a squeeze ball to siphon a sample of fluid into a gauge cylinder. An indicator floats in the coolant and is read at the level of the coolant.
Refractometer
A refractometer is the preferred tool because of its increased accuracy. A small sample of coolant is placed on a view window and as the technician looks thru the tool, a line show up on a gauge. The refractometer has a gauge in it for battery acid, ethylene glycol and propylene glycol.
PH
PH (Percent of Hydrogen Ion) is the acidity or alkalinity levels of the coolant. Acidic coolant can eat away at the metals in the system. Higher pH levels above 6.5 are considered alkaline and below are considered acidic. Typical new coolant with the proper water or premixed coolant is about a pH of 9 to 10. As coolant ages is becomes more acidic and is usually the reason it is being changed. Test strips available have a pH gauge (litmus strip) to measure the pH. Compare the strip to the gauge chart. Dip the test strip in the coolant and compare it to the chart.
SCA or DCA
SCA or DCA protection is used on medium and heavy duty diesel engines and also on the coolant test strip. It is recommended to use the test strips from the OEM that made the coolant; Fleetguard (Cummins), Detroit Diesel etc. Many heavy duty diesels use a spin-on coolant filter that contains an SCA additive. Some ELC OEMs do not require SCA testing.
Dissolved Solids
Total dissolved solids can be tested using a voltmeter. Ground one lead of the meter and drop the other lead into the coolant. This must be in the main body of the coolant and not an overflow bottle. Check the specifications for the levels recommended by the OEM but usually .4 to .5 volts requires a coolant service.
Cooling System Flow
Standard Cooling System
The cooling system flow starts with the water pump and goes directly to the heat exchangers (oil cooler, EGR cooler, turbo aftercoolers and manual transmission cooler if equipped). After the coolers the coolant flows into the bottom of the block to flow around the cylinders and up towards the cylinder head. In the cylinder head the coolant flows around the valve seats and injectors. The coolant leaves the cylinder head and travels to the thermostat housing. In the thermostat housing is one or two (diesel) thermostats that will direct the coolant flow either back to the water pump inlet (cold) or to the radiator (hot). At the thermostat housing part of the coolant is sent to the heater cores for heating the cabin. The upper radiator hose connects the thermostat housing to the inlet of the radiator. As the coolant flows through the radiator, heat is given off to the airflow. The radiator outlet is connected to the lower radiator hose to circulate the cooled engine coolant back to the water pump.
Reverse Cooling System
Many cars and light duty applications use a reverse cooling system. This type of cooling system sends the coolant that has been cooled by the radiator to the top of the engine and returns it out of the bottom. The cooled antifreeze is sent into the cylinder head and returns the coolant thru the block. With a reverse cooling system the thermostat is located before the lower radiator hose or at the water pump and returns the hot coolant to the radiator.
Radiators
Radiator
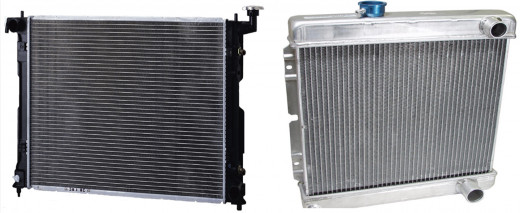
The radiator, located in front of the vehicle (in most applications), radiates the heat of the coolant to the atmosphere. Two types are used; downflow radiators have a tank on the top and bottom and the coolant flows to the bottom thru the radiator core, crossflow radiators have a tank on both sides and the coolant flows from one side to the other thru the core. The fins on the radiator increase the surface area to aid in the radiation of heat to the air. The fins need to be clean and straight. Fins clogged with dirt or bent-over will reduce the heat transfer.
The coolant flows through the core which is made up of tubes that connect the tanks. Fins between the tubes give the radiator more metal surface area to “radiate” the heat to the air. Heavy duty radiators are usually made from copper/brass but, aluminum or a combination aluminum core with plastic tanks is available. The combination aluminum core and plastic tanks are common in automotive and light trucks.
Common areas for the radiators to leak are:
-
The core can be rotted out from the inside or damaged from stones or other projectiles.
-
The hose connections can be cracked by the stress of the hose being removed or engine movement tugging on the connection.
-
The connection between the tanks and the core can develop leaks, especially on the plastic/aluminum types.
-
The tanks can develop cracks or abrasions from improper mounting in the vehicle.
Water Pump
The water pump as its name implies, pumps the coolant throughout the cooling system. Centrifugal type pumps take the coolant into the center and throw it to the outside as the impeller spins. Most water pumps are belt driven The shaft of the water pump is supported by a sealed bearing and has a shaft seal. The water pump can cause a coolant leak out the small hole called the weep hole. If this happens the water pump will need to be replaced.
Thermostat
The thermostat controls the temperature of the coolant in the engine. When the engine is cold, the thermostat is closed and only allows the coolant to recirculate into inlet of the water pump then back to the block and heater core. This allows the engine to warm up quicker. As the engine warms up to the opening temperature of the thermostat, it will start sending the hot coolant to the radiator. The thermostat generally opens between 180 and 195°F. A thermostat that sticks open may cause the engine to run too cool and have a “no heat” complaint. A thermostat that sticks closed may have an overheat condition. The thermostat, or on some engines, two thermostats are located where the upper radiator hose connects to the engine in a thermostat housing. A gasket or seal is used to seal the thermostat.
Radiator Caps
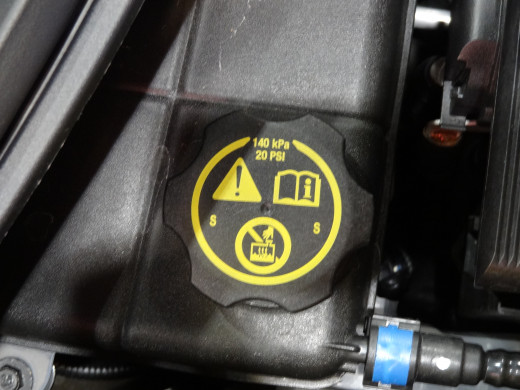
Radiator Cap
The radiator cap holds pressure in the cooling system. The spring loaded cap is the pressure regulator of the cooling system. The cap pressure is marked on the cap with most caps being in the 13 to 15 psi or 90 to 110kPa (kilo Pascal’s) range. The pressure raises the boiling point of the water in the system. If the cap is bad it will lower the point at which the coolant boils.
The second feature in a radiator cap is a vacuum valve. When the cooling system cools down, the liquid shrinks in size. This would cause a vacuum to be created in the system and the hoses would collapse because of the higher atmospheric pressure on the outside of the hoses. The vacuum valve allows air to flow into the system instead of a vacuum being created. A sign that the vacuum valve is not working would be collapsed upper radiator hose.
Heater Core
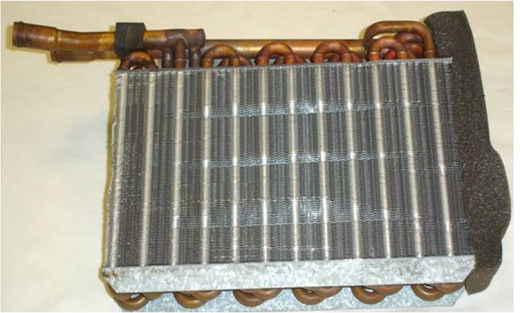
Heater Core
The heater core is located under the dash in the heater/AC box. Two hoses, one in and one out, connect the heater core to the engine cooling system. The hose that supplies the heater core is usually connected close to the thermostat housing. The return hose is usually connected near the water pump inlet. Vehicles with rear heat/AC or a truck with sleeper heat/AC will have a heater core also in the rear unit. This means you have AC and heater lines running all the way to the rear unit. Common indicators of a heater core leaking are; a sweet smell inside the cabin, steam on the inside of the windshield or a puddle on the passenger side floor usually under the carpeting.
Hoses
The hoses and clamps may need tightening from time to time depending on the clamp style. Hoses should be checked for signs of bulges, cracking or physical damage and replaced accordingly. The lower radiator hose typically has a coiled wire to prevent the hose from collapsing due to the lower pressure created by the water pump.
Some hoses are preformed to fit a given application. Heater hose can generally be purchased by the roll in the proper inside diameters (5/8, 3/4 and 1 inch). Routing the hoses is extremely important so they won’t be damaged by rubbing on moving or hot parts. Longer hoses usually run through brackets or clamps to support the hoses. Some applications will use sections of pipe with hose connections.
Radiator Pressure Tester
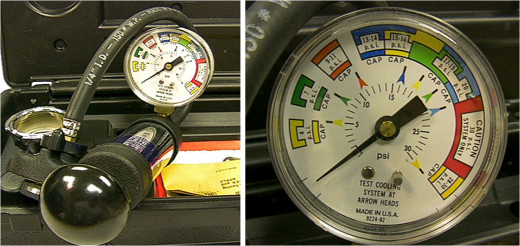
Pressure Testing the Cooling System
CAUTION:
Opening a HOT cooling system could cause severe burns from scalding coolant. Always let the cooling system cool down before opening. Check the upper radiator hose for coolant temperature.
To test the integrity of the cooling system, a cooling system pressure test can be performed. This will test the entire cooling system and the radiator cap. To perform the pressure test a special pressure tester will be needed with the adapters to fit the vehicle radiator cap and radiator or de-aeration tank neck.
Test the Cooling System
To test the cooling system:
-
Attach the adapter to the pressure tester and cooling system opening.
-
Pump the pressure up to the rating on the cap, typically 15PSI. Do not pressurize the system above the rating.
-
Let it sit for 10 minutes and observe the pressure. The pressure should hold.
-
If the pressure drops, a leak is present. A leak below the coolant level will leak coolant. A leak above the coolant level will leak air.
-
Repair the leak and retest.
Test the Radiator Cap
To test the radiator cap:
-
Attach the adapter to the pressure tester and to the radiator cap.
-
Pump the pressure up to the rating, typically 15PSI marked on the cap.
-
Let it sit for 1 minute and observe the pressure. The pressure should hold and pop-off within 1 PSI of the rating. If higher or lower than 1 PSI, replace the cap.
-
Visually check the seal and gasket on the cap for cracking or wear.
Service Tip: The radiator cap also contains a vacuum valve to allow air or coolant from an overflow bottle to flow back in to replace the coolant as it cools and shrinks in size. If collapsed hoses are found on a cold engine, this could be the cause.


