Headlight Restoration Made Easy
Headlight Restoration
Other truck hubs
- How to: Starter Motor Repair Video Ford Truck
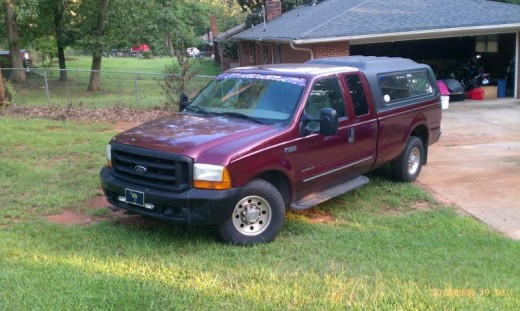
This hub gives you a checklist so that you can properly diagnosis that it is indeed the starter that needs to be replaced on your Ford 7.3L Diesel Truck, once all electrical systems pass inspections. - How to: Serpentine Belt Change Video Ford F-350
I give you instructions on how to change a serpentine belt on a 2000 Ford F-350 7.3L Diesel Truck. - How to: Fuel Filter Change Video Ford Diesel Diesal F-350 7.3L
This is a detailed set of instructions on how to change your fuel filter on a 7.3 liter diesel engine, typically found in 90's and early 2000's model Ford Trucks - How to: Starter Motor Replacement Video Ford Diesel Truck
These are the detailed instructions on how to install a new starter on a 7.3 liter diesel for truck.

Products
There are many products on the market to accomplish this task. Many have the same written techniques as demonstrated here and in the video above.
Headlight Restoration Kits
Tips
Due to the sorness in my arms after I made this video, my advice is to find a buffer kit that attaches to a rotating buffer wheel. This would be extremely useful if you are to do more than one automobile. Personally, I just needed to do one, so I went the manual buffing route.

Warning
If you use the above kit, make sure to use plenty of product and thus lubrication as you use the rotating buffer. Without it, you have the risk of doing permanent damage to the lens if you do not.
Again, if you are doing multiple vehicles, do not hesitate to buy a kit that has the buffer wheel to go with your electric buffer. Big time saver!
Instructions
These are very basic. These apply to all cleaning and polishing surfaces.
- Follow the instructions with the product that you purchased
- Use plenty of product to maintain lubrication as you sand the surface
- Wipe the surface clean between different levels of sanding, using different levels of grit paper
- Start with the most coarse sanding grit paper with your package because this will do most of the cleaning process and remove all of the oxidation. Use this sanding paper the longest, as it does the most work.
- Change directions between grit paper, from vertical, to horizontal, and back again, etc.
- Slowly but surely work your way towards the smoothest, fine grit paper that your package contains. This goes from the cleaning/sanding process into the polishing process for a like-new finish as delivered by the factory
- Apply the liquid plastic solution carefully, because smears or runs will show.
- Allow to dry. The cloudiness will dissipate, and it will remain clear
- Pat yourself on the back for savings hundreds of dollars a month by switching to Geico.
Conclusion
Although it still isn't as good as a brand new headlight, combined with new headlight bulbs and a clear, clean lens, I noticed a dramatic improvement in my night time driving visibility. I would not waste one dime on paying someone else to do this for you. It's a very DIY project!
COPYRIGHT
This article was originally posted on hubpages at http://franksg384.hubpages.com/. If it is found anywhere else on the internet, it has been illegally copied and posted, and I ask you to simply report it to google or myself at http://twitter.com/franksg384. THANKS!


