Installing a sequential taillight kit in a late model Ford Mustang GT


I always loved the look of the sequential turn signals on the Ford Thunderbirds built between 1965 and 1971, Mercury Cougars between 1967 to 1973 and Shelby Mustangs between 1967 and 1970.
Some 2010 Mustangs are also equipped with three lens taillights with LEDs (Light Emitting Diodes) that blink in sequence for turn signal indication. But how do I duplicate this on my late model Mustang GT?
The Internet search
I did some searching on the Internet and found that Amazon had a Mustang sequential taillight kit on sale from one of its affiliates. It included free shipping which made me very happy. I purchased the Mustang sequential taillight kit on the spot.
Mustang Sequential Taillight Harness on Amazon

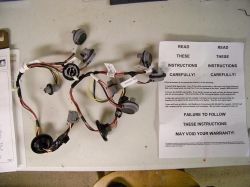
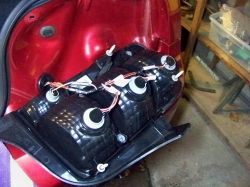
Shipment Arrived
The day finally came when my Mustang sequential taillight kit from Amazon arrived. the kit included two replacement wiring harnesses, one for the left rear turn signal, the other for the right turn signal, and easy to follow instructions.
Check rear lighting operation before installing the Sequential Taillight Kit
Before installing the Sequential Taillight Kit, I recommend checking the operation of your tail lights, turn signals, backup lights and reverse lights before hand to make sure they are working properly. It not correct any problems before proceeding.
This will save you troubleshooting time later.
Removing interior trim from trunk
The first thing you need to do is remove the interior trim piece from the trunk to expose the bolts that hold the tail lights to the body of the car.
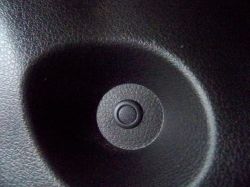
In order to remove the trunk interior trim piece, remove the four center pin lock retainers. These can be removed by using a flat-head screwdriver to pop the center of the pin up, which then allows you to remove the retainer.
You will need to push back the carpeting to remove the trunk interior trim piece.
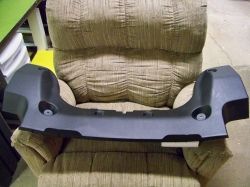
Picture of the interior trim piece
Here is a picture of the trunk interior trim piece removed from the car.
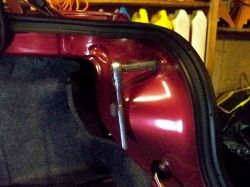
Removing the taillight assembly from the car
Remove the three 11 mm nuts on the back of each taillight assembly, you should now be be able to pull the taillight assembly away from the car.
Do this for both left and right taillight assemblies.
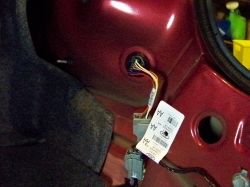
Disconnect the stock taillight wiring harness
On the inside of the trunk there is an electrical connector that connects the taillight wiring harness to the car's electrical system. Disconnect this connector.
Do this for both left and right taillight assemblies.
Remove light bulbs from stock harness
Remove the sockets from the taillight housing by twisting them. Remove the light bulbs and put them in a safe place where they cannot be damaged.
Do this for both left and right taillight assemblies.
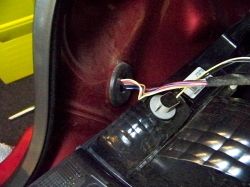
Remove grommet from the body of the car
A rubber grommet is used to pass the taillight harness between the exterior and interior of the car. From the outside of the car gently pull free the grommet from the car. Pull the electrical connector through the hole in the body.
Do this for both left and right taillight assemblies.

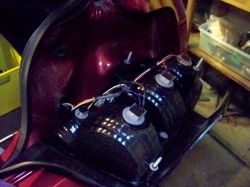
Clean the taillight assembly
This would be a good time to clean the taillight assembly. Be careful not to scratch the lens.
Do this for both left and right taillight assemblies.
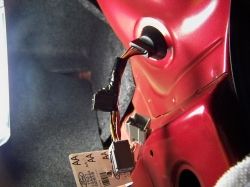
Install the replacement harness
Two replacement taillight sequential harnesses came with the kit. One for each taillight assembly. Insert the bulbs into the new sequential harness. Install the new harness into the taillight housing. Note: Mustang sequential tail lights harness sockets are labeled 1, 2, and 3. Socket 1 is for the innermost taillight bulb, socket 2 is for the middle taillight bulb, and socket 3 is for the outermost taillight bulb. From the exterior of the car, insert the connector on the taillight sequential harnesses into the hole in the body then secure the grommet around the taillight sequential harness to the body of the car. Connect the taillight sequential harnesses connector to the car's electrical system.
Do this for both left and right taillight assemblies.
Reinstall the taillight assembly to the car
Carefully align the bolts on the back of the taillight assembly with the holes in the body of the car. Once aligned push the taillight assembly in place against the car body. Hand-tighten all three nuts that secure the taillight assembly to the car. Use a 11mm deep well socket to snug the taillight assembly to the body of the car. Do not over-tighten as you could crack the taillight assembly.
Do this for both left and right taillight assemblies.
Check rear lighting operation after installing the Sequential Taillight Kit
Before you put the trunk interior trim piece in place, it is a good idea to test the operation of your tail lights, turn signals, backup lights and reverse lights to make sure they are working properly. If not correct any problems before proceeding with installing the trunk interior trim piece.
Testing the sequential taillight kit
Installing the trunk interior trim piece
Installation of the trunk interior trim piece is reverse of the removal process.
Video of the Sequential Taillights in Action!
Conclusion
With a little effort you too can install a sequential taillight kit in a late model Ford Mustang GT.
Related

Smart Car Body Kits: Wicked Kuhl Body Kits and Mods

How to Replace Chrysler Wiper Bushings

How To Give Up Cable TV By Installing An Indoor TV Antenna

How to Make Your Car Smell Good With Tips to Using Air Fresheners

Car Modding, Car Tuning and the Science of Horsepower - Tuning Preparation and Clean Up


