Quick steps to Set Up Google Analytics for HubPages

Google Analytics is a tool providing content reader's deeper information. Using this great tool with HubPages account, more interesting information can be extracted. Default HubPages learning center has a good information which can be accessed from there. The goal of this page is to give you more detail information to set up Google Analytics for HubPages account. All steps are clearly focused and explained each point clearly. Hopefully, following these steps you could easily set up Google Analytics for your HubPages account easily and accurately.
Step 1: Log in to Google analytic account
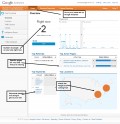
Go to http://www.google.com/analytics/ (Fig: a) and click on Sign in. Type your user name and password and click on Sign in button (Fig: b). After successful signed in, click on Admin link (Figure: c) and then click on + New Account button (Figure: d).


Step 2: Accessing account administration section of Google Analytics
After successful signed in, click on Admin link (Figure: c) and you will go to the main administration area of your Google Analytics account. From Account Administration section, you can create the profile for each site. Our target is to create an analytic profiles for our HubPages account. So, we must have to access this page. Otherwise, you are unable to create any analytics account for that page.

Step 4: Initiating new profile for HubPages account
At the end of Step 3, you will access administration section of Google Analytics. It's time to create or open a new analytics account. You will find a button like + New Account in your Account Administration area. Just click on that button and the new account opening will be initiated. Just wait few seconds and you will be presented a new page with a form.

Step 5: Specify and tracking method selection
After the above steps you will find the form for your new Google Analytics account with a form containing several forms. You need to fill up the forms with necessary information. The first question of the form is What would you like to track? Remember, your target is to create analytics account for your HubPages account and this is a website. So, you have to choose Web Site option for this question's answer.
The next question of the form is Select a tracking method and offers you two choices: [1] Universal Analytics and [2] Classic Analytics. Anyone you may choose. But I prefer Universal Analytics as this has more advanced features compared to "Classic Analytics".

Step 6: Setting up your web property for your account
In this step you have to put four information and one is really very important. All the information that you need to enter are the followings:
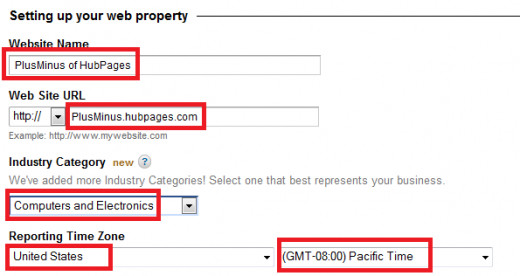
- Website Name: The name of your website goes here. It is only a name and you can enter your as you wish. For example, you may enter like [yourName] of HubPages where youName refers your own personal name on hubpages. My profile name in HubPages is plusMinus and so i write plusMinus of HubPages.
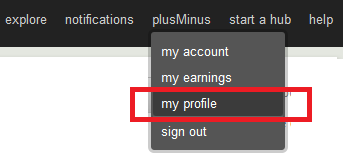
- Web Site URL: This is the most important part and you have to carefully enter this field information. It's the URL file through your contents of HubPages can be accessed. The value of this field will be Your Profile Access URL and looks like YourProfileName.hubpages.com. Suppose, my profile name is http://plusminus.hubpages.com/ and so I have to put plusminus.hubpages.com in the URL file of Google Analytics form. [Note: To find out this information, you have to follow: Log in to your HubPages account -> Move your cursor pointer to your profile name and a pop-up menu will be appeared -> click on "my profile" link an you will find the profile link of yours.]
- Industry Category: This is just the category option which best matches your contents. Pick a choice which best matches of your contents.
- Reporting Time Zone: This is option for time zone. HubPages recommend United States with (GMT-08:00) Pacific Time. You may also choose other one if you like.
After completing the information, the form looks like the following figure:
Step 7: Setting up your account into Google Analytics
Type HubPages in the field Account Name field. There are some other option under Data Sharing Settings option which are optional. At last, click on Get Tracking ID button to save all the changes and to get the Google Analytics's tracking ID.
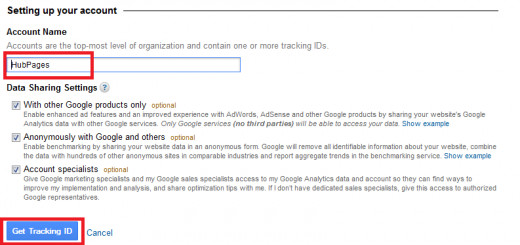
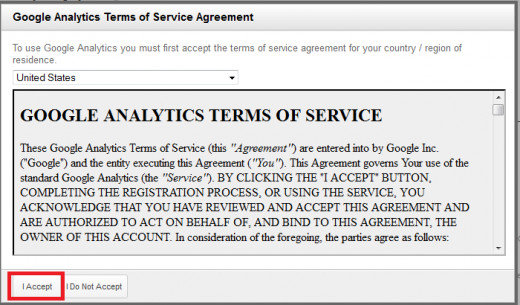
After clicking Get Tracking ID, Google Analytics Terms of Service Agreement window will be appeared. You must have to click on I Accept button to get the tracking ID. Simply click on I Accept button.
Step 8: Getting the tracking ID
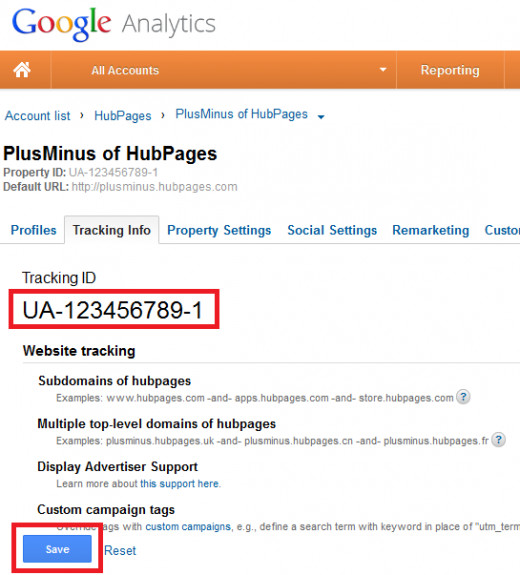
Completing the above step, you will get your Tracking ID which starts with UA and like UA-xxxxxxxxx-1. Lastly, click on Save button to save your tracking ID.
Step 9: Configuring Google Analytics Tracking ID on your HubPages account
After sign up your HubPages account, access the link https://hubpages.com/my/earnings/affiliate/ to start configuration with your Google Analytics account. After accessing that URL, do the following things:
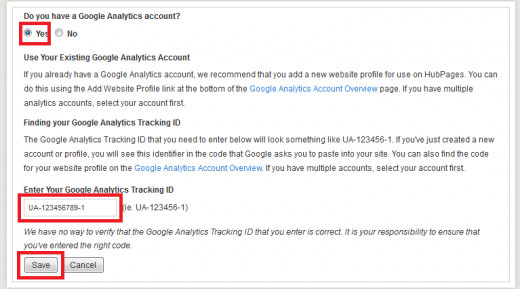
[a] Under the question Do you have a Google Analytics account?, choose Yes as we already have created a Google Analytics account from Step 1 to Step 8.
[b] Copy the Google Analytics Tracking ID which we have already created in Step 9 and put that tracking ID code in the field Enter Your Google Analytics Tracking ID.
[c] Click on Save button to save all the changes.
That's all. Following the above mentioned steps, you can easily set up Google Analytics for your HubPages account and can extract deeper information of your contents readers' behavior.