- HubPages»
- Education and Science»
- Teaching»
- Lesson Plans
Trees Lesson Plan for Elementary

Examine tree cookies and count the rings, create delicious tree fruit and nut balls, act out the parts of a tree, sketch a twig to learn its parts, and more in this fun, hands-on lesson on trees! This is part 6 of a 6 part hands-on unit on Plants. This lesson is geared toward 2nd-3rd grade level children and their siblings. I created this to do with a weekly homeschool co-op which meets each week for 2 1/2 hours. Use this fun lesson with your class, family, after school program, camp, or co-op!
Which type of tree is your favorite?
Tree Cookies and Tree Rings

1. Read and discuss Psalm 1:1-3: Blessed is the one who does not walk in step with the wicked or stand in the way that sinners take or sit in the company of mockers, but whose delight is in the law of the Lord, and who meditates on his law day and night. That person is like a tree planted by streams of water, which yields its fruit in season and whose leaf does not wither— whatever they do prospers.
2. Ask: How are plants important to us? (Allow students to share)
- We eat them for food or eat animals that eat them for food.
- They're an important source of Vitamins A, B-complex, C, E, & K
- Most of the water in our clouds is pulled from the ground through a plant & then evaporated into the sky.
- They recycle our carbon dioxide & provide oxygen for us & for animals.
3. Have students study a tree "cookie" (a slice of a tree trunk.) What do they notice?
- During regions that have seasons, trees will grow very rapidly in the spring and then not as rapidly in the late summer. The faster growth of early spring makes large cells that are light in color, the lighter colored area is called earlywood or springwood.
- Summer growth, which is slower, produces cells that are smaller and darker in color, these dark regions are called latewood, or summerwood.
- The circles created by the alternating summer and springwood are called annual rings.
- The oldest layer of growth is in the center, and the newest growth rings are closest to the bark. Counting the rings can give you an estimate of how old the tree is. This method is not foolproof though. Some environmental conditions can cause the tree grow more than once during a growing season, and thus produce false rings; ring counts do not always indicate the tree’s true age.
- The width of the rings gives you clues about how favorable the growth season was. If environment conditions were good (plenty of water & sunlight) the growth rings will be wide. If conditions were not as favorable during the year, the growth rings will be narrower.
- Also, if a tree is damaged on the outside, as it grows that damage will become a scar on the inside. Damage could come from being cut, or fire, or disease.
- Tree rounds have three distinct regions. The outer region, or bark, is separate from the area of wood on the inside. The center, or core, of the tree is the pith, which is small in comparison to the larger area of wood. Less noticeable region is the thin cambium, which lies between the bark and wood.
- Wood rays appear as lines radiating from the pith to the outside of the wood like spokes of a wheel.
- The wood area is further divided into two regions. The outer area of the new growth is usually light in color and represents the live tissue called sapwood. The inner area is darker, and is dead tissue called heartwood. Sometimes this is filled with gums and resins which gives it a very dark color.
YOU WILL NEED:
- tree cookies (sliced pieces) and magnifying glasses
(The above explanation came from the excellent book Exploring Creation with Botany by Jeannie Fulbright .)
Sketch a Twig

4. Lead the students in drawing a twig. (I watched the below video ahead of time and then led the students in sketching just as she does in the video.) Even 5 year-olds were able to create nice sketches! What I love about the video is that the artist talks about the different growths on the twig, and made us all notice parts of a tree that we would not have otherwise noticed.
YOU WILL NEED:
- paper and pencils
Tree Bark and Leaf Rubbings


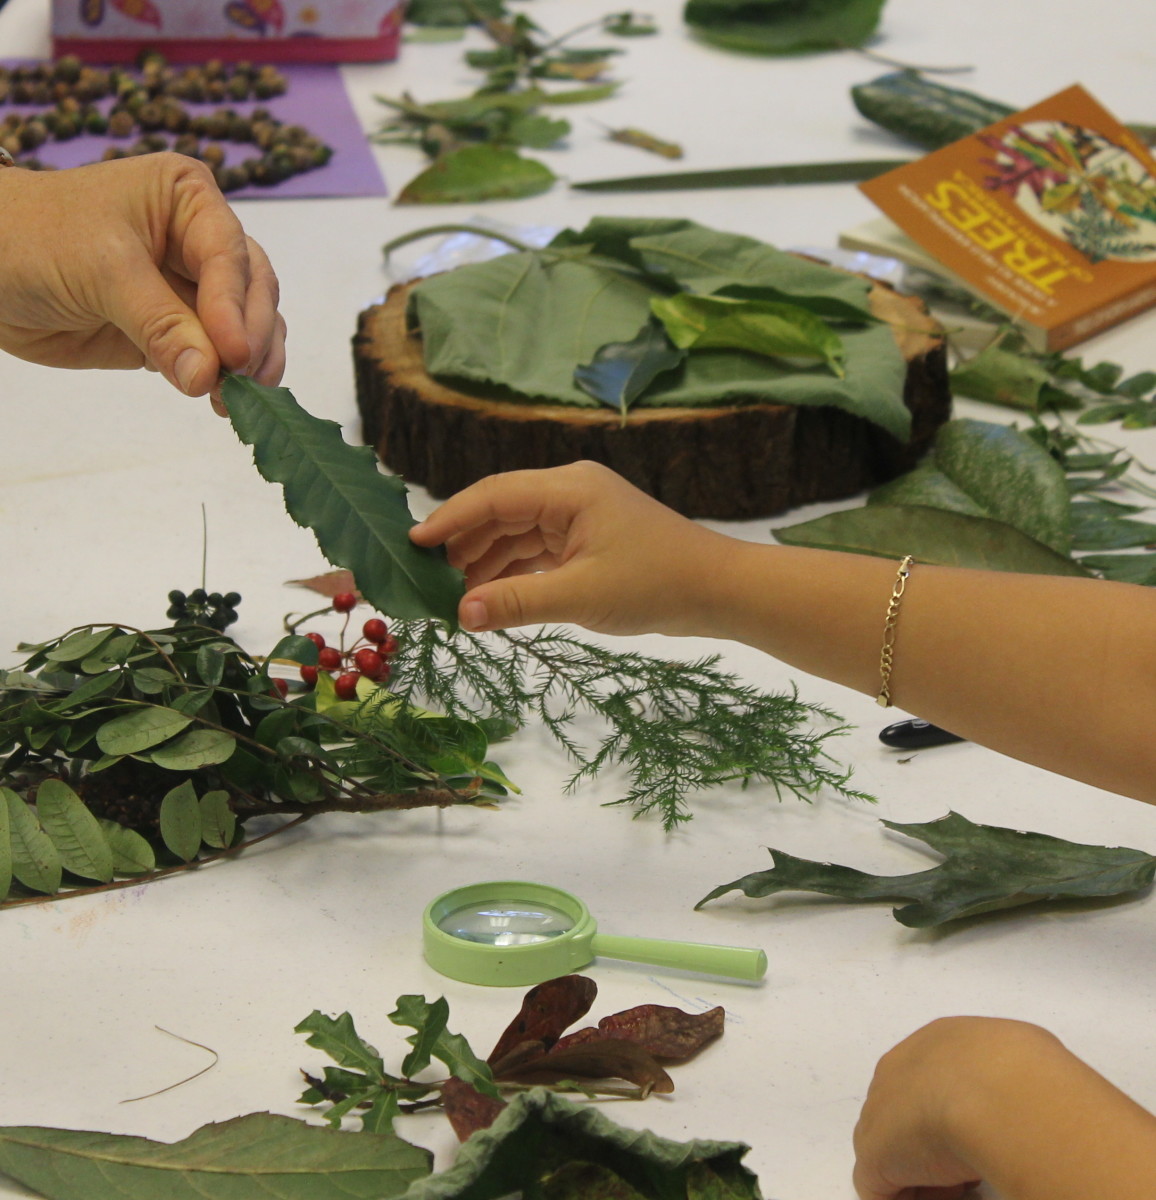
5. Head outside to locate the parts we had drawn on the twigs on real trees. Be sure to stare at the twig and have the children note what you can see.
6. In addition to using leaves to identify trees, you can also use their bark to help identify a tree.
- Create a bark rubbing of a tree by placing a sheet of a paper against the bark and coloring over the paper with a crayon.
- Tip: We noticed that some crayon brands and colors worked better than others, so try to switch out any crayons that do not seem to be producing clear images.
- Pick a leaf from the tree and return inside.
- On the back side of the tree bark rubbing, create a leaf rubbing by placing the leaf under the sheet of paper and coloring over it with a crayon.
- (Optional) If you're not limited by time, use a tree guide to try to identify the tree using the bark and leaf rubbing.
YOU WILL NEED:
- paper and crayons
The Parts of a Tree

7. Read Tell Me, Tree by Gail Gibbons or Are Trees Alive? by Debbie S. Miller if you have younger children (preschool or kindergarten age) or if you have older children.
YOU WILL NEED:
Tell Me, Tree by Gail Gibbons or
Are Trees Alive? by Debbie S. Miller or other book telling the parts of a tree.
8. Direct children to act out each of the parts of a tree and their functions. (This activity originally came from Ranger Rick's Naturescope book Trees Are Terrific.) Children will work together to form the heartwood, taproot, lateral roots, sapwoods, cambium, phloem, & outer bark. (A similar activity can be found at gen.uga.edu). If you have a smaller group of children, have the children act out the root structure first and then act out the trunk structure separately. Have children act out the following parts and describe what that part does as you assign the part:
- Heartwood: Like the backbone of a person, it's the Inner core of the tree, giving it its strength, & holding the trunk upright so its leaves can get plenty of sunlight. For the first few years, it is alive xylem, but its tubes eventually get blocked with resin and pith, and it dies. -->The heartwood child should stand up straight, show his/her muscles to show s/he is strong, and then cross his/her arms together. Repeat, "I support!"
Roots:
- Taproot: Long, large root or roots that get water & nutrients from the ground & anchor the tree in place. Taproots can reach as far down under the ground as the trunk of the tree stands above the ground.(Some trees like redwoods do not have taproots.) -->The taproot child should sit on the feet of the heartwood child to show that it anchors the tree. Pretend to suck up water by making a slurping sound.
- Lateral Roots: Lots and lots of smaller roots with even tinier rootlets which look like threads or hair. A tree can have millions of rootlets, many of which lie closer to the top of the soil and can immediately soak up water from the rain. All the roots work together to get water & nutrients from the ground & anchor the tree in place. They grow in the direction of water sources.
- Large taproots and lateral roots branch into smaller and smaller roots. --> The lateral root child or children should lie down with their feet toward the taproot. If the person has long hair, have her spread it out on the ground like rootlets. Pretend to suck up water by making a slurping sound.
Trunk:
- Heartwood: (Should already be standing)
- Sapwood/Xylem: Like a bunch of straws or pipes, the sapwood draws up water & minerals from the roots to all the branches and leaves and other parts of the tree, and it stores the nutrients. --> The sapwood child or children should hold hands to form a circle around the heartwood. Tell them to lift up their arms from the ground where the roots are and say, "Water and nutrients coming up!"
- Cambium: Can only be seen using a microscope because it's only 1-2 cells thick. It's where new layers are added to the sapwood and is the part of the tree that is growing outward to make the tree thicker. -->The cambium child or children should hold hands to form a circle around the sapwood and repeat, "We make new cells to grow outward."
- Phloem: Transports food (sap) created by the leaves to the rest of the tree The phloem acts as a food supply line from the leaves to the rest of the tree. If a tree's phloem was cut all the way around, the tree would mostly likely die because it wouldn't be able to get food. -->The phloem child or children should form a circle around the cambium, holding their fingers upward as if they were leaves. They should then lower their arms to signify them taking the nutrients from the leaves and spreading it to the rest of the tree. They can repeat, "We bring the food from the leaves to the rest of the tree."
- Outer bark: Like skin on a person, the outer bark protects the tree from bugs, diseases, and fungi. It also keeps the tree from drying out. You also Humans can damage you if they pull you away from the tree. As you get older you crack and stretch. -->The outer bark child or children should hold hands to form a circle around the phloem and repeat, "We protect!"
9. After the children have acted out their roles, review each of the parts and their functions.
Trees: Fruits and Nuts


9. What are some of the products we use from trees?
- Some of our favorite products are ones that we can eat such as fruit, nuts, and chocolate (cocoa powder).
- Make Tree Nut & Fruit Balls by following some of the recipe found at www.joyofbaking.com:
Ingredients:
- 1 cup of toasted tree nuts (such as pecans and/or walnuts)
- 2 cups of any combination of dried fruit (pitted dates, dried cherries, dried figs, pitted prunes, dried cranberries, and/or chopped dried apricots)
- 2 tablespoons orange juice concentrate
- cocoa powder
- chopped walnuts or pecans
Directions:
In a food processor, blend together 1 cup of toasted tree nuts (such as pecans and/or walnuts), 2 cups of any combination of dried fruit (pitted dates, dried cherries, dried figs, pitted prunes, dried cranberries, and/or chopped dried apricots), and 2 tablespoons orange juice concentrate. Have the children roll the mixture into walnut-sized balls and roll the balls in cocoa powder or crushed pecans or walnuts. Place the balls in the refrigerator until you are ready to serve them or serve immediately.
YOU WILL NEED:
- food processor, measuring cups, 1 Tablespoon measuring spoons, 1 cup of toasted nuts (such as pecans and/or walnuts), 2 cups of any combination of dried fruit (pitted dates, dried cherries, dried figs, pitted prunes, dried cranberries, and/or chopped dried apricots), 2 tablespoons orange juice concentrate, 1/4 cup cocoa powder, 1/2 cup crushed and toasted pecans or walnuts, and 3 plates
10. Serve the Tree Nut & Fruit Balls
YOU WILL NEED:
- napkins
11. 5 Minute Review what we learned.
12. Assign optional homework: Memorize the poem "Trees" by Joyce Kilmer.
Joke: What did the tree say to the ax?
"I'm stumped."
Our Favorite Books on Trees

In addition to the books we read in the lesson, we also enjoyed:
I Can Name 50 Trees Today!: All About Trees (Cat in the Hat's Learning Library) by Bonnie Worth was our favorite picture book that goes over what aspects to look for when identifying trees. My children are especially fond of how it is written in a rhyming Cat in the Hat Dr. Seuss style.
The Secret Life of Trees, Level 2: Beginning to Read Alone (DK Readers) by Chiara Chevallier
The World's Largest Plants: A Book About Trees (Growing Things) by Susan Blackaby covers the basics about a tree including parts, conifers vs. broad-leaf, food making, stem, etc. - and it has just the right amount of text on each page to keep the attention of my preschooler while providing enough educational information for my 2nd grader.
A Tree Is a Plant (Let's-Read-and-Find-Out Science) by Clyde Robert Bulla follows an apple tree as it grows from a seed to a full size tree and then through the various seasons.
Nature All Around: Trees by Pamela Hickman
Looking for all the lessons?

Go on a seed hunt, act out germination, create seed mosaics, make and eat a plant parts salad, dissect a flower, decorate sunflower cookies, compete in a photosynthesis relay race, got on a plant scavenger hunt, and more during this fun four part unit study on Botany and Plants!
- Seeds Lesson - Go on a seed hunt, act out germination, create seed mosaics, and more in this fun lesson on plants! This is part 1 of a 6 part unit study on Botany and Plants.
- Flowers Lesson - Go on a flower hunt, dissect a flower, create edible flowers, paint flowers, and more in this fun lesson on flowers! This is part 2 of a 6 part unit study on Botany and Plants.
- Bee & Honey Lesson - (This lesson is optional.) Dance like a bee, make edible bees using honey balls, use cheese puff balls and and juice boxes to dramatize pollination, create pipe cleaner bees and have them fly to the tune of Flight of the Bumblebee, and more! This is part 3 of a 6 part unit study on Botany and Plants.
- Roots & Stems and Transpiration Lesson - Observe roots and stems, observe transpiration in action and dramatize it, create a plants part salad, and more in this fun, hands-on lesson on roots and stems and transpiration! This is part 4 of a 6 part unit study on Botany and Plants.
- Leaves & Photosynthesis Lesson - Play a photosynthesis relay race, create an edible leaf structure, act out the parts of a tree, examine and classify tree leaves and use them to identify trees, and more in this fun, hands-on lesson on leaves and trees! This is part 5 of a 6 part unit study on Botany and Plants.
- Trees Lesson - Examine tree cookies and count the rings, create delicious tree fruit and nut balls, act out the parts of a tree, sketch a twig to learn its parts, create bark and leaf rubbings, and more in this fun, hands-on lesson on trees! This is part 6 of a 6 part unit study on Botany and Plants.
- Botany Scavenger Hunt & Field Trip Ideas - This is the culminating activity we did after a 6 week hands-on unit study on botany/plants. Children went on a fun-filled scavenger hunt for a variety of plants, and afterward had a plant-themed picnic lunch. Also included are the field trips we went on while studying this unit on botany and plants.
- All of my Fun, FREE Hands-on Science Unit Studies & Lessons - Fun, free hands-on Science unit studies and lessons - Learning through Doing: Experiments, Cooking, Dramatizations, Edible Projects, Games, Crafts - Astronomy, Geology, Biology, Plants, Genetics, CSI, Human Anatomy, Simple Machines, Electricity, Earth Science, Fossils, Weather, Five Senses, & Ecology
© 2025 Shannon

