Guitar Chords System
CAGED system
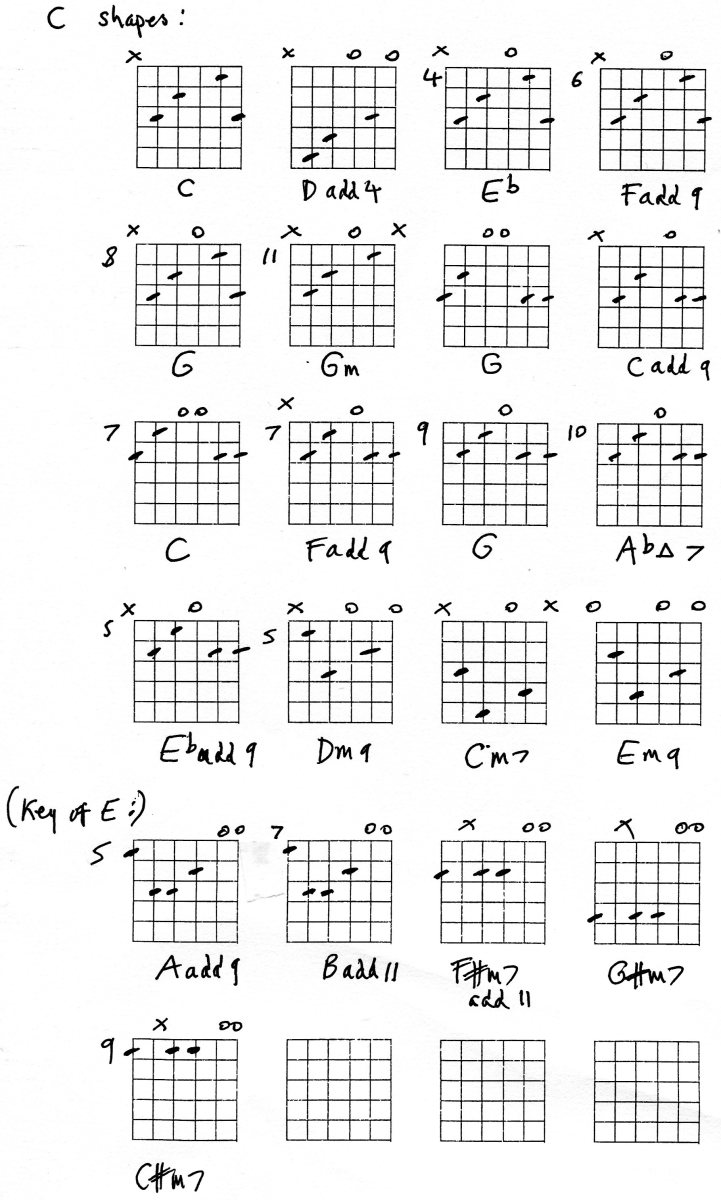
The C, A, G, E, D system divides up the guitar neck into 5 chord shapes that cover the guitar neck. A way of visualising notes and chords can save you a lot of time, and you should always look for patterns on the guitar neck. Once you've learned the 5 chord pattern for C chords that is shown here, you can apply the same pattern to all other chords, just starting at a different fret.
Think of it as a template, that you could move up and down for all the different chords.
See the picture for all the 5 shapes for a C chord - the colour coding should make this easy to follow.
- Navigation tips - you can find a low C note on string 5, fret 3 (colour code, red and blue)
- Another low C is on string 6, at fret 8
- Both of these C notes are in a busy area of the fretboard!
- As strings 1 and 6 are tuned the same 9 (E) fret 8 is also a C on string 1
- The red chord shape is the cowboy chord C, and it is the easiest one to play. It repeats again from fret 13, an octave higher.
- The lowest and highest notes of this chord shape are the note C
C chords, using the 5 different shapes.

Practical applications
There are entire books written on this subject, but the idea here is to keep it simple.
- When you have an overview of the whole neck and fretboard of the guitar you can be much more confident about trying out new things.
- As a C chord is only the notes C, E and G - all of the chord shapes on the diagram consist of only these three notes.
- Improvising guitar solos can be improved, as you know where the chord tones are all over the neck.
More tips
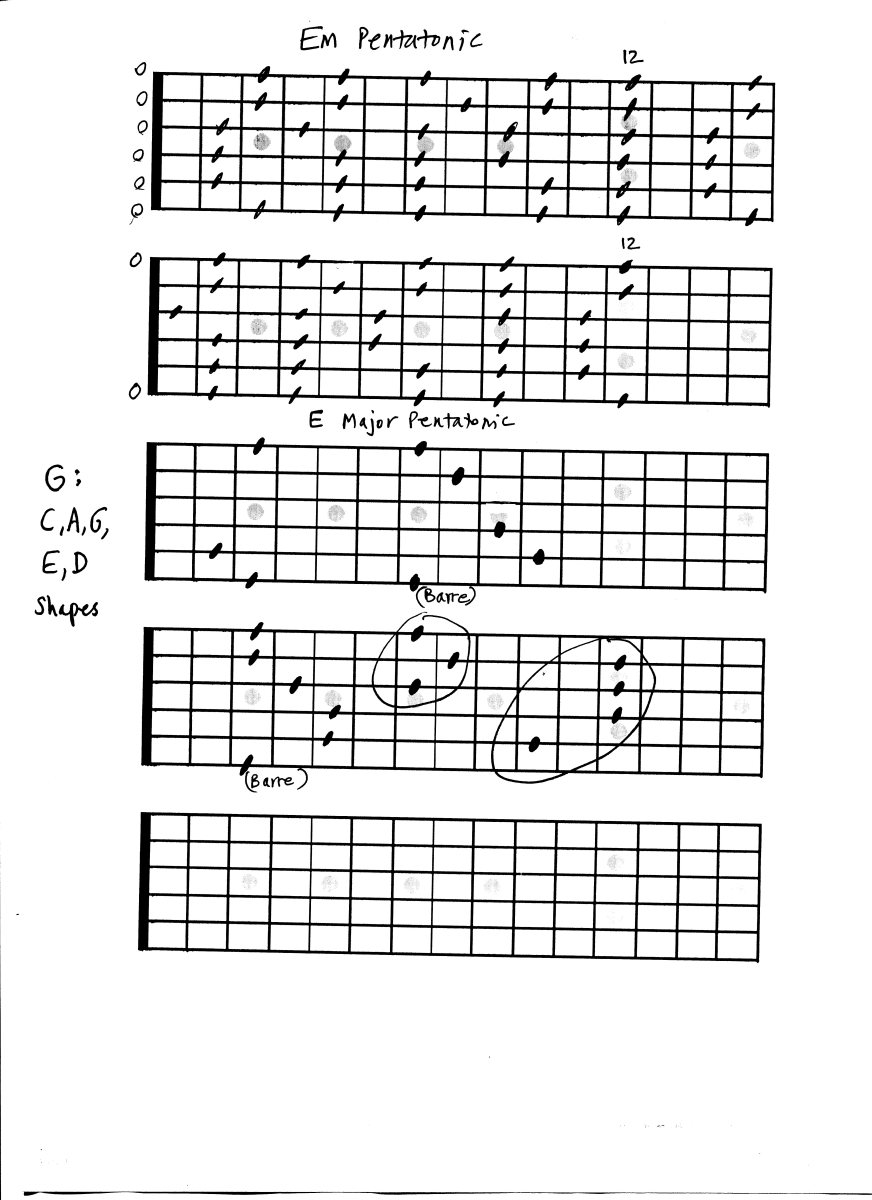
If we wanted to apply this concept to a G chord instead -
- Start with the green G shape, root note on fret 3, string 6 - where it would normally be found.
- Now the other chords follow the same sequence, with the next shape being E with a barre in fret 3, then a D, then an A, then a C shape.
Related chords
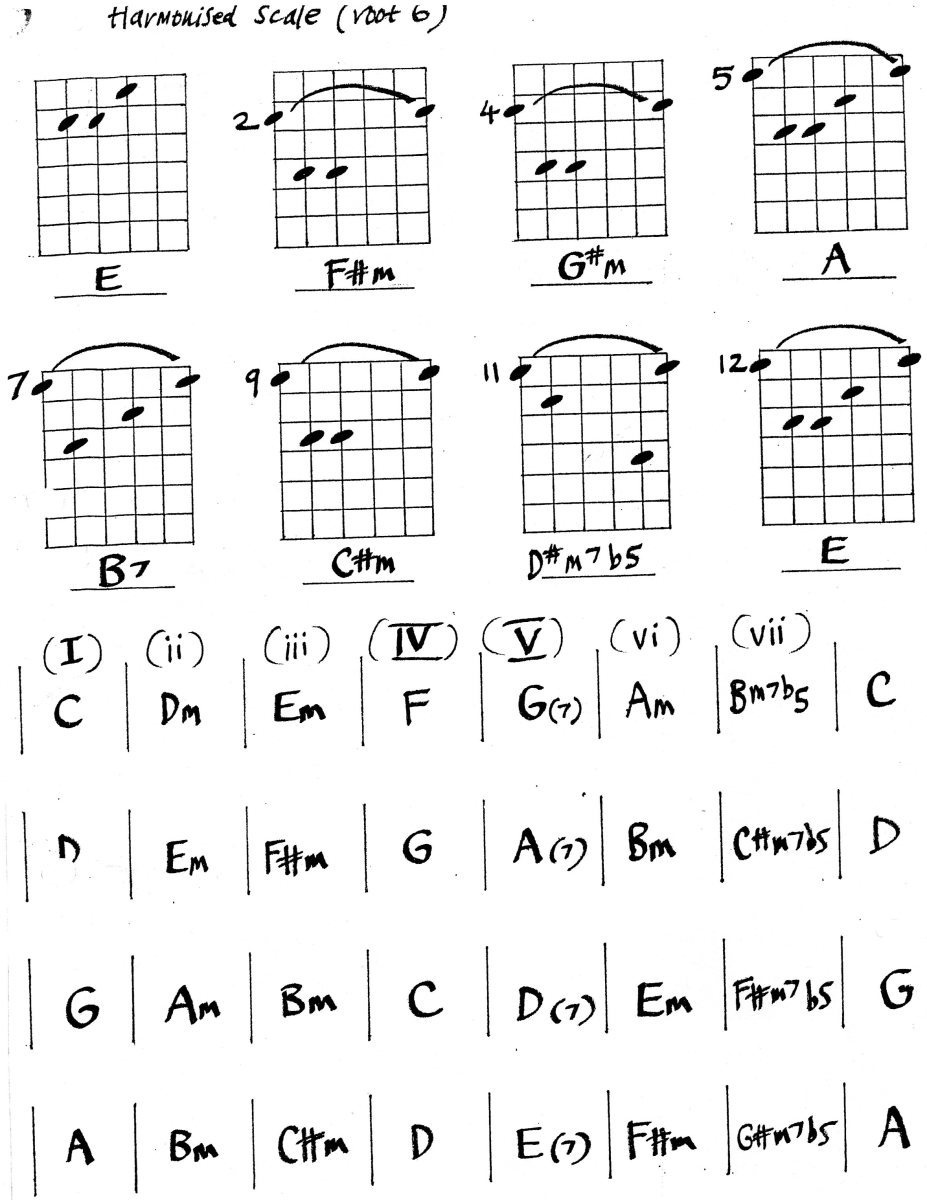
Now you could extend all this template by altering the chord shapes to make minor chords and seventh chords. Find the 3rd and flatten it by one fret to make the chords minor, add a flat 7th to make it a 7th, etc. It's a good idea to do this only when you really feel confident with the major shapes.
- The red shape can be converted to 7th (C7) by adding fret 3 on string 3 - a four note chord on the middle strings.
- Slide this shape up 2 frets = D7
- Up another 2 frets = E7, and so on.
- The root note is always on string 5 for this shape, regardless of where you play on the neck.
Adding pentatonic scales
The pentatonic scale that works for this pattern could be an overlay on this diagram. The A shape shows you where to start - where you have the three notes together at fret 5, using the blue shape.
- Fret 8, 5 on string 1 (aka the thinnest string)
- 8, 5 on string 2
- 7, 5 on string 3
- 7, 5 on string 4
- 7, 5 on string 5
- 8, 5 on string 6 (aka the thickest string)
This works for all the different keys, but here we are looking at C or A minor pentatonic - essentially the same thing.
Now, the good thing about this is that you have related a chord to a scale that will always work, and the scale pattern is built into the chord pattern you've already learned. Then it's possible to switch between chord and scale playing quite quickly, and put in little fills between the chords.

