Ask Carb Diva: Questions & Answers About Foods, Recipes, and Cooking, #51

Step into My Kitchen
We live in a farmhouse in a quaint old town in Washington State (population less than 6,000 souls). Our home is surrounded by trees and seeing raccoons, possums, rabbits, chipmunks, deer, and even the occasional fox in our backyard is not at all unusual.
When not tending to the garden (did I mention that we have 1 1/2 acres?) or in my office/studio designing quilts or writing, you will find me in the kitchen. There's a large walk-in pantry, a wide French door refrigerator-freezer, a double oven, 4-burner gas cooktop in a large central island, and a 120-year old kitchen queen where I store all of my mixing bowls, herbs and spices, and cooking/baking gadgets.
And, this is where I imagine all of you, helping me to dice and saute vegetables for a homey kettle of soup. Or maybe I'm showing you how to knead bread dough for pizza. You're my friends and I love having you here, sharing, laughing, and having fun.
Let's get started.
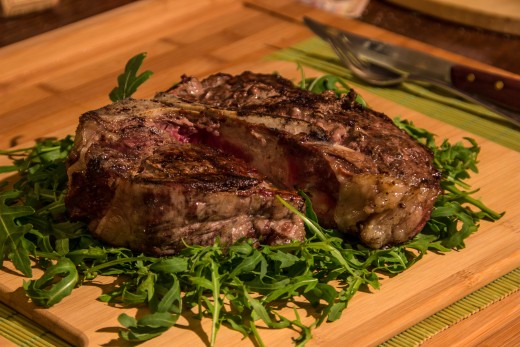
Is Beef on the Bone More Flavorful?
I was living in the UK during the BSE (mad cow) time and beef was only sold off the bone because of this. My mother-in-law said, that meat nearer the bone was sweeter or more tender, is that true?
"Closest to the bone, Sweeter is the meat, Last slice of Virginia ham, Is the best that you can eat."
Popular song, The Closer To The Bone, by Louis Prima, 1957
Mary, I don't know about "sweeter", but there is no doubt that any meat (beef, pork, lamb, or even chicken) is more flavorful when cooked bone-in. The bones themselves are a source of umami, that savory flavor we crave. And bones are a source of collagen, that miracle protein which, when heated, melts into gelatin. It's the gelatin that makes the difference in whether a gravy or sauce or bone broth will be thin and watery or have a thick, rich mouthfeel.
But, is it more tender? For that answer, I went to my friend Kenji (of the Food Science Lab). He conducted an experiment:
"I cooked four identical roasts. The first was cooked with the bone on. For the second, I removed the bone, but tied it back against the meat while cooking. For the third, I removed the bone, and tied it back to the meat with an intervening piece of impermeable heavy-duty aluminum foil. The fourth was cooked completely without the bone.
Tasted side-by-side, the first three were completely indistinguishable from each other. The fourth, on the other hand, was a little tougher in the region where the bone used to be.
What does this indicate? Well, first off, it means the flavor exchange theory is completely bunk—the completely intact piece of meat tasted exactly the same as the one with the intervening aluminum foil. But it also means that the bone does serve at least one important function: it insulates the meat, slowing its cooking, and providing less surface area to lose moisture.
Just like air spaces in home insulation guard against temperature fluctuations, so too does the bone protect the meat closest to it. This is where the expression "tender at the bone" comes from (meat near the bone is less cooked, thus more tender)."
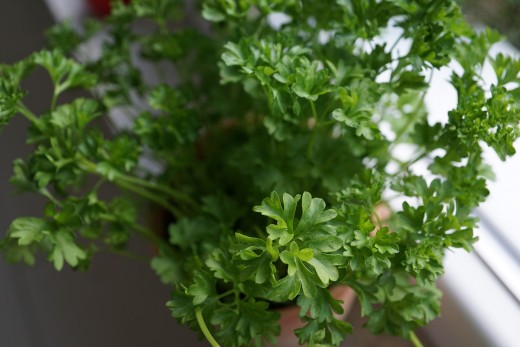
How to Store Parsley
So, here's my question: the aforementioned recipe called for fresh parsley. Since I don't currently have any growing in my garden, I had to purchase an already-cut bunch from the grocery store. How do I store the unused portion so it can go in my belly and not the composter? I tried setting it in a glass of water and storing in the fridge like I sometimes do with celery, but that didn't work. The entire bunch wilted.
Any ideas?
Shauna, your instincts are great. Treating the parsley like a bouquet of flowers is the way to go. But next time try these tips as well:
- snip off the ends (make a fresh cut like you would for cut flowers) so that the stems will take up more water.
- make sure that the tops are not soggy wet because the final thing you will do is
- if your house is warm, slip a plastic bag over the whole thing (it should be loose) and refrigerate.
Change the water daily and your parsley should last for a week.
Alphabet Soup
Today I'm starting a new column-within-the-column. The first was an alphabetical cooking lexicon, then I shared with you the simple (i.e. low-cost) gadgets I have in my kitchen that I find indispensable.
This is the first of 26 articles I will be presenting on soups. Since in the Northern Hemisphere, the weather is turning cold and blustery, it's time to think about warm, steamy bowls of comfort, don't you think?
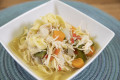
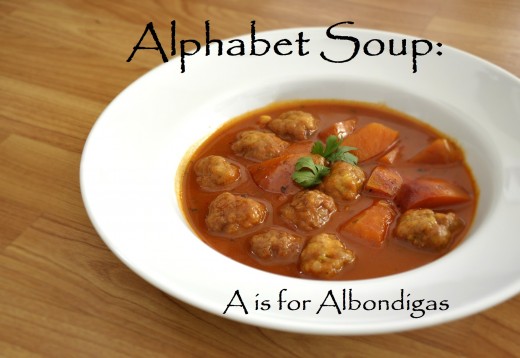
Today, we'll start with Albondigas, a traditional Mexican meatball soup loaded with vegetables.
Albondigas soup originated as an Arab dish imported to Spain during Muslim rule of the Iberian Peninsula. The name is derived from the Arabic word al (the) bunduq (small round object) because of the meatballs small, round shape. The soup eventually ended up in Mexico when the conquistadors were traveling about doing their conquistador thing.
Ingredients
- 1 ½ pounds ground beef or turkey
- 1 teaspoon salt
- ½ teaspoon black pepper
- 1 clove garlic, crushed
- ½ cup dry masa flour
- 1 large egg
- ¼ cup fresh cilantro, minced
- 2 tablespoons olive oil
- 1 medium onion, diced
- 1 medium red bell pepper, diced
- 2 carrots, finely chopped
- 2 stalks celery, finely chopped
- 1 8-ounce can tomato sauce
- 3 quarts chicken broth
- 2 teaspoons dry oregano (flakes, not powdered)
- 1 teaspoon dried ground cumin
- Fresh cilantro for garnish
Instructions
- In a large mixing bowl combine ground meat, salt, pepper, garlic, masa, egg, and minced cilantro. Form into 1-inch meatballs and set aside.
- In large stockpot heat olive oil over medium heat. Add onion, bell pepper, carrot, and garlic. Sauté until the vegetables are tender, about 5 minutes.
- Add the tomato sauce, broth, oregano and cumin to the pot and bring to a boil.
- Add the meatballs a few at a time, allowing the soup to return to a gentle simmer between each addition. Partially cover and simmer for 30 minutes.
- Garnish with fresh cilantro.
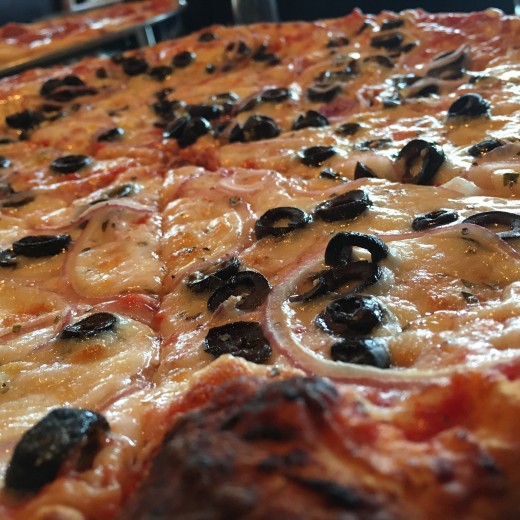
Reheating Leftover Pizza
What is the best way to reheat leftover pizza? I don't use a microwave.
Mary the expression "leftover pizza" is almost lost on me. No such thing can ever be found in the Carb Diva house LOL.
Before we talk about reheating, can we take a moment to talk about storing the leftovers? I think a lot of people simply place the pizza box (assuming we're dealing with take-out or home-delivery pizza) in the refrigerator. Let's rethink that, OK? To properly store pizza so that it doesn't dry out do this:
- put a paper towel on a dinner-size plate and place one slice on the paper towel. Top that slice with another paper towel.
- repeat.
- each slice should have a paper towel above and below and then the whole thing should be covered with plastic wrap.
Now let's pretend that this is Day #2 in the life of the pizza and you want to reheat it and still have hot toppings and crispy crust. What to do? Grab your largest skillet and preheat for a few minutes on the stove at medium heat. Add the pizza slices (in one layer, of course). Cover and cook for about 5 minutes or until the cheese on the edge is bubbly. If you don't have a cover for the skillet, use a sheet of foil. Your toppings will be hot and the crust perhaps even better than before.

Well, that's it for another week. Next Monday we'll have cake and ice cream to celebrate the 1-year anniversary (can you believe it?).
And, in the meantime, if you have a question you can leave it in the comments below or write to me at lindalum52@gmail.com.
See you next Monday!
© 2018 Linda Lum
Related

Cooking With Sarah Palin! First, Bag A Moose Or Grizzly, But Stay Away From Dead Fish That Go With The Flow!

Authentic Dalmatian Fish Stew / Lešo with Potato, Garlic and Parsley

Australian Cooking With Bush Tucker and Aboriginal Foods
")
The Versatile Banana and Banana Hearts (with Recipes)

Bacon Perfection: Mastering the Art of Cooking the Perfect Strip