Best Peanut Butter Ever Recipe

Before I was taught this simple and easy to imitate recipe by my mother in law, I honestly wasn’t much of a fan of this calorie bomb – Peanut Butter. Now I have become an ambassador of home-made Peanut Butter and this crunchy delight has even travelled to several countries with us – on demand;) So I can proudly say that I guarantee you that this Peanut Butter will easily be the best you’ve ever had (and will have) and turn you (like me) into a Peanut Butter buff. And the best about it – besides being a little bit time-consuming the recipe is ‘idiot-proof’ (very important for me, as I have spoiled the easiest recipes before) and thus will always result in success. I hope you will love the recipe as much as we do!
Cook Time
What you'll need
- 1 kg raw peanuts, with skin
- 2 tsp sugar, heaved
- 1/2 - 1 tsp salt
- 1 cup groundnut oil, or any other neutral oil
- 1 kitchenblender

Instructions
The first step is to get your peanuts roasted. We usually when making Peanut Butter measure nothing, but make as much as possible in one sitting. But for the sake of even numbers I have used exactly one kilogram of peanuts in this recipe.
1. Spread your peanuts evenly on an oven tray. You can actually fill it up really well, if you like. Our tray in this example holds 1kg, but could easily have held another 400-500g. If you have a smaller oven, use respectively less. Since we always store our peanuts in bulk in the storage fridge I also sort out a few old/whitish/discolored looking ones. Now turn your oven on. Even here you are flexible – if your heat is lower it will take longer, but it will be easier for you to roast your peanuts evenly. If you go higher you have to pay more attention not to burn your peanuts, but once you have done it a few times you can save some time like this. I recommend you for your first try or especially for a really big batch to start with a lower heat (about 3 on gas or 160°C on convection). In the beginning you can wait about 10 minutes before you first mix your peanuts, later on you should check about every five minutes. The whole roasting process can thus take between 20 – 60 minutes depending on the amount you have put, the heat, your oven and how much you like your peanuts roasted. I prefer it heavily roasted so that the Peanut Butter becomes a little bit darker in color. But you have to be careful – if you burn your peanuts too much your Peanut Butter might turn bitter. The more evenly you manage to roast your peanuts without burning them, the better your end result will be! But don’t worry too much about it, every batch turns out slightly different, but each and every single one of them will be delicious!


2. Once most of your peanuts seem to have changed color without too many of them turning dark you can take the tray out and leave the peanuts to cool down. If you at this stage nibble one or the other peanut and they don’t seem crunchy, don’t worry about it, they will be once they are cold.
3. Now comes the most laboursome bit of the peanut butter making – taking the skins off. But again, I simply recommend to keep this tedious task aside until you have some idle time in front of the TV, you don’t need to watch what you are doing, you just need to rub the peanuts between your fingers and the skin will fall off. Put them all in a big container and do this till nearly all of the peanuts are skinless. Then spread a few sheets of newspaper on the floor and simply shake your peanuts up and down in your container. The skin is lighter and thus will fly out or accumulate on top of the peanuts. It looks a bit tricky when you do it for the first time, but it is actually very simple and will only take you a few minutes.


4. Now that your peanuts are roasted and cleaned of their skins we will need a kitchen blender to further process the peanuts. Place the peanuts in the blender (if you have made a very big quantity you will have to do this in two runs) and start grinding them for a while. Then add the peanut oil, sugar and salt up to your taste. Take the amounts I have given you in this recipe just as estimates and keep adding them little by little, tasting your peanut butter in between for flavor and consistency. Keep in mind that your peanut butter will become harder in the fridge, so if it seems slightly soft it should be good. Grind your peanut butter until it gets the smoothness you desire – we usually love it chunky, so we blend it only for a minute or so.


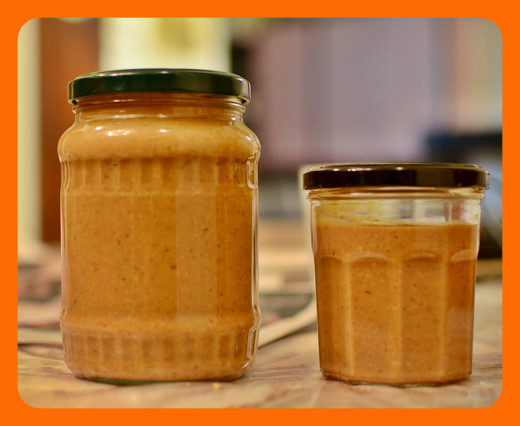
5. Now place your peanut butter in glass jars and keep them refrigerated. They would hypothetically last over a month, but practically they will be finished off much faster;) Enjoy your peanut butter just like it is, with jelly, nutella or honey – you will love it! And share your recipe tweaks with us, we always love to develop!
TIP: Fill your Peanut Butter in decorative jars and give them out as small treats to your friends and family - they will love it!


")


")
