Make Greek fat free yogurt in 4 easy steps

Test your knowledge: What do you know about Greek yogurt
view quiz statisticsYou may be surprised how easy it is to make Greek-style, fat free yogurt
Why buy expensive Greek yogurt in one-use plastic tubs when you can make your own with very little effort? This is one of my all-time favorite Green Tips because it is so easy and so good.
See that bowl of yogurt and granola? That's all homemade! I made the maple almond granola last week, and the yogurt yesterday--in a thermos!
This morning, it took less than five minutes to set the yogurt to straining. Then I went for a nice walk in the fresh, dewy air, showered, enjoyed my first cup of coffee and leisurely set the saucers and bowls for our granola and Greek yogurt breakfast treat.
By then, about ninety minutes later, we had creamy, rich Greek-style yogurt to dish over our fruit and cereal.
On this page I take you through the four super-easy steps, from choosing your plain yogurt to packing the creamy Greek goodness into a lovely jar. It takes almost no time at all!
Set the process in motion in five minutes or less, then walk away and do something you love for an hour or two. Gravity does the rest.
Eat and enjoy!
Greek yogurt, also referred to as European style yogurt, is thicker and creamier than the regular packaged yogurts on American supermarket shelves. That's because it's been strained to reduce the whey content.
How to Make Greek Yogurt in Four Steps
It will take you longer to read these steps than to set your yogurt to straining. Once you know how to do it, you'll never have to buy expensive, one-use plastic tubs of Greek yogurt again.
Step 1: Assemble utensils and containers - Only four!
Gather just four tools you likely already have on hand to convert your regular yogurt to nonfat Greek yogurt. You will need the following items.
- 8-Cup Measuring cup or sturdy 2-quart bowl
- 8-inch diameter fine mesh strainer
- Sterile unbleached cheesecloth
- Clean, tight-sealing jars
The items below are the same, or very similar, to the tools I use.

Start with a 2-quart measuring cup or sturdy bowl
This 2-quart measuring cup with lid is so versatile in the kitchen, and is perfect for making Greek-style yogurt.
Let the whey drain into the cup, then easily pour into your storage container.
One reason I pick this brand: It's made right here in the United States, a rare find these days.
Next, you need a sturdy, good-sized mesh strainer
This 8" fine-mesh strainer is exactly like the one I've been using for a few years now.
It fits nicely over the 2-quart Pyrex measuring cup so you can strain your yogurt easily.
To prevent rust, wash and pat dry immediately after use.
Choose unbleached cheesecloth for health
Why unbleached? Chlorine bleach has been identified as a factor in breast cancer, so I avoid bleached products whenever possible.
The cheesecloth helps the whey to drain more slowly, leaving more of the creamy yogurt in the strainer.
Always boil any cheesecloth before using with food. Store boiled, air-dried cheesecloth in an airtight container so it's ready when you need it.
Fido jars seal tight and keep yogurt fresh longer
You will need two containers: One for the yogurt and one for the whey. My favorite storage containers are Fido jars. Their near-vacuum seal keeps food fresh longer.
Our great grandmothers used this type of jar for canning and preserving food. I wouldn't go that far today, but the rubber rings do make a nice, tight seal.
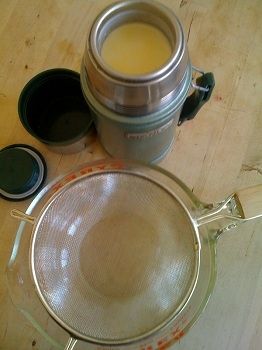
Step 2. Start with 1-2 quarts good quality, fresh non-fat yogurt
Commercial or homemade, either works fine. To make a healthy fat free Greek yogurt, start with fresh, live-culture, nonfat yogurt. Use your own homemade or a commercial brand you know and trust.
Most often, I use my easy, thermos-incubated, homemade yogurt, because I know exactly how fresh it is and what's in it.
When I haven't time to make a fresh batch, I use a local San Francisco Bay area brand called St. Benoit, because of its superb taste and the fact their Jersey cows are pasture-fed year round on small family farms.
Whenever I need to refresh my mother (that's what we call the portion we set aside to inoculate our milk when we make a new batch of yogurt), I buy a small quantity of their unadulterated, live-culture yogurt.
If you can find a similar operation that makes small batches of yogurt in your neck of the woods, all the better. If not, I also trust Nancy's organic non-fat yogurt, which I have used in a pinch, and which is available in one-quart and half-gallon sizes.
If using a commercial yogurt, read the label and check the "use by" date. You want a yogurt made from nonfat milk with no added pectin. The fresher the better. The label should state that live cultures were added after pasteurization.
Step 3: Pour the yogurt into a triple-cheese-cloth-lined sieve over a 2-quart bowl, cover loosely, and wait
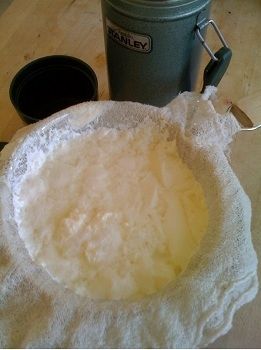
Fold the cheesecloth into three layers, large enough to hang over the sides of the strainer. Pour the yogurt into the lined strainer, then fold the corners of the cloth over the top, as shown in the next photograph, to protect your yogurt from air-borne dust.
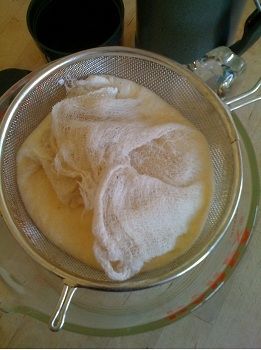
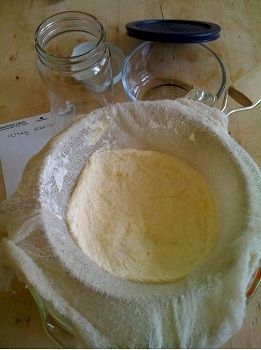
When yogurt reaches desired thickness, it's ready! After ninety minutes, our yogurt is just how we like it.
One of the nicest things about making your own Greek-style yogurt, apart from the taste, is that you can stop the draining process at precisely the texture you prefer. It usually takes 1-2 hours, depending on the consistency you want, the quantity you start with, and the type of yogurt used.
If you get busy and leave the yogurt too long, no worries! Just stir a little whey back in, a teaspoon at a time, until you get that Goldilocks just-right creaminess you're looking for.
Step 4: Fold the creamy yogurt from the cheesecloth directly into a storage container
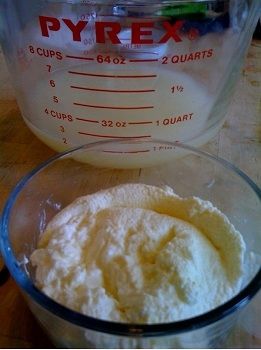
When the yogurt is just as you like it, carefully lift the cheesecloth by the corners and fold the creamy goodness directly into your storage container.
It should come off in a nice, fat, little mound, like the one in the picture, here. Right now, it shows all the cheesecloth wrinkles, but whisk it a few seconds and it turns into creamy, thick luscious Greek-style yogurt goodness.

One more storage option - Pyrex rounds with lids
In addition to the Fido jars I showed earlier on this page, I store my yogurt in glass Pyrex containers like the one you see above.
Pyrex seals tightly and keeps the yogurt fresh for several days with no worries about phthalates, BPA and other plastic molecules leaching into the food.
I have to admit, though, ours rarely lasts more than a day or two, because we gobble it up.
Green Tip
Reuse your cheesecloth (Wash, boil and dry, then store in airtight container) until it's lacy with big holes, then toss it in your Halloween decorations box for decorating with next fall.
Save the whey! It's packed with protein and other healthy goodness
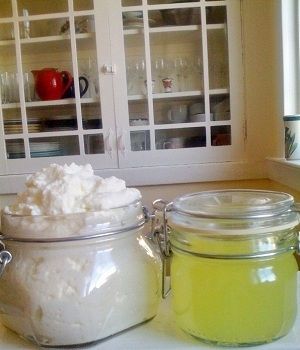
Whey is the thin, nearly clear liquid that accumulates on top of your yogurt container after you've used it a time or two. It is also the liquid that drains away when we strain for Greek yogurt.
Full of protein, other nutrients and pro-biotics, whey is a good source of calcium, potassium and vitamin B2.
Use it in salad dressings, to ferment lentils, beans and grains, as part of the liquid in breads, soups and stews, or for cooking rice.
When you heat the whey, you will lose the pro-biotics, but you'll still get the proteins, vitamins, minerals and other nutrients that are not heat sensitive.
Think you'll give this method a try?
I hope you enjoyed this page
If you love Greek yogurt, but hate the cost and want to reduce the calories, making your own is easy.
© 2012 Kathryn Grace


