ArtsAutosBooksBusinessEducationEntertainmentFamilyFashionFoodGamesGenderHealthHolidaysHomeHubPagesPersonal FinancePetsPoliticsReligionSportsTechnologyTravel

Dragon Fantasy Book I Walkthrough, Part Eighteen: Brigand's Cavern

Updated on April 20, 2013
Dragon Fantasy Book I is copyright Muteki Corporation. Images used for educational purposes only.

An Oasis plundered, an Oasis Emerald recovered, a bundle of cash earned. Jerald and Ramona are well on their way to earning 20,000 gold that they might escape Sandheim for good. There's still a lot of cash to go, though, and one of the jobs handed out by the Thieves' Guild will have them taking on their own kind…

Leave Sandheim and travel west to the coast, north of Jobport. In a small mountain range you'll find a cave. Enter it and you'll discover a hidden town, Brigand's Cavern, which has a lot to see and do.

Weapon and Armour Shops

West of the entrance are two obvious stores. Both offer goods somewhat above and beyond the things you'll find in town. Try not to spend too much of your prize money on 'em.

Inn

This large building is in the south of town. Aside from the brigands inside who will cheerfully greet you, rooms here will cost 50 gold.

Outhouse

East of the Inn you'll find a dirty toilet where you can save your game, of all things. Eh, whatever works.

Item Shop

The last two buildings in town look innocuous enough, but one houses an item shop. A few extra Herbs probably couldn't hurt.

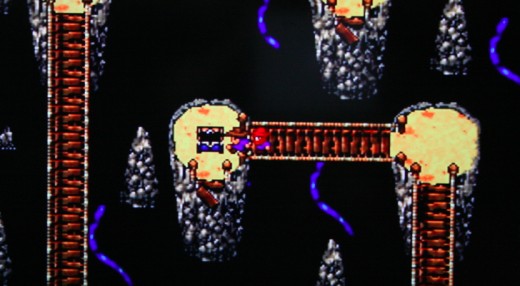
Done looking around? Check the southeast corner of town. A set of stairs will lead you into the maze several people in Brigand's Cavern mentioned. Dungeon delving time! There are no random encounters down here, but there is an enemy:

  • Bitey Box. You'll come across these things occasionally while checking treasure chests. They're not very hard to beat. You can steal Herbs from Bitey Boxes, and each time you kill one you'll earn its in-battle cash value and a small, extra reward after the battle screen fades.

To the south of the entrance and across an eastern bridge is a stone with a hint on it… though not terribly helpful. Backtrack and continue south. Follow the paths to a four-way intersection. North of here is a Bitey Box you can beat up for 10 gold. South of the intersection, eventually, is a chest with a Wooden Chalice. East of the intersection is another intersection.

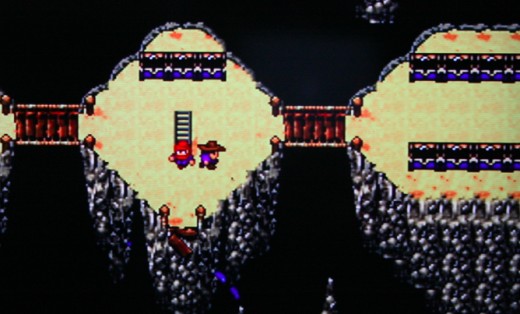
Go north here to find another Bitey Box. Beat it up for 20 gold. East of here is another island intersection; follow it south to yet another Bitey Box which yields up 30 gold when beaten. Further east from the previous island is a larger area with a small house…

…. with, uh, an enormous interior. There are things to be learned from the bookshelves, but that's about it. Go back outside and continue east. Head north at the first intersection as far as you can go to find a chest containing an Herb. Return to the previous intersection and head west. At the end of the bridges is a Broken Spyglass.

Return to the intersection to the right of the house. Go all the way south to find a Bitey Box. Kill it for 100 gold. Return to the intersection again and take the eastern route south to the southeast corner of the map to find a ladder. At the bottom is a long path across bridges and up and down ladders; follow it until you find another intersection.

The next waystone at the intersection advises you go south. Head north first to find a Bitey Box worth 10 gold, then take the southern bridge from the intersection. It will lead you to a ladder, as well as a continued path east. There's only 25 gold at the end, so don't bother. Use the ladder.

This path eventually leads to a small island with a north and a west bridge. The northern bridge leads to a fairly useless roundabout that will only get you lost for nothing. The western bridge leads to a new chamber filled with treasure chests, containing:

  • Busted Keys
  • Bandit treasure
  • Wooden Idol
  • Herb
  • Golden Sword
  • Antidote
  • 20 gold
  • 75 gold
  • 10 gold
  • 25 gold
  • 25 gold
  • Crappy Map
  • Broken Spyglass
  • Amateur Painting
  • Shoddy Toy
  • Wyvern Powder
  • Rope
  • Rope
  • Wooden Chalice

What a bunch of junk. Oh well. Take the ladder on the right side of the treasure stockpile and you'll wind up back at the small house, not far from the entrance to the maze. You can use the paths here to return to Bandit's Cavern, and, eventually, the surface. Take the garbage you scraped up and the secretary back at the Thieves' Guild will give you 5,000 gold for your work. Could be worse.

(You might also notice a familiar face in the Thieves' Guild when you return. That guy gets around.)

working

This website uses cookies

As a user in the EEA, your approval is needed on a few things. To provide a better website experience, hubpages.com uses cookies (and other similar technologies) and may collect, process, and share personal data. Please choose which areas of our service you consent to our doing so.

For more information on managing or withdrawing consents and how we handle data, visit our Privacy Policy at: https://corp.maven.io/privacy-policy

Show Details
Necessary
HubPages Device IDThis is used to identify particular browsers or devices when the access the service, and is used for security reasons.
LoginThis is necessary to sign in to the HubPages Service.
Google RecaptchaThis is used to prevent bots and spam. (Privacy Policy)
AkismetThis is used to detect comment spam. (Privacy Policy)
HubPages Google AnalyticsThis is used to provide data on traffic to our website, all personally identifyable data is anonymized. (Privacy Policy)
HubPages Traffic PixelThis is used to collect data on traffic to articles and other pages on our site. Unless you are signed in to a HubPages account, all personally identifiable information is anonymized.
Amazon Web ServicesThis is a cloud services platform that we used to host our service. (Privacy Policy)
CloudflareThis is a cloud CDN service that we use to efficiently deliver files required for our service to operate such as javascript, cascading style sheets, images, and videos. (Privacy Policy)
Google Hosted LibrariesJavascript software libraries such as jQuery are loaded at endpoints on the googleapis.com or gstatic.com domains, for performance and efficiency reasons. (Privacy Policy)
Features
Google Custom SearchThis is feature allows you to search the site. (Privacy Policy)
Google MapsSome articles have Google Maps embedded in them. (Privacy Policy)
Google ChartsThis is used to display charts and graphs on articles and the author center. (Privacy Policy)
Google AdSense Host APIThis service allows you to sign up for or associate a Google AdSense account with HubPages, so that you can earn money from ads on your articles. No data is shared unless you engage with this feature. (Privacy Policy)
Google YouTubeSome articles have YouTube videos embedded in them. (Privacy Policy)
VimeoSome articles have Vimeo videos embedded in them. (Privacy Policy)
PaypalThis is used for a registered author who enrolls in the HubPages Earnings program and requests to be paid via PayPal. No data is shared with Paypal unless you engage with this feature. (Privacy Policy)
Facebook LoginYou can use this to streamline signing up for, or signing in to your Hubpages account. No data is shared with Facebook unless you engage with this feature. (Privacy Policy)
MavenThis supports the Maven widget and search functionality. (Privacy Policy)
Marketing
Google AdSenseThis is an ad network. (Privacy Policy)
Google DoubleClickGoogle provides ad serving technology and runs an ad network. (Privacy Policy)
Index ExchangeThis is an ad network. (Privacy Policy)
SovrnThis is an ad network. (Privacy Policy)
Facebook AdsThis is an ad network. (Privacy Policy)
Amazon Unified Ad MarketplaceThis is an ad network. (Privacy Policy)
AppNexusThis is an ad network. (Privacy Policy)
OpenxThis is an ad network. (Privacy Policy)
Rubicon ProjectThis is an ad network. (Privacy Policy)
TripleLiftThis is an ad network. (Privacy Policy)
Say MediaWe partner with Say Media to deliver ad campaigns on our sites. (Privacy Policy)
Remarketing PixelsWe may use remarketing pixels from advertising networks such as Google AdWords, Bing Ads, and Facebook in order to advertise the HubPages Service to people that have visited our sites.
Conversion Tracking PixelsWe may use conversion tracking pixels from advertising networks such as Google AdWords, Bing Ads, and Facebook in order to identify when an advertisement has successfully resulted in the desired action, such as signing up for the HubPages Service or publishing an article on the HubPages Service.
Statistics
Author Google AnalyticsThis is used to provide traffic data and reports to the authors of articles on the HubPages Service. (Privacy Policy)
ComscoreComScore is a media measurement and analytics company providing marketing data and analytics to enterprises, media and advertising agencies, and publishers. Non-consent will result in ComScore only processing obfuscated personal data. (Privacy Policy)
Amazon Tracking PixelSome articles display amazon products as part of the Amazon Affiliate program, this pixel provides traffic statistics for those products (Privacy Policy)
ClickscoThis is a data management platform studying reader behavior (Privacy Policy)