How NOT to Build a 3d Printer
What NOT to do
Slanted Printing
Care really should be taken during the assembly process of the Z axis (the part that makes the printer go up and down). The installation guides always suggest using a plumb line during this step - something that I ignored that I regret every print. Really really hard to fix once you have the whole printer together, not impressed.
Fires....yep impressive fires
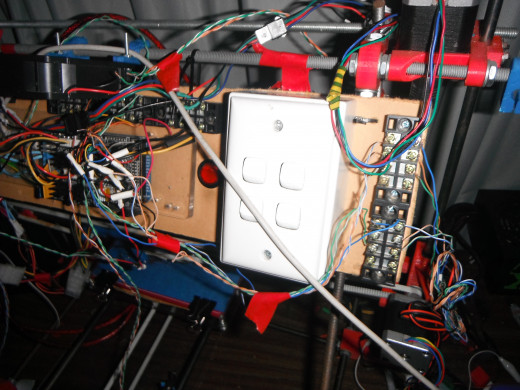
I learned the hard way on more than one occasion of just how important using a sufficient gauged wire plays when dealing with high current wiring. The heat-beat on a 3d printer runs around 10 amps, so if you happen to use regular speaker wire like me, you may find that it may get hot. hot enough to melt and catch on fire...right when you invite your father round to show him your invention that you've been working on for six months. f.y.i. he was not impressed with a machine which all it did was print a square and then catch fire.
Real Estate
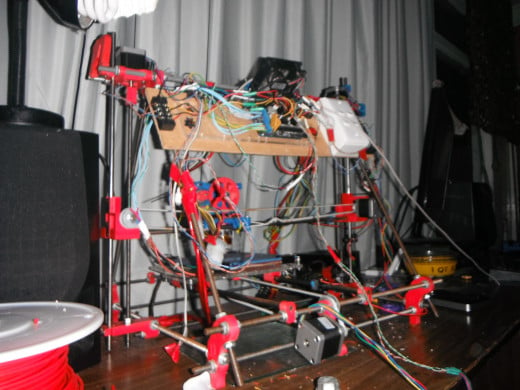
Why on earth would I think designing a GIANT 3d printer would ever be a good idea. My reasoning was simple - I planned up front, prior to building my printer, that I should not follow the recommended dimensions of the printer, but instead decided to double the length every threaded/smooth rod used to make the structure of the printer. Twice the size printer means being able to print things twice as large right? WRONG.
Apart from the fact that the best takes up more than the entire desk and even hangs off the edge a little, building an oversized reprap 3d printer is just a silly idea for a first time builder. The dimensions suggested were suggested for a reason- because it will produce a solid machine that is structurally sound and will hold together throughout the print with ease.
What I learned was that by building a printer double the recommended size comes with a myriad of unforeseen headaches. You wouldn't just double the size of the London bridge and not expect disaster; it just wouldn't be structurally sound. Well the same logic holds true with a 3d printer. Due to the amount of movement that occurs with the reprap's printhead darting from one point on the print surface to the next, the amount of vibrations and wobble that you encounter is phenomenal. Building an oversized printer can be done, but not by simply extending the rods. There is a lot of additional structural support
On-the-fly Tweaking
I can't tell you how many times I have decided it would be a good idea to tweak some of the circuitry on my printer mid-way through a print. Heed my words, there's a reason why everybody advises against it; because it's true. Don't be a fool, I've gone through more stepper drivers then a care to mention.
More Fires...yep...
Yep, so I've already mentioned that I've started fires with thin wiring. And I'm a little embarrassed to say that was not an isolated innocent. With a 3d printer, the hotend is heated up which melts the plastic filament in order to draw out the object being printed. This normally runs at around 220C, when dealing with ABS plastic as the printing material.
OK, here goes..
So in order to ensure that the hotend runs at the correct temperature, a 3d printer uses a small temperature sensor known as a thermistor. This is placed as close as possible to the tip of the hotend to get the most accurate temperature. If the hotend is not hot enough, more current is sent to increase the heat. If the hotend temperature rises above the desired temperature, then the printer reduces the current so that the hotend temperature starts to drop.
If the thermistor happens to detach itself from the hotend for any reason, such as due to the lack of attention to detail during assembly, then the hotend temperature will report back much lower then it actually is and therefore will try to heat up the hotend to try to reach the understated temperature. So while the hotend temperature was only reading 150C because it had detached, it was probably over 250C and counting. Eventually I worked this out, but not before melting a fair amount of parts. The most severe symptom of this overheating was that it would cause the tiny brass hotend tip to contract which would block the flow of extrusion. However, I had learned a trick on youtube on how to unclog a tip...involving a cup of acetone and a blowtorch. Need I say more? I should but it's late.
Apparently you can use a blowtorch to heat the hotend and then you submerge it into the acetone. This apparently works, however as I was heating and dunking, heating and dunking, the acetone slowly started to evaporate. Once the cup got about halfway down the acetone vapors started to form, creating a ticking time bomb. Hotend went in, desk now covered in fire- not regular fire, but acetone fuel fire, that embraced the desk, computer monitor and wireless modem. Wont be doing that again in a hurry.
Some other things I learned not to do:
-Didn't start with PLA plastic and instead went straight to ABS. I read that ABS was stronger and therefore better. Maybe, but it is also harder to print. And if you know anything about 3d printing it's that most people have more trouble with getting the thing to work, rather than their prints not being strong enough. I'll explain why tomorrow.
-Didn't wire everything together with connectors. Instead, I secured the pretty much every connection on the printer using electrical tap. This may work..on a couple of wires...for a while, but with all the vibrations that a 3d printer makes, it ended up shorting every second print.
-Didn't take a copy of my reprap firmware that I had configured specifically (I assumed I could just download it off the printer). Now I'm going through the whole long and arduous process again of having to recalibrate to find my steprates/temperature setting etc. Argh.
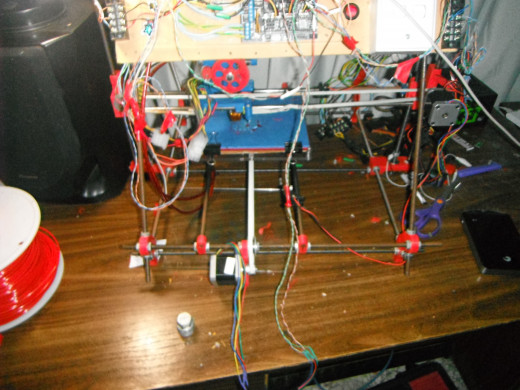
Tell me I'm not the only one who has had their soul sucked out from building a 3d printer?
- 3D printing - Wikipedia, the free encyclopedia
3D printing or additive manufacturing is a process of making a three-dimensional solid object of virtually any shape from a digital model - 3D Printing at Home
Imagine seeing a pair of your favorite sneakers on the internet, and then being able to download them and have them built right in front of your eyes. - How to Build a 3D Printer on a Budget
Here are some tips that I found saved me a little bit of money when building my rerap. - 6 Great Tools for your 3D Printer
A few handy tools I keep close at hand when working on my repap printer. Some of these things may sound like a no-brainier, others are handy tips for things you may have lying around your workshop

