ZombiU walkthrough, Part Four: Defend the Safe House
Though the concept promised some healthy gains, the Supermarket was largely a bust. There wasn't much food or equipment to be had - and there's evidence that you should expect something bad when you leave. As with most areas in ZombiU, this evidence proves dead-on correct.
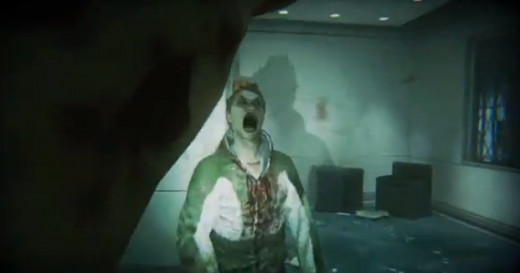
The moment you set foot outside the Supermarket, you'll be confronted by a rather unexpected sight: a screaming zombie. This screecher will bring a horde of other zombies down on you, and the last thing you should want right now is a fight. Spring past the screecher and down the alleyway where you first entered Market Street. It's just past the zombie. Get into the manhole as quickly as possible - there will be normal zombies at your heels, and you won't have much time to check your pad and move from one location to the next. If you fear getting caught, sprint past the manhole and try for the Brick Lane entrance instead.
Once you're back in the Safe House, Prepper will instruct you to check the blue box beside the computer terminal. This is your own personal Metal Container, which you can use to store items that are cluttering up your Backpack. Stick anything you don't think you're going to use right now (probably a few Flares) in there, then prepare for a fight -
- as a horde of zombies is about to show up and spoil your day. So much for resting and saving your game. This is the first real hurdle for new players, and the most likely point where you're going to lose several survivors in a row. Fortunately, you don't have to be quite so unlucky to get past the incoming zombies - just smart.
The suicidal move here is to roam the hallways while fighting the zombies. This isn't so bad against one zombie, but against two or more you're likely to get blindsided and eaten. Your safest bet for survival is to force them into a bottleneck - and the only place they're guaranteed not to get you from behind is in the Safe House. Wait either within the gated area or the door just outside it and smack each zombie to death as it comes through. The bottleneck also makes this a perfect spot to get in some practice with your handgun.
Even with the bottleneck, this part is rather difficult, as the zombies will enter in groups of two or three if you're not fast enough at killing them. If this is an issue, use Flares to keep them occupied and peg them at a distance with your gun. Better yet, use Flares to lure the zombies to a spot where you've lain down one of the Mines from the manhole room in the Safe House. Just be careful not to cross that spot yourself, or you'll die along with the undead.
If you do die during the defence of the Safe House - and that's a very real possibility - your old survivor will come back as a zombie, just outside the door to the Safe House. Kill it as quickly as possible once you come back and grab your loot before the rest of the wave shows up. If you die again before getting your stuff back this zombie will be replaced by the new zombie... which will take away everything you've collected up to this point (assuming, of course, that you didn't stash most of it in the Metal Container).
Once you've killed enough zombies, take Prepper's advice and sleep. Then check the computer terminal. Prepper will tell you to head to Buckingham Palace to grab supplies, earning you a new mission: get to the Palace Bunker Entrance. Follow your map to the barricaded door nearby, pry open the barricade, grab the Key Card within, and head to the lobby.
Go down into the lobby and kill any zombies that might be here (if you didn't kill them on your first trip). Follow the map indicator deeper into the subway until you come to a subway car. Check the ground here for a Newspaper, then go through the subway car and keep following the path until you reach a red, underground room marked 'Exit'. There is nothing to collect, and nothing to bother you, along the way.
Newspapers?
Though it does you little good in the long run, Newspapers are fun items to grab as they show some of the pre-apocalyptic details of the zombie plague. They show up in one of your Prepper Pad's menus, and they don't take up any room, so snag any you find and enjoy.

