Dark Souls Lost Izalith Guide
Dark Souls Lost Izalith Guide
In Dark Souls, the hero must venture into Lost Izalith to find the mega boss and destroy it to obtain one of the four lord souls needed to fulfill the lordvessel quest. This will guide the hero in finding the Lost Izalith bonfires, defeating the various monsters in the Lost Izalith area, obtaining the Lost Izalith treasures and finally finding the Lost Izalith White Light or fog gate that will lead to the boss fight of Lost Izalith.
Dark Souls Lost Izalith Guide
Dark Souls Lost Izalith Navigate from First to Second Bonfire
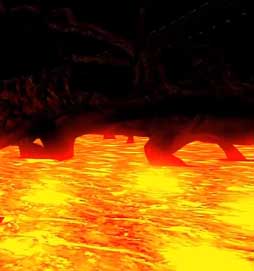
In Dark Souls, the Lost Izalith bonfire is easily found from the chamber where the hero defeated the centipede demon. Just head left into a cavern opening and emerge at the other end to find the first Lost Izalith bonfire. To find the second Izalith bonfire is slightly more difficult. Remember to wear the Orange Charred Ring at all times, as this will prevent the hero from being burnt to ashes by the lava.
Now from the first Lost Izalith bonfire, head straight ahead and find a large opening (with a pillar wall on the right) which will lead to a massive cavern with a lot of headless hulking beasts. These beasts actually look like tyrannosaurus without heads or the upper bodies. They are ugly to look at, and even uglier to defeat. They deal massive damage with their feet stomping attacks, their jump and butt ground smashing attack, and their sweep attack. In addition, they are large and difficult to aim, and have massive health points. The only good thing is that once defeated, they are worth 2000 experience points, and they do not respawn. The tactics here should be to deal with just one of them at a time. Lure them to the entrance of the massive chamber and deal with each one there. If the hero is caught fighting two or more at once, there is a chance their attacks will cause damage on each other. In general it is better to fight one of these hulking beasts one at a time. If the hero is a pyromancer, target them, cast Iron Flesh and keep torching them with Great Combustion or Combustion until they are down.
Once the first barricade of hulking beasts is cleared, spot a square shaped chamber in the midst of the lava pool and head to it. There are fire-breathing statues on the outside of this chamber.Eliminate them or wait for the hulking beasts to eliminate them due to collateral damage. The hero can slip inside this chamber and fight the beasts one at a time within this chamber. When the beasts are defeated, head out of the chamber and spot another chamber some distance ahead. Move across to the second chamber. The second chamber may appear to be inaccessible due to four stone walls. However, one of them is an illusion. Use melee weapons to knock off the illusion and proceed inside and save at the Lost Izalith Second Bonfire. It is necessary to fight off more of these Lost Izalith hulking beasts to access this Lost Izalith second bonfire within the second chamber.
Dark Souls Lost Izalith Second Bonfire
Dark Souls And Skyrim
Dark Souls Lost Izalith Beyond the Second Bonfire
In dark souls, from the lost Izalith second bonfire, head out in a straight line. If there are more hulking beasts here, take them down. Spot a tree root which acts as stairways upwards. Head up all the way and then down and spot a lot of fire breathing statues in this area. The hero is on the right track to reach the Lost Izalith fog gate beyond the second Lost Izalith bonfire.
It is recommended the hero runs past the firebreathing statues. Run until the hero can see some actual stairs on the right leading to a peculiar monster with two sprouts and an inverted petal with teeth in it. Use fire orbs on this monster, and proceed into the next stage. The path turns right, and if the hero is here for the first time, he will come face to face with a pyromancer. This pyromancer can throw various fire spells including fire orbs, firestorm and chaos great fireball. Dodge all these spells, and then throw in a few melee swings with a long weapon like the halberd +10 with electricity damage, and the pyromancer will have no chance to retaliate.
Now from where the pyromancer has sprung up to attack, there are three paths here. On the extreme right, the hero can go down some roots and arrive to pick up some treasures from corpses. One of the corpses with a treasure of a rare ring of sacrifice lie just on the ledge of a root. Be careful not to fall down to the ground; otherwise the hero just to dodge the firebreathing statues and run up the stairs again.
The second path on the middle right leads to more great treasures. Go down the root, and just run past the firebreathing statues to proceed to an area on the left. This area will collapse, sending the hero crashing onto the lower levels. If the hero survives and looks down, he will see more of the peculiar inverted petal creatures in the underground level. Use a bow and arrows to eliminate them, and jump down to pick up more great treasures from the corpses. The way out of this underground area is to navigate some pits and find a narrow water passage at the back end of the underground area, and then climb the stairs to reach the upper levels again.This area also contains the Catarina knight, who thanks the hero yet again for dispatching the inverted petal creatures. Now find a root to head up and the hero will find himself back at the top level where the floor collapse. Or just use the miracle Homeward to return to the Lost Izalith second bonfire and start again.
From the second path on the middle right, if the hero turns right rather than left, he will reach a long corridor with a titanite demon guarding it. Finish it and proceed on to discover some Lost Izalith insects and a door that will not open (for now). Destroy them all. One of them will drop a sunshine maggot.
Dark Souls Lost Izalith Fog Gate
In darks souls, from the point where the pyromancer attacked, just head up the stairs. One the left side is the Lost Izalith Fog Gate or White Light that will lead to the Lost Izalith boss fight. If the hero continues straight ahead, he will encounter another inverted petal creature. Eliminate this and pick up the Chaos Fire Whip from the chest at the back.
With all these treasures picked up in Lost Izalith, it's time to use the treasures (most of them are souls of brave warriors, and one of them is a soul of a great hero) to level up and then face off with the Bed of Chaos.
