How to Emboss Father's Day Greeting Card

Please rate my hub! Thanks
My first Father's Day Card

Did you ever say "I Love You, Dad" to your daddy? ( Regardless of what occasion)
I think my mom put it best. She said, 'Little girls soften their daddy's hearts.'
— -Paul WalkerHandmade Father's Day Card
Looking for the perfect Happy Father's Day Card in the bookstores can be a challenging task as most cards are printed with various designs with simple quotes.
Select 3 or 4 suitable cards but if you compare them carefully, don't you think that they appear very common and aren't worth the money you will be paying?
Nevertheless, a wide range of popular online websites such as Etsy, Amazon and Ebay that offers collections of handmade Father's Day card could easily spoil customers with choices.
If you have trouble with making decision or trying to figure out which is the best card yet cost you less money, do consider making a handmade Happy Father's day card on your own.
Card making is a craft project that re not just for kids, as it is also suitable for people of all ages; teenagers, working and stay at home adults and even elderly folks who are bored at home doing nothing.
Spectacles

About This Project
It is easy to design a cool Happy Father's Day Card even though you have no experience in card making at all. Use your imagination and the cards that you see in the bookstores. Combine them together in order to create your "one and only" unique designed handmade card for your dearest dad.
Do not give your dad a card of cute little teddies when you know that he is a middle age man or in the mid of golden age man. Make a card that involves his interest or his current job. Some of the best examples are :
- a book with a pair of glasses ( spectacles)- a dad who loves to read
- a shirt and matching tie - a dad who works in an office
- a hammer and a toolbox- a handyman dad
- flowers and gardening tools- a dad who loves gardening
- food and drinks- a dad who loves to cook
Simple Step by step instructions
- Firstly, you need to decide what object you intend to emboss onto the front card.
- Next, decide the 2nd object to make by twisting and turning with the soft wire.
- Make sure that both objects are related to each other. Don't mix a hammer with a flower which don't make any sense at all.
- Embossing is an easy task. You need not have any metal card making object or Cricut to make the embossing part. Just fold a piece of hard card or card box into half, draw the outline of a book and cut it out. You will get a book with a hole in the middle of the folded card. That is the mold of the book you required to make the embossing on the front card.
- The rest are simple. Cut out 3 circles for the word "DAD"
- Tie a bow tie with the ribbon and paste it on the front card
- Sew the glasses onto the book.
- Cut out 2 rows of jigsaw designs for the top and bottom card
Tips for Additional Decorations
- Print out the words "Happy Father's Day" or "You are the best " on colorful construction paper and paste it on the top of the card.
- Instead of ribbon, make a tie with the ribbon or old fabric and paste it beside the word "DAD"
- Print the word D, A, D on different color construction papers, cut into different shapes.
- Use gift wrapper to replace the pattern paper for colorful design
Do you need a Father's Day Quote?
Yes, no matter what type of Father's Day card you have, whether it is store bought card, handmade card or a printout card, do REMEMBER to include a Father's Day Quote to show how much you care, love and cherish your dad. Be choosy with the quotes. Choose the best quote that suits your dad, words that you wanted to say to him but you can't find the courage to do so. Sometimes, these quotes are useful to send the message to your dad, letting him know how you feel.
Things You Will Need
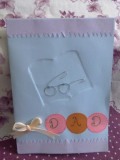
In this article, I had just made a unique card which is quite different from the usual greeting cards.
A handmade embossed Happy Father’s Day card with a book embossed on the front card and a simple soft wire to symbolize a pair of glasses for my dad who loves to read any reading materials that he could get his hands on.
You should had seen my dad who could read the same newspaper 4 times a day!
You don’t have to be a professional to make an embossed Happy Father’s Day Card.
In fact, the materials needed are simple items that you can find at home. Just gather some :
- scraps of colorful construction papers,
- a string of ribbon,
- a piece of soft wire or a pipe cleaner,
- a piece of card box or a hard card,
- sewing needle with threads and
- the basic stationary items that you usually use them.
Sharpie Markers
I love these Sharpie markers! Actually I had bought one in a bookshop and I was extremely please with the solid color that gives rich markings and doesn't leave stains on my fingers.
One unit cost $2, so I went online at Amazon and stumbled upon this great offer. Comes with various 24 colors, it is stated waterproof. So, I drew a line, sprinkle some water on top and it doesn't fade or smear at all!
24 colors give me a great choice to use different colors for my craft making cards. Worth the price and the quality is superb.
Buy Sharpie markers

Material Photos

Buy soft wire

What is a soft wire?
Soft wire is actually a roll of wire that is easily bend, turn, twist, any shape you want to create. You have to use a pair of scissors to cut it off after you have confirmed the length that you want. It is not sharp. Feels similar to ear rings hardness. You can easily purchase soft wire in hardware shop, gifts shop, florist or bookstores. Useful in making scrapbook, crafts, flower making and handmade cards.
Basic Materials...


Things You Need To Prepare:
- 1 string soft wire, for making the spectacles
- 1 string ribbon, for the bow tie
- A few pieces colorful construction papers, to make 3 circles
- 2 pieces of long rectangle purple color construction paper, to make the top and bottom design
- Colorful markers, to draw the dots
- Thread and Sewing Needle, to sew the spectacles
- Some card box or hard card, to emboss
- 1 scissors, to cut
- pencil, to draw
- a bottle of glue, to paste
When it comes to Father's Day, I will remember my dad for both being there to nurture me and also for the times he gave me on my own to cultivate my own interests and to nurture my own spirit.
— -Jennifer GrantHow to make an Embossed Father's Day Card Step-by-Step Tutorial
Here are the step-by-step instructions with photos included for easier understanding how to make the Embossed Father's Day Card. Hope that you will enjoy this craft and do let me know your thoughts in the comment box. Thanks for reading my hub.
1- Folding Photos


Step 1- Fold the Card
- Choose your dad's favorite color. My dad love blue, his favorite for almost all the things he had.
- Fold an A4 construction paper into half, vertically. Use your fingers to press along the creased paper.
- Then fold half again, horizontally. Press along the creased paper again.
2- Making the embossed book


Step 2- How to make Embossed Book
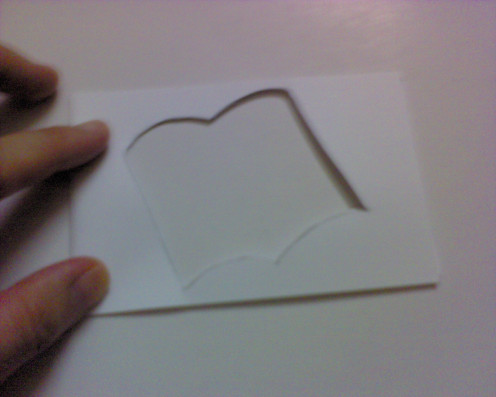
- Fold a hard white card or flat card box into half. The size of the hard white card is approximately double the width of the front card while the height depends on how big you want to draw the book.
- As you can see from the photo I had taken, it is almost 1/3 of the front card.
- After you had fold the hard white card into half, use a marker or pencil to draw the outline of a book. I had drawn an open book which is a little facing sideways.
- Use the sharp scissors to cut out the book outline, both the top and bottom of the cards.
- Hence, you will have 1 set of "cut open" book.
- Repeat the same steps to make another set. You will need 2 sets of "cut open" book of cards.
- Slip in the 2nd card in between the 1st card. The purpose of doing so is to thicken the book card to make a deep embossing for the front blue card.
3- Pressing out the book shape
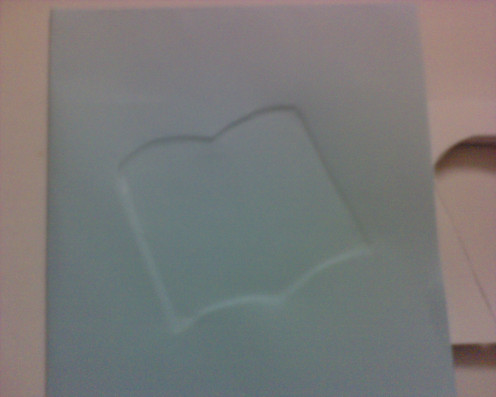
Step 3- How to emboss the front card
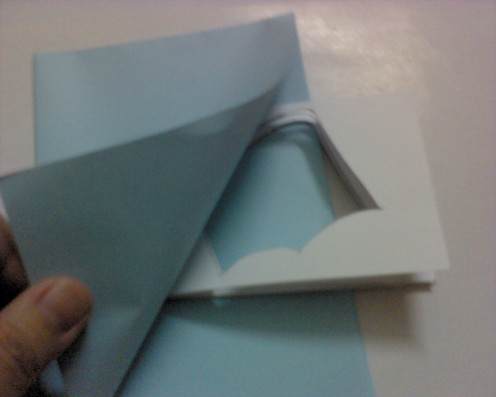
- Slip in the "cut out book" cards in between the blue construction paper which had been folded.
- Adjust your desired book position either on the top, middle or bottom of the front card.
- I chose to place the book almost to the top of the front card so that the embossed card would look outstanding at the first glance.
- You can either use clothes pegs to clip the "cut out book"cards and the blue construction paper together so that the cards wouldn't be running out of the position.
- Alternatively, you could just use your left hand , firmly press down the cards and blue paper together while you do the embossing on the front card.
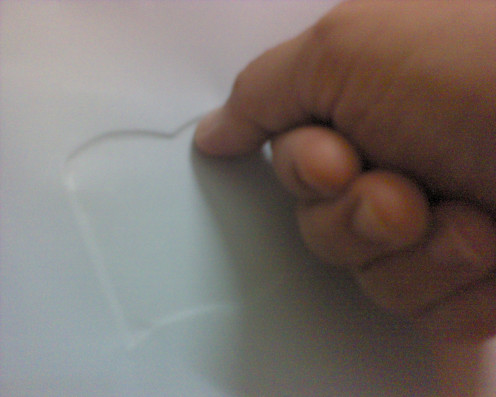
- Use your right thumb to press down the blue construction paper into the "cut out book" which is underneath it.
- Press all 4 sides of the of the "cut out book" in order to create an embossed book on the front card.
- Make sure that your thumb fingernail isn't too long. Otherwise, you may create some tears while pressing down the paper.
4-Make a Bow Ribbon


Step 4- Prepare and paste the Bow Ribbon
- Get a string of ribbon, any color that you have in hand. I have peach color ribbon, the only one.
- Tie a bow ribbon according to the size that you prefer. You can have a big bow ( outstanding ), moderate (casual )or a small bow (cute ).
- I made a moderate bow ribbon as I do not want it look too outstanding. The main object for this Father's Day card is the embossed book so the bow ribbon should be smaller.
- Cut off the excess "tails" of the ribbon.
- Make sure that the bow is tied tightly. Otherwise, it will come off easily.
- Apply some white glue or a double-sided tape behind the bow ribbon.
- Paste it on the bottom left hand side of the embossed "book"
5- Dotting around the circle papers


Step 5- Paste the word "DAD"
- Get some left-over construction papers. I have some pink and orange papers which are small pieces.
- Draw 3 circles on the papers with a bottle cap or 50cents coin.
- I made 2 circles with pink papers and 1 circle with orange paper.
- Apply some glue at the back of the circle papers.
- Paste one circle next to the bow ribbon you had pasted earlier on.
- Paste the 2nd circle and and 3rd circle paper, next to each other.
- Choose your favorite marker color and draw a circle of dots around the each circle papers.
- Use different marker colors to write out the capital letter "D" on the 1st circle , "A" on the 2nd circle and "D" on the 3rd circle, as creatively as you can.
- It's okay if you aren't artistic, just write the casual "DAD" with your own style handwriting. It doesn't matter as long your handwriting is readable.
Test yourself How Much You Know About Father's Day
view quiz statistics


Step 6- How to make a pair of glasses with soft wire
- This is not so easy but with the step by step photos, I am sure you can assemble a pair of glasses for your dad with this soft wire which are easily bend and twist.
- Cut approximately a 5-6 inch length of soft wire.
- Starting from the middle of the soft wire, wrap it around the tip of your index finger. If you think that the circle for the glasses is too small, wrap around your middle finger instead.
- After you had wrap it, loop the end of the wire into the "hole" to "tie" it lightly as photo shown.
- Do not tie it tightly. Otherwise the circle shape might become smaller.
- Leave a little space in between and wrap another circle around the tip of your index finger again.
- Repeat the same step to "tie" it lightly.
- Leave at least 2-3 inch length for the glasses "ear" handles. Twist a little at the end of each handle to make a downward curve for the ear. Cut off the excess soft wire for both sides.
- Twist a little here and there to make your wire glasses more presentable.
Here is your small, cute soft wire glasses for your Father's Day card
7-Sewing

Sewing Kit
- I was getting low shortage of sewing threads and most of my needles are rusty, so I had bought this 100-in-1 sewing kit that has everything I needed, for my sewing machine and sewing for my Father's Day handmade card.
The sewing comes with 32 assorted spools of colorful threads , metal bobbins that can be used in almost any sewing machines, assorted sizes of needles which I love best because I needed a small, thin needle to sew the handmade card. It poked through the card well, without tearing.
It also has a measuring tape and thimbles which I don't need and a pair of small scissors too.
Great kit for novice people like me.
Step 7- Sew the glasses onto the Embossed Book
- This is the easiest part
- Prepare a sewing needle and a piece of thread, tie a knot at the end.
- Place the soft wire glasses onto the embossed book. Position any way you like.
- Hold on the glasses with your left thumb and start sewing by inserting the needle from the inside blue paper.
- Poke it lightly through the blue paper, facing up and pull out the needle with the thread.
- Sew a few repeated stitches over the soft wire glasses to ensure that it doesn't falls off.
- Sew both sides of the glasses and tie a dead knot at the back of the blue paper ( front card).
8- The top card


Step 8- Pasting the pattern papers
- This is the final part. Choose any color construction paper that has the similar width for the front card. You will need 2 pieces around 2 inch height.
- I had found excess purple construction papers that matched the background of the front card.
- Snip the bottom purple paper into "V' shapes. Cut a row of "V" shapes to form the consistent pattern.
- Alternatively, you could cut out your own design or patterns such as "U" shapes or uneven lines or simply tear of the bottom edges. Create your one and only pattern that you can think of!
- Make 2 sets of the same patterns.
- Take the 1st set and position it on the top card. Use a pencil to mark the excess length so that you could cut it off later on.
- Make sure that the even straight line is facing upward while the "V" shape is facing downwards.
- Apply some glue behind the purple paper generously.
- Carefully paste the purple paper from the left hand side edge to the right hand side.
- Ensure that the purple paper is paste in the range. Otherwise it will appear uneven.
- Snip off the excess paper.
- Repeat the same procedure for the 2nd purple paper with the same pattern at the bottom of the front card.
- This time, the "V" shapes will be facing upwards while the straight line is facing downwards.
- Finally, write or print out a Father's Day quote that suits your dad on a piece of color construction paper and paste it inside the Embossed father's Day Card.

Finally, your dad is going to be happy receiving this unique card!

Peachpurple Hub Related to Father's Day
- Father's Day Present ( Gift )- Handmade Bookmark
I love handmade gifts. Making them are easy especially when you use all the left over materials in hand. Recycle the papers, wrappers and old buttons are the best method. This handmade bookmark requires ribbon, color papers and markers. I am sure you - How Do You Celebrate Father's Day
Most father prefer to stay at home or have simple dinner at moderate restaurant compare to fancy, high class restaurant. Fathers are simple men with not much request. - How to Make A Pop Up Card For Father's Day and Father's Day Quotes
Give a special card to your dad on this Father's Day. Make your own Pop Up father's Day card with your favorite Father's Day quote in your card. With your handwritten message and card, I am sure your dad will be touch with your effort and time taken
Do you know you can make embossing with a rolling pin?
This content reflects the personal opinions of the author. It is accurate and true to the best of the author’s knowledge and should not be substituted for impartial fact or advice in legal, political, or personal matters.
© 2013 peachy