How to make a popcorn birthday cake

A popcorn cake is perfect for a movie themed birthday party!
My daughter wanted a movie themed birthday party when she turned 12. We had to come up with the perfect themed cake to go along with her party. Of course, we made a cake in the shape of a simple popcorn box. This cake is as easy to make a regular 9x13 rectangular one. As a busy mom of seven, I need to find birthday cakes that are quick and easy to make and decorate and frugal as well. Here I have included step-by-step instructions along with pictures. All of the pictures were taken as I made the cake. Maybe this cake will be perfect for your next birthday party! I made this in about a half hour.
Get the tools you need to decorate great cakes!

Start with a 9x13 cake
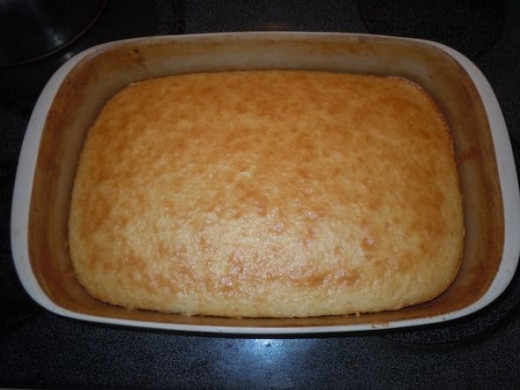
I made things easier on myself by starting with a box mix. The price is right, and the directions and ingredients are very simple. Start by baking a cake in your favorite flavor in your rectangular 9x13 pan. I used a white cake mix because the white cake would not show through the icing, but you can use any flavor. Make sure you grease and flour the pan well, so that it will not stick or fall apart when you take the cake out of the pan. Then let it cool commpletely before you move to the next step.
You need a great 9x13 pan! - I use mine daily
I love to bake cakes and everything else in my stoneware pan. Stoneware keeps the bottom of cakes and bar cookies from burning and it heats evenly for great results every time. I make most of my family dinners in my stoneware 9x13 pan also--ziti, lasagna, shepherd's pie, chicken--it does it all. A 9x13 stoneware pan is great for cooking Frugal Family Meals!

Cut the edges to shape your cake
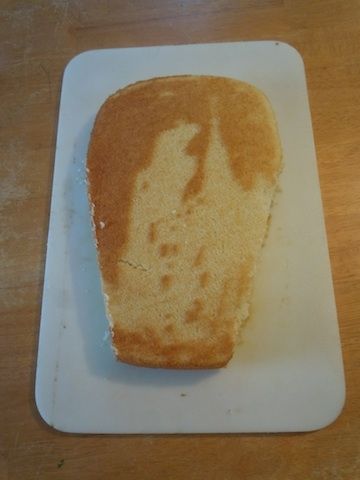
Once the cake is completely cool, you need to cut the edges off the bottom at an angle to shape the cake like a popcorn box. Two quick cuts are all you need! (I know it doesn't look like much yet.) At this point, you can have a snack--eat the edges that you cut off!
Ice the entire thing with white icing - I used a can of Pillsbury white icing
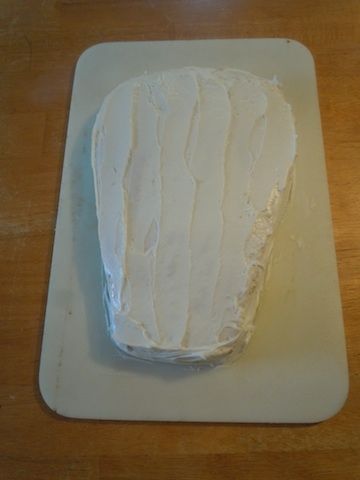
Cover the entire cake with white icing. It will be much easier to ice if you put it in the freezer for a bit first, but I didn't have time so as soon as the cake was cool, I iced it. Tip: Ice the sides first, then do the top. Smooth out the icing as you go.
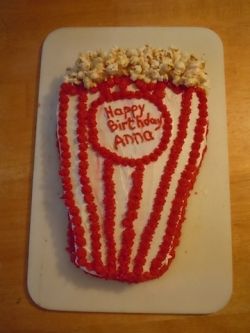
Pipe a circle of red icing in the middle - This is where you can write "happy birthday"
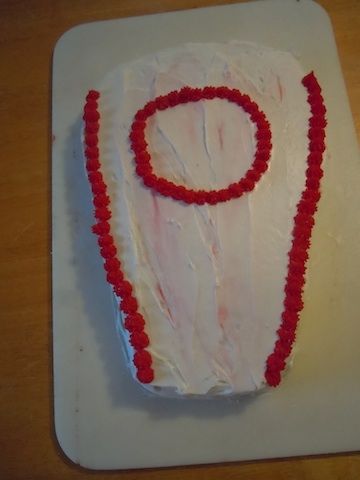
I used a star tip to pipe a circle of stars in the middle near the top, then I began to pipe stripes (again using the star tip) up the side to about 2 inches from the top. You will be adding real kettlecorn popcorn to the top of the cake. (That is why you don't want the stripes to go to the top of the cake.) When you pipe the circle, make sure you leave enough room to write your birthday greeting inside.
Pipe lines up and down the entire top - Write your birthday message inside the circle

Continue to pipe stars to form lines on the top of the cake. I then piped a zig zag across the top above the circle and a line across the bottom. I also piped a line of stars around the base to give it a more finished look.
Add real Kettle Corn popcorn to top of cake - Add more icing and more popcorn as needed
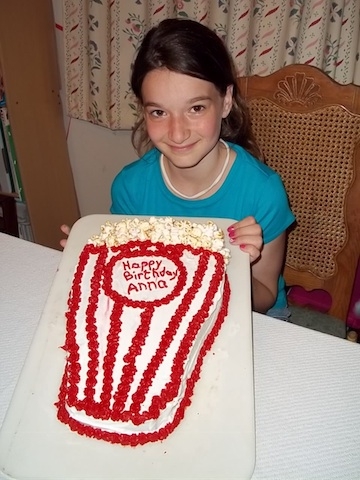
You can use a bag of store-bought kettle corn or you can make your own. I used a bag of ready made kettle corn to save time. Push the kettle corn into the icing, add more icing and more popcorn as needed. I used a bit of additional icing as "glue" for the popcorn until it looked like a full popcorn bag.
You can make this impressive cake in minutes!
Here are some additional variations for the popcorn cake
- Coolest birthday cakes (popcorn cake page)
Here you will find many variations of the popcorn birthday cake including cupcakes and a movie camera cake. This site includes photos. (I based my cake on #17 on this page.)


