Playing with Fire – Making Match Rockets

Using things found in your house.
So, the Fourth of July is around the corner. After all the fireworks are have gone off in a blaze of glory. But you still have a bunch of match books lying about with nothing flammable to burn/fire off/explode.
Are your fingers still intact?
Time to chance fate once again.
In this page, we are going to learn how to make launchable match rockets out of a normal, everyday, match, a paperclip, and some aluminum foil.
Picture Courtesy: US Government, public domain, hosted by Wikipedia

First Things First
A disclaimer
No one should play with matches, ever.
You should be over 18, 21 in Utah.
You should have adult supervision, because if you are playing with matches at 18, you clearly aren't really an adult.
You should have a launch area that is free from flammable items, plants, small children (a driveway works great).
You should wear eye protection.
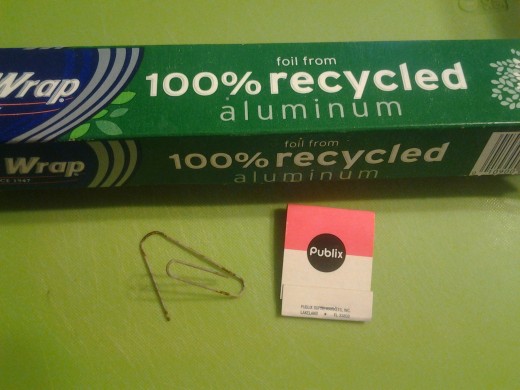
You will need
1 normal, everyday Paper Clip
1 or more match books
Aluminum Foil
You probably have all these already in your house.
Paper Clip: You probably have one of these in your office supplies. An uncoated metal paperclip works best.
Matchbook:
Bum a match book from a smoker, or the supermarket (ask behind the counter, they usually give them out to smokers), or a restaurant/nightclub.
Aluminum foil: Probably in your kitchen, but otherwise you can get this at any supermarket.
Note: Wooden Matches will not work as a rocket!
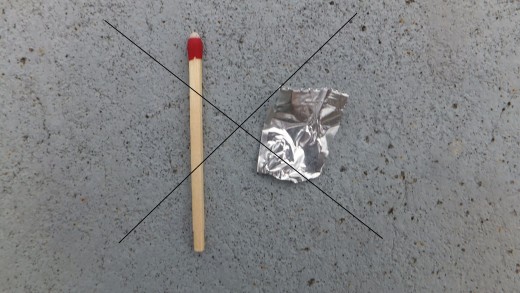
I tried this with wooden matches, and they just aren't aerodynamic enough. Or probably just too heavy.
You can use them to ignite your rocket matches though.
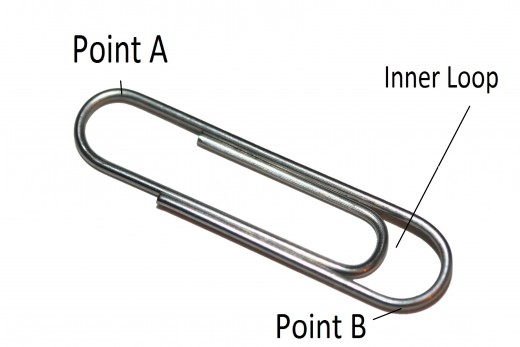
Creating your Launch Pad
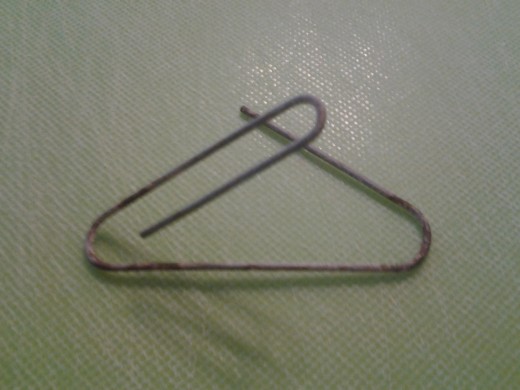
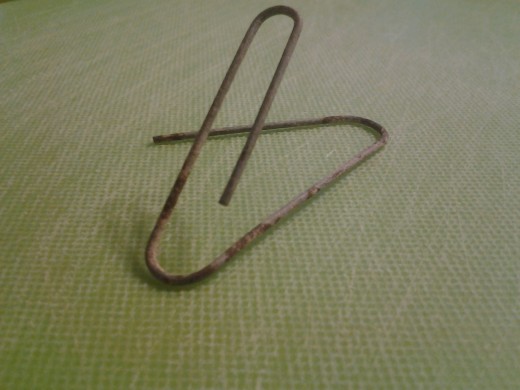
1. Bend the inner (smaller) loop of the paperclip up about 45 degrees.
2. Bend the paperclip out slightly at point A
3. Bend the Paperclip out slightly at point B
Steps 2 and 3 provide some stability to the launch pad.
Protip: If you want your paperclip to go higher instead of farther, bend the smaller loop to a higher degree
Protip 2: If you tape a few pennies to the bottom, your launch pad will be even more stable.
Pictures of my Launch Pad - Not pretty, but functional. Photos by me.
Click thumbnail to view full-size

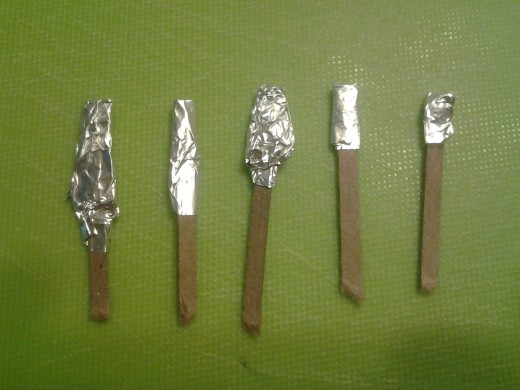
Making the Rockets
1. Rip a match off from the book, set aside.
2. Rip a piece of Aluminum foil off. You don't need a lot, about the size of a dime. Square is best, but any shape will work.
3. Wrap the head of the match with aluminum foil. Just the head, not the body. A little tight, to help channel the power towards flight.
Protip: Place the match in the center of the foil, fold the foil over the match, then roll the foil around the match tightly.
Less is more, use the least amount of aluminum foil that still works. This will take some practice. I like the second one from the right best, but these all should work to some extent.
Photo by: Me.
Time for liftoff!
1. Place your launch pad/paperclip in your desired flight zone. As mentioned earlier, a driveway works fine.
2. Aim your launch pad down the driveway, away from people, animals, and anything combustible.
3. Place your match rocket on the inner loop (the one that is bent up 45 degrees).
4. Light a second match, or use a stick lighter.
5. Keep clear of the flight zone. These rockets should fly about 3-8 feet, depending on wind.
6. Conscript others to make your match rockets, so you can have a steady supply of ammunition.
7. Enjoy!
Making Match Rockets Video
This video shows an advanced technique using a pin to create a channel for the fumes to escape, creating a further flying match. You could use the end of a paperclip just like the pin to create the same effect.
Match Rockets fly just fine without the added step.

