Create Interesting Images Using PowerPoint for Your Writing Assignments
Images not only improve the aesthetics of textual content, but also make the content engaging and easy to understand. So, we are always looking for impactful and original images to include in our articles, presentations, or blog posts. In doing so, copy pasting images from the Internet is not an option as it will lead to copyright violations. Buying stock images or hiring a Graphic Designer can be expensive if you are short on budget. So, it is best to create our own images.
Earlier, creating digital images required one to possess the knowledge of graphic design tools and purchase those expensive tools. Today, technology has advanced to a point where we can use common tools, such as PowerPoint, to create images of decent quality. Although the quality of these images may not match the quality delivered by professional artists, the images will serve our purpose.
In this article, I will share four methods for creating images using PowerPoint for your writing assignments. You can apply these methods even if you do not have illustration skills. I have tried these methods using PowerPoint 2016 with Microsoft Office 365 ProPlus subscription.
Use Built-In Icons
PowerPoint 2016 provides several built-in icons that you can use to create thought provoking images. The icons are grouped into categories, such as Arts, Business, and Education. Once you insert an icon to your slide, you can enhance the icon further by resizing, rotating, and recoloring it.
To add the icons to your slide:
-
Click the Insert tab and then click Icons.
-
Select one or more icons, and click the Insert button.
The selected icons will be added to your slide. The icons will appear stacked on top of each other. You can select the individual icons and move them around to create a pleasing layout for your image. Watch the video given below to see how to use built-in icons.
If you cannot find an appropriate icon, try combining two or more icons to depict an idea. In the exceptional scenario where you are unable to use the built-in icons, you can always create the desired icon using PowerPoint. I will explain how to create a custom icon later in this article. Use multiple icons to create a great story pictorially for expressing your thoughts.
Use Design Ideas
For developing more abstract images, like cover images for your content, you can use the power of artificial intelligence in PowerPoint 2016! Yes, you read it right. The Design Ideas feature in PowerPoint 2016 is powered by artificial intelligence. This feature will analyze the content on your slide and suggest a range of professionally designed layouts for you to choose from.
To use Design Ideas:
-
Insert multiple icons on your slide and then click Design tab.
-
Next, click Design Ideas. PowerPoint will display the Design Ideas pane on the right side of your screen and populate it with several layout options.
-
Once you select an option, it will be applied to your slide and the icons will be rearranged according to the layout design.
Watch the video given below to see how to use Design Ideas.
Create Custom Shapes
As I mentioned earlier in this article, you can create custom icons or even detailed illustrations using PowerPoint. You can develop them from scratch or by just tracing an existing reference image.
PowerPoint provides features, such as Freeform: Shape, Freeform: Scribble, Curve, Edit Points, and Merge Shapes, to help you easily develop custom shapes and icons. I have already written a detailed article on this topic. Here is the link to read the article: How to Create Any Custom Shape in PowerPoint?
Use 3D Models
PowerPoint 2016 allows you to add 3D models to your slides. So, you can create simple 3D shapes using tools, such as Blender or Paint 3D, and import them into PowerPoint. If you develop a 3D model using Blender, export it as a .obj file.
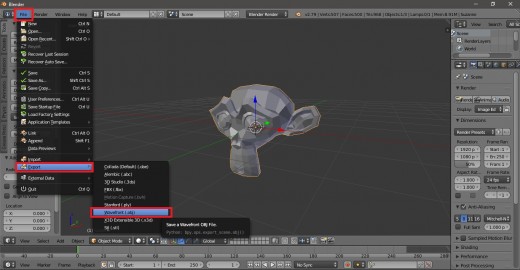

To import the file to PowerPoint:
-
Click the Insert tab.
-
Then click the From a File option in the 3D Models list.
PowerPoint also allows you to insert 3D models from online sources, but the models may be protected by copyright. The From Online Sources option is available in the 3D Models list.
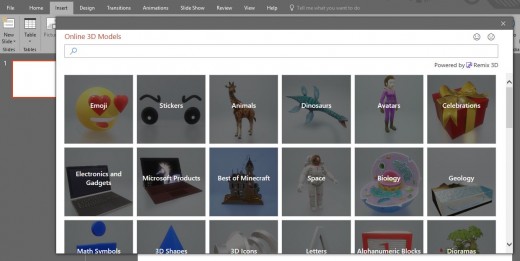
Once the model is inserted on the slide, you can resize, rotate, pan, and zoom it, as required. Watch the video given below to see how to format a 3D model in PowerPoint.
Format Images
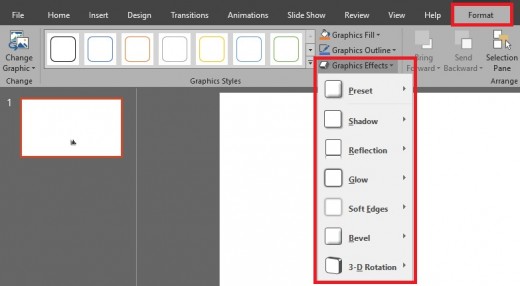
Once you have created your image, you can enhance it further by using the formatting options provided by PowerPoint. These options include shadow, reflection, glow, soft edges, bevel, and 3D rotation.
Save the Images
After creating images using any one of the above methods, you can save your slide as a PNG file and use the image in your writing assignments. To save your slide as an image:
-
Click File.
-
Click Save As.
-
Click Browse.
-
In the Save As window, select the PNG option from the Save as type drop-down list.
-
Click Save.
- Click Just This One in the dialog box.
Or, you can save a screenshot of your slide. Then, crop the screenshot and use it in your articles.
I hope you will find this article useful for your future writing assignments.
This content is accurate and true to the best of the author’s knowledge and is not meant to substitute for formal and individualized advice from a qualified professional.
© 2019 thebloggerville


