Automatic Watering System Installation for Your Garden and Landscaping - Do it Yourself Installation
Save Money, Do it Yourself! Not as Hard as You Think..
Want to save hundreds, even potentially thousands of dollars on your automated irrigation / sprinkler system for your garden or landscaping? You can do it yourself, and it isn't as hard as you think.. I did it, and learned as I went.. Picking up easier ways to do things along the way.. Here's a step by step process on how you can do it yourself with your landscaping or garden irrigation project.. Oh, and I installed my automatic watering system for under $200.00.. With pretty extensive landscaping involved! No kidding..
First Things First, You Need A Plan..
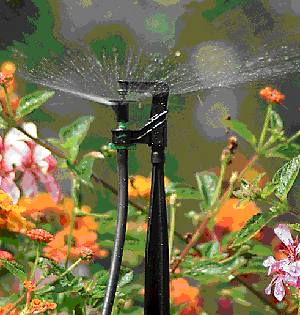
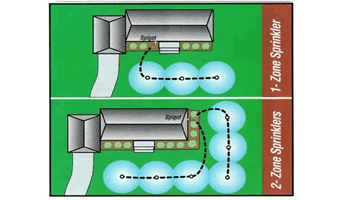
You'll need to get out some paper and a pencil, and draw a layout of your garden or landscaping surrounding your home (more of an aerial view looking down at your home), much like the image to the right. You'll need to walk around your property to get a good sense of where your water spickets are in relation to your targeted landscaping or garden/s. You'll also need to get an idea of distance from the spickets to the targeted areas, in order to get a gauge on how much tubing and sprayers (which we'll describe below) you'll need (sometimes one irrigation system kit isn't enough). Also, if there are obstructions such as sidewalks or patios, you'll need to incorporate that into your planning. You'll need to determine if you need more than one spicket feed (i.e., if you have landscaping all around your house, you'll most likely need a two zone set up, as opposed to a one zone set up as shown in the picture to the right. Now, I'm not a big fan of drip irrigation (either soaker hoses or nozzles that drip water out), because I've had some bad luck going this route with soaker hoses breaking down, etc.. I will be describing how to set up a micro sprinkler irrigation set up (as seen in the top right photo). These sprinklers cover a broader area, and you can control how the water is being distributed more efficiently over a broader area.
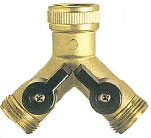
Hose Splitter
If you don't have a hose splitter already, I recommend highly that you get one. This will allow you to have a free hose line in case you need to do other chores, while the other line is dedicated to the watering system. Most hose splitters have on/off valve levers, so that you can keep your spicket on, and control the flow of water with the valve lever, like the black valve levers in the picture to the right.
Sprinkler Irrigation Kit
The next, and most important thing you'll need is a sprinkler irrigation kit, like the one shown at right in the video. It typically comes with 50 feet of 1/2" tubing. Now, I was about to prepare a huge narrative on standard assembly instructions, when I stumbled upon the video at right. This walks you through how to assemble a typical micro sprinkler irrigation kit. Now, there are some bumps in the road for some assembly scenarios, which I'll address later.. You can also purchase what's called add-on kits, which provide more tubing connectors, nozzles, etc., to expand your irrigation down the road, or on your current project.
Electronic Water Timer
I highly recommend a water timer to run your watering on a proper schedule. The easiest one to use on the market, I have found, is by Mister Landscaper, shown in the video at right. Very simple to operate, battery powered, easy installation. If you don't get a timer, you will have to manually turn on and off the water on a daily basis (more so in the summer), while the electronic water timer eliminates that chore, and regulates watering automatically. So, even if you're out of town, the watering is taken care of.. Installation of a water timer is shown in the video at right.
Run Piping / Hose Under Your Sidewalk
Obstructions, Such as Sidewalks and Patios
This happened to me. A sidewalk or patio gets in the way of what you're doing.. What do you do? Well, you go under it.. I went under both a sidewalk and a portion of a patio, and how I did it I thought was genius, until I saw the Sidewalk Sleever (shown in video at right).. I basically did the same thing, using a length of steel rebar, PVC piping and a sledgehammer and rubber mallet.. But the idea is the same as shown in the video at right. You'll need to do a bit of digging and run your tubing through the PVC piping, using an L joint to help the tubing around and up out from the ground. I then ran my tubing along the edge of the sidewalk and patio, pulling up the sod, tucking the tubing under it and placing the sod down over the tubing..

