The Basic Interior House Painting Hub

Painting Materials Needed
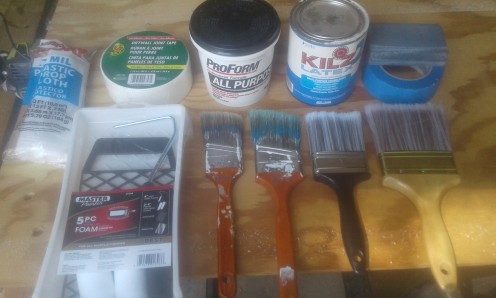
The Proper Tools To Perform
The painting materials you use while painting will always determine the final outcome of the job. Using high quality materials and the proper tools are key to a good paint job. A few of the necessary materials will include: paint brushes, rollers, painters tape, paint stirrer sticks, drop cloths, sandpaper, extension poles, step-ladder, stain-blocking primer, caulks, spackles, drywall joint tape, and compounds. Paintbrushes are needed to control the finish, reach difficult areas, and to execute touch-ups. Either the Purdy Clearcut or Purdy Clearcut Elite brushes are highly recommended. Both brushes will have smooth bristles that are cut at a sharp angle to make painting so much easier. A paint roller comes in many different forms and varieties. Some rollers are made of natural fabrics, others are made from synthetic materials, and even foam rollers are available. Painters need to be certain they choose the correct fabrics fit for the particular paint and the job. Only use rollers made of natural fibers for oil-based paints, always use synthetic rollers with water- based paints, or latex paints. A foam roller will usually work the best for high-gloss results. Choose the nap of the roller according to the surface texture that your painting. Roller naps will range from quarter-inch to one and half-inch in sizes. The painters tape is also a highly important material needed when painting. Numerous different tapes are available for every type of surface, paint, and type of application. Generally tapes are used to protect certain elements of seepage where the baseboards meet the walls or the areas were the walls join the ceilings. Whenever choosing painters tape always know how many hours or days the tape will be left stuck to the surfaces. Tape that is left stuck for longer lengths of time is much more likely to allow for drips to creep through. The first recommended choice for tape is the Frogtape Multi-Surface painters tape. It comes green in color opposed to the typical blue tape and can be left stuck safely to surfaces for upwards of three weeks. Primers come in many different types and its crucial to use the right one for various wall conditions. A good even coat of primer will serve as a base layer to allow top coat of paint to adhere much better and often gives better results. Working with the proper tools will always help the job to go much smoother and less errors in the final outcome of the job.
Repairing Imperfections To Drywall
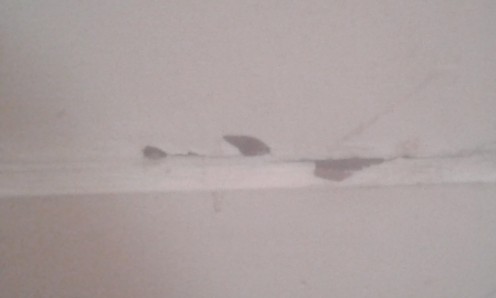
Fixing Cracks, Crevices, Nail holes, Chipping, Or Flaking Paint
In General, prepping all of the surfaces prior to painting will take up the vast majority of your time during a painting project. Roughly three-quarters of your time will be spent prepping all of the surfaces. Repairing drywall imperfections with caulks, spackles, and compounds is a process that takes time. If you have nail holes, crevices, or cracks then you should use the proper patching materials to repair the potential surface problems. The compounds you choose should be appropriate, paintable, and fairly fresh. Expired products that have been sitting around on the store shelves for many years will never perform as well. All areas with chipping and flaking paint need to be diligently sanded to help paint adhere properly. Whenever deep or spot sanding surfaces with sandpaper make sure to use the correct grit. All surfaces should be wiped off and cleaned thoroughly prior to applying any paint. Removing all doorknobs, metal hinges, cable box covers, plug, and switch plates will significantly aid in the painting process. Protecting the floors with drop cloths is highly recommended to reduce paint drips and splatters. Moving furniture out of the area is wise, but furniture can also be covered with plastic to prevent any contact with the paint. Taping off certain areas will greatly help with sharp painting around baseboards, trim, door jams, or windowsills. Grease and water stains on walls need correct primer to cover stains. A coat of stain-blocking primer will help seal the stain prior to painting. Remember that brand new drywall needs primer to seal the surface. Measuring the total square footage of walls and alcoves will help determine how many gallons of paint to purchase for a project. Whenever selecting paint keep in mind that a gloss or satin paint will make wall imperfections much more pronounced. A flat paint tends not to clean or endure touches that well. On the contrary, flat paints will always hide any wall imperfections like no other.
Painting Baseboards

Paint In One Vertical Direction
After the baseboards and trim have been cleaned then they are officially ready for paint. First start by running a strip of painters tape between the edges of the wall where they meet with the edges of the baseboards. Place drop cloths over the floor to prevent paint from staining carpets, tile, or hardwood floors. These steps will help to avoid painting over unwanted areas. Typically latex or semi-gloss paints are best suitable for painting baseboards due to both cleaning up the easiest. Using a four and half inch paintbrush begin by dipping brush three-quarters of the way into the paint. Scrape off excess paint by gently scrapping the brush over the edges of a paint tray. Remember to always paint all baseboards in only one vertical direction to reduce any visible brush strokes. Carefully overlap your strokes to make the newly painted sections blend together evenly and nicely. Keep repeating the same exact process until the entire baseboard is completely painted. Never peel off any painters tape until the paint on the baseboards has had time to fully dry. Sometimes it might take upwards of four hours for the paint to fully dry. To finalize your paint job fill all crevices between the wall and baseboards with painters caulk. Finally you have just performed a professional paint job my friend and hopefully you will enjoy the final outcome.
Painting Walls And Corners
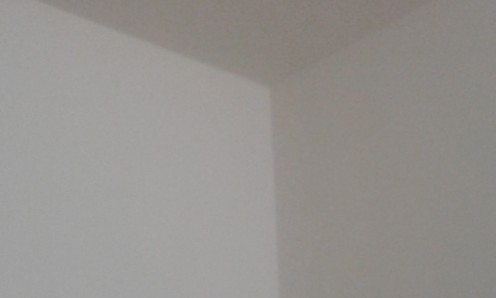
Paint Walls In Overlapping ''W-Motion''
Numerous types of different paints for wall painting are currently on the market today. Many professional painters claim that high traffic areas do well with a gloss or satin paint. A paint job with these particular paints tends to hold up much better with touching and can be easily cleaned by a simple wipe with a wet rag. Before selecting wall paint for the home make sure to test samples first to get a better idea. Be certain to tape onto the ceiling or a floor in the corner following the wall you desire to paint. The corner of a room must always be cut-in prior to painting the larger walls to ensure smooth work when using rollers to paint later on. To effectively paint the rooms corners a painter must grasp the paint brush down near the bristles in a ''pencil-grip'' fashion. Fully saturate the corners of the room with paint and stroke with a steady outward motion. Some amateurs will often choose to paint downward strokes about twelve inches long in all of the rooms corners. Professional painters can adeptly push a brush swiftly and get a razor-sharp line in the corner anytime. Remember that attempting to cut-in after painting the larger areas of the wall instead of before only creates uneven lines that are hideous in appearance. Always paint the walls in an overlapping ''w motion'' to get good coverage and to smooth out all roller lines.
A Quiz For The Wise
view quiz statisticsPainting Ceilings
The First Surface To Paint In A Room
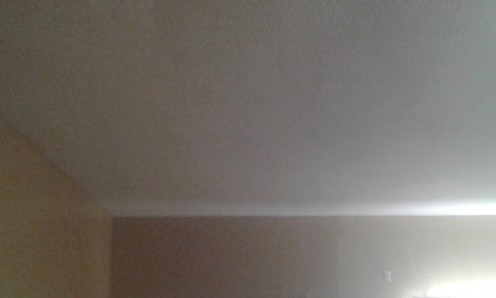
To successfully paint the ceilings a painter will need a sturdy step ladder to cut-in detail work at heights. A simple extension pole with a roller added on can also save a large amount of time because you reach further distances without having to move around so often. Typically the ceilings are the first surface to paint in a room. The ceilings must be cut-in around the perimeter by using a two to three inch trim brush. First start in the corner of a room by painting roughly three foot along one wall and then paint the adjoining wall as well. All light fixtures and ceiling fans must be cut-in around as well. Roller nap will depend upon what particular ceiling type your painting. Always use a deeper nap roller for popcorn ceilings and use lower nap rollers for smoother ceilings. Vaulted ceilings can normally pose its own set of special challenges. More paint will be needed to penetrate the many grooves of a textured ceiling and remember to never roll in a ''W motion'' whenever painting ceilings.
Painting Windows

Painting The Window Sills
Today various window types will come in many different forms, but painting them properly is all the same. There are the casement windows, pivot, louvre types, bay style, sash forms, bow, and french varieties. Apply painters tape to the glass surfaces of the window for protection. Start by painting the vertical bars of the upper sash as far as possible. After finishing the upper sash, then start by painting the lower sash, and never forget to paint the underside of the cross rails. Lastly, brush on a fresh coat of paint onto the window frames and window sills. Always allow for proper drying time before opening or closing the windows. Never apply excessive paint onto a window or else it will become permanently painted shut.
Painting Doors
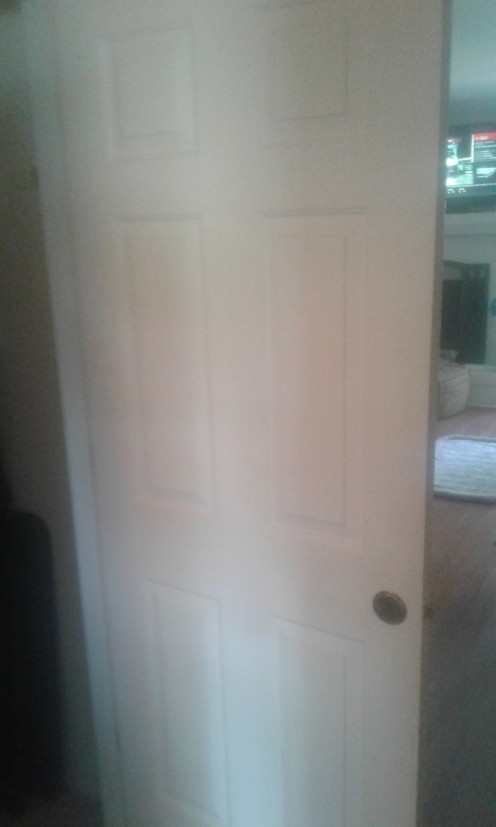
Paint Recessed Areas First
An interior door can be easily taken off the hinges and laid flat atop sawhorses for painting. This simple practice will significantly reduce the odds of any drips or runs. A door is much easier to paint unattached, but that is an optional alternative. Remove all door knobs, hinges, and hardware from the door prior to painting. First apply paint to the inside of the recessed areas of the door and then paint all face panels. Whenever painting the vertical center stile methodically blend brush marks from the center stile. A fresh coat of paint to all horizontal rails will spruce up the doors appearance as well.
To My Painter Friends
What An Excellent Paint Job My Brothers!!
A Short Video Clip About Interior Paint
© 2017 Chase Gentry