How to Build an Entry Table


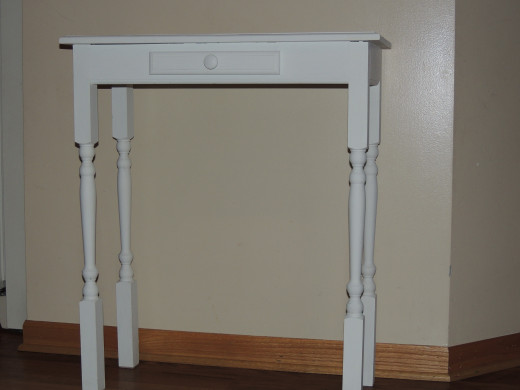
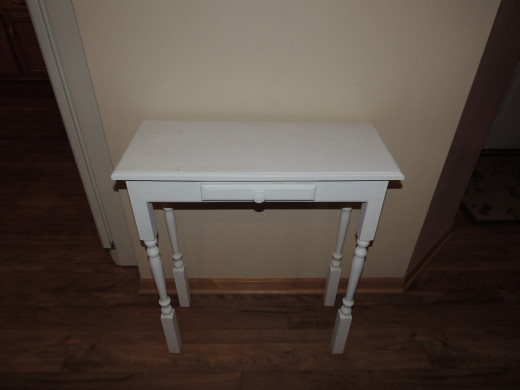
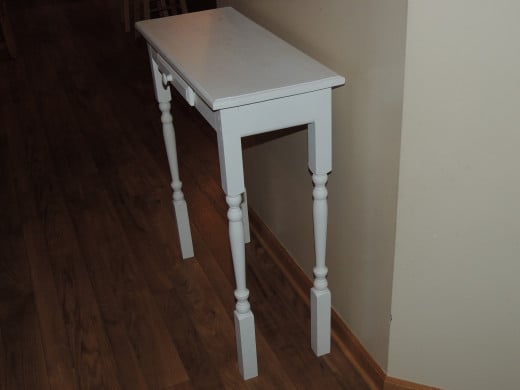
A year or two after we moved into our house, my wife asked me to build her a small table for the bathroom to set stuff on. Back then, I only had a few tools and my woodworking skills left a lot to be desired. However, I came up with a simple design that would be easy to build and look good when it was finished. We now have the table positioned next to our front door and it serves as a place for her to put pictures of our family as well as decorate seasonally throughout the year.
Detailed Instructions to Build the Entry Table
This project can easily be completed in an afternoon. It only takes a few cuts and you will be ready to assemble it. Feel free to customize the dimensions of the table to whatever you need them to be. Just be sure to think through the changes to make sure that the adjustments will fit together properly before cutting. Measure twice, cut once.
Project Supply List
Qty
| Description
|
|---|---|
1
| 48" x 24" x 3/4"
|
4
| 36" x 1 1/2" x 1 1/2" Classic Spindle
|
1
| 1" x 4" x 8'
|
1
| Door Knob or Drawer Handle
|
1
| Small Can of Paint
|
1
| Wood Glue
|
1
| Wood Putty
|
1
| Box 3" Screws
|
1
| Small Box or Pkg of 1 1/4" Screws
|
I listed the board needed for the tabletop is 48” x 24” x ¾”. For the table that I built, I purchased a pine tabletop board that was already glued together, which is the more expensive. A cheaper alternative is to buy a couple of 1” x”4s or 1” x 6”s and glue them together and attach a couple of supports underneath that is screwed into each of the boards.
Tools Needed
The tools listed below are the ones that you will absolutely need to use without changing the plans.
- Drill
- Table Saw
- Router
- Screwdriver
- Tape Measure
If you have a drill press, I would highly advise using it to make sure that the holes are drilled straight.
How would you rate your woodworking skills?
Creating the Table Top
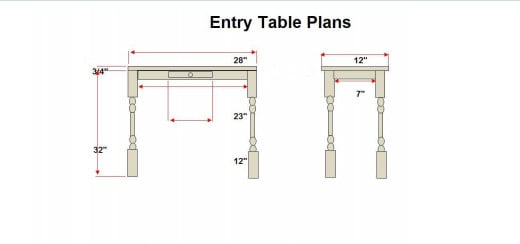
Grab the board for the table top and using the table saw rip it to a width of 12”. Next, use the table saw again and cut the length of the table top to 28”. Place the table top on a flat surface lying face up. Put a round over router bit into your router and set it so that it is a hair deeper so that it leaves a nice line around the tabletop and rounds the edges. It is a good idea to play around with it using scrap wood to test how deep the router bit is set for. Once you are sure that it is exactly how you want it, take the router and router around the entire board. Spend a few minutes sanding the entire table top as well as the area that you used the router on.
Cut List for the Remaining Pieces
Take the 1” x 4” x 8’ board and round one side using the router. The router should be set just to round the edge of the 1” x 4”. Using either the table saw or a miter saw, if you have one, cut the following lengths:
- 23”
- 23”
- 12”
- 7”
- 7”
Rip the 12” piece so that it is only 2” wide. Be sure to not cut off the side that the router rounded. Clamp the board down and router all the way around the board. You will probably have to move the clamp once or twice. The best practice in this circumstance is to attach the router to a router table. Finally, cut the “legs” down to 32” either using a table saw or miter saw. My advice is to cut off two inches on each side so that the thick part of the spindle is equal on both sides, but that it up to you.
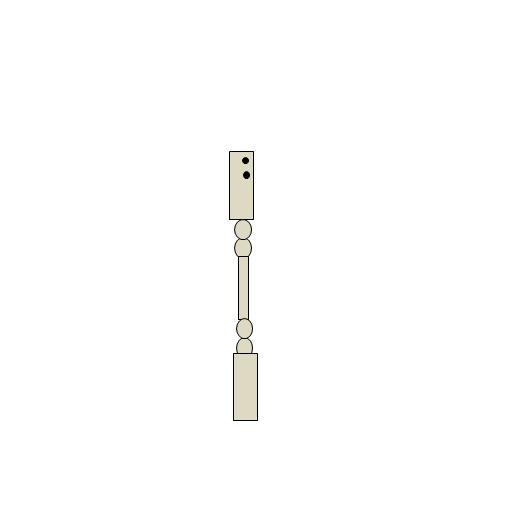
Table Leg Prep
Take one of the legs (spindles) measure down 3 ½” from the top, and make a mark. Measure in 3/4” in from the edge right edge and make another mark. Using a straight edge, lightly draw a box by connecting the two measurements. Now make marks inside of the box 3/8” in. Drill two holes, about an inch deep in the leg, inside of the box. Use a drill bit that is slightly larger than the head of the screw that you are using. Using a much smaller drill bit, drill the rest of the way through each hole. This will allow you to bury the head of the screw into the leg. Repeat this process with another leg. For the other two legs, drill the wholes on the opposite side of the leg so that you have two legs with holes on the top right and two legs with holes on the top left. During the assembly process, you will need to drill two more holes into each leg.
Legs Assembly
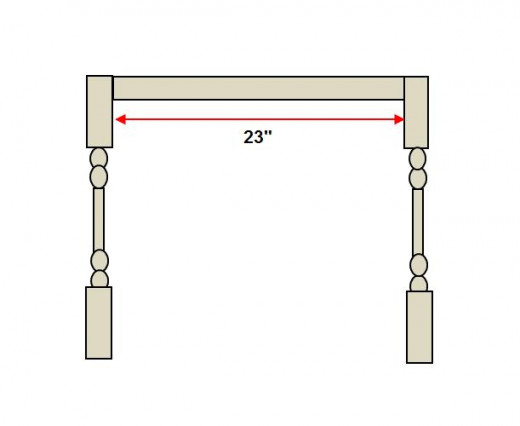
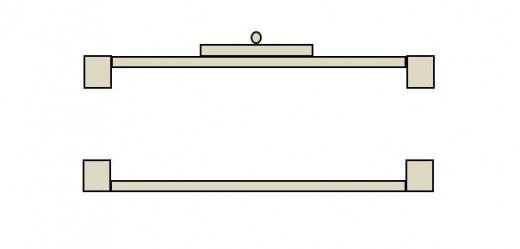
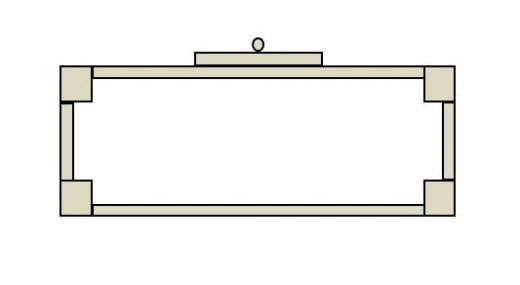
Take one of the 1” x 4” x 23” boards and align it with the outside of one of the legs so that the holes will line up. Using two 3” screws, attach the leg to the 1” x 4” piece. Be sure to keep it flush on the top and the outside edge. Grab a leg with holes on the opposite side and attach it to the other side of the 1” x 4” board. Next, do the same procedure with the other 1” x 4” x 23” board and the other two legs. Once you are finished with that you should have two identical sides except that the 1” x 4” is to the opposite side of the other two legs. Take the 1” x 4” x 12” piece and attach the drawer knob to the front of it. It is a good idea to buy a pack of flat head screws for this so that it fits flush with the back of the drawer facing. Now center the drawer facing on whichever of the 23” boards that you decide. Drill from the back side of the frame through to the front using a small drill bit. Make two holes that are 4 inches to both sides of the center point. Use 1 ¼” screws to screw it to the front. Next, we need to connect the 1” x 4” x 7” boards to connect both sides together. Drill two holes in the outside of each leg within a box that is 3 ½” down and ¾” in. Once again, measure in about 3/8” and center your holes off of this line. Drill the holes just like you did on the other side of the legs. Attach each of the 1” x 4” x 7” boards to the frames that you already built. Be sure to keep the 1” x 4”s flush to the top and outside of the legs.
Attaching the Tabletop
Flip the legs upside down so that the frame is lying face down on a table. The next step is to drill holes in the frame (1” x 4”s) so that the tabletop can be attached to the table. Once again, use a drill bit that is slightly larger than the head of the screw. It is critical that you drill down only an inch. Too much further and the screw will go through the top of the table. One tip for doing this is to measure in an inch from the end of the drill bit and put masking tape on the bit which will stop it from going any further. The best way to do it is to use a drill press and set the table so it will only allow the drill bit to go that far. Use the smaller drill bit to finish drilling the holes all the way through. I suggest drilling two holes on each of the 7” long pieces and 4 holes that are evenly spaced in the 23” long pieces. Turn the table top upside down. Lay the table frame on top of table top. Take a few minutes and center the frame in the middle of the tabletop and run a bead of wood glue on top of the frame and then attach it using 3” screws. Wipe off any excess glue. Do not over tighten screws as you may drive the screw through the table top.
Finishing Touches for the Entry Table
All that is left is to finish the table. Fill all of the screw holes with wood putty and let it dry per the instructions that come with the wood putty. Sand the whole table including the puttied areas so that the table is nice and smooth. Now paint it whatever color that you like.
This content is accurate and true to the best of the author’s knowledge and is not meant to substitute for formal and individualized advice from a qualified professional.

