How to make Brick and Cobblestone works of art for your Driveway or Walkways.
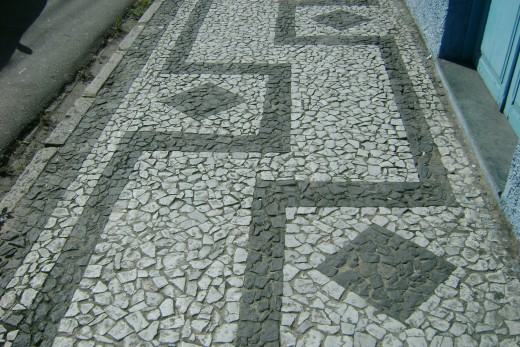
Cobblestone a Walk or Diveway
Simple step by step instructions:
Do you love the look of a Cobbled Stone walk or driveway? Or would you like to Brick or Cobblestone your walkways to match your driveway and your walk... This is a simple old world method that you can use to achieve great results... You can even mix and match your materials for an old world look or make designs in your work... you have all sorts of possibilities by Doing it Yourself!!!
Here is what you will need:
- Shovels: round and flat point
- Rock hammer: helpful for digging and tapping.
- String Line
- Pegs: Wood or Metal
- 4´level
- Buckets
- Trowel
- Wheelbarrow
- Large Masonry Sponges: Hold Lots of water and are very sturdy
- Cement Mixer: a cement Mixer is a nice option, but you can use a wheel barrow to mix the cement in if it's a smaller job.
- Supply of Cement, Sand, Rocks, Bricks, stone slabs etc
Prepare your work area... Mark out the area and loosen soil with a pick and round point shovel. Get rid of any debris. Add a Bunch of sand and mix it in with dirt... Then rake it out to make a nice clean desired surface area. The surface should represent the desired outcome by being Crowned, Level or Sloped.
Drive wooden stakes and use a string line to help you find where you need to remove or add some more sand/soil to get the ground ready for the walkway.
Sand bed... Of Damp Sand...
Bring in the sand... shovel in the sand and rake it out so that you have a bed
that is an inch or two deep over the entire area you are laying the
Cobblestones. Keep the sand moist by sprinkling it with water as needed.
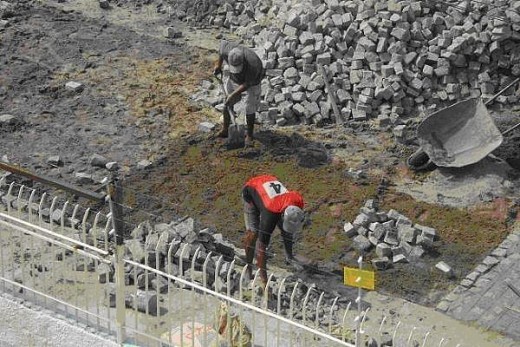
Use a String line
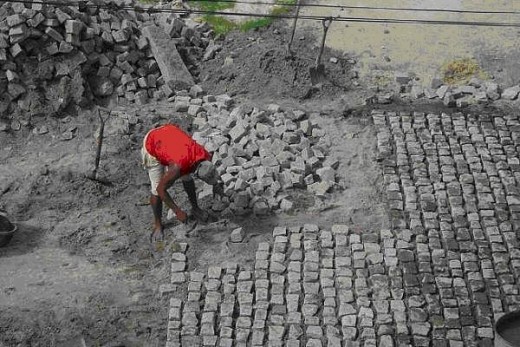
Plan your work for water to naturally run off... Crown the walk higher in the middle and lower on both sides.
To do this get a long level at your local Home improvement store... If you working a driveway you can strap your level to the edge of a 2X4 to make it long enough to reach where you need it...
To crown the center of the driveway..Find the center line of the driveway and mark it... Place a center line of Stones or Bricks in damp sand to mark this line... Go to the side of the drive and place a few stones there as well... now use your level between the center and sides to check that your Middle Crown is tall enough... if not add some sand... or Remove some sand from the side... depending upon your terrain... Do your prep work before trying to lay your stones!!! You should be working in a Sand Bed... not an area of un worked dirt and rocks.
Don't Get anxious and get ahead of yourself.
Preparation of your work area is one of the most important parts of this project..
Use a string line
Set up a string line from one side of your work area to the other. Use this
string line to keep your row of stones straight. Work from side to side and do
about 10 rows at a time.
As you place the stones into the sand bed where you want them... Tap them into
the sand so they stay where you put them.
String line should mark your first Row of Bricks or Cobblestones to get started... then after having placed and tapped the first row in place... Now place 4 more rows neatly in line with the first row... Or stagger them but keep them neat and organized.
Now measure your first 5 rows and set a string line far enough for some more 5 rows of stone with their gaps.Place these stones in place by the string... making a line across your area according to the string. Now go back and carefully place the stones that belong in between the first rows you placed and the row that you just made next to the string line
Placing and Tapping in the Stones
When Placing and tapping in stones. Remember to leave a gap between the stones of ¾" - 1" or so... This will allow you room to pour in or trowel in the mortar when you are at that step. Don't get in a hurry... wait until you are ready before you get to that. To many times people will jump ahead of themselves and start making cement before they have prepared the area and placed the stones properly... this just makes a mess of the job so don't do get ahead of yourself... follow the steps.
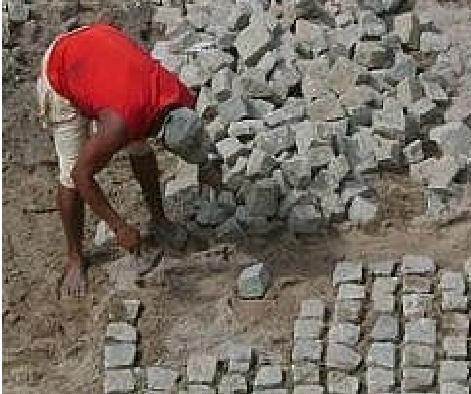
String line usage
Its ok to move the string line often or if you prefer... Use two string lines... Husband and wife teams can work two strings easily... One person measuring and laying the marker rows... and the other person filling in... Again you can do 5 rows or so between marking rows... (Professionals do up to 15 rows between the marking rows)

Artwork in the Midst of it...
For those of you who feel artistically inclined... this is the point at which you can express yourself in the form of designs in the cobbled stone... In your preparation you should have a few sketches of what you would like the walkway to look like when you are finished..
Lets say for example that you want a large Scorpion made of Black Obsidian stones in the middle of a white marble courtyard.
Obviously you will need to get the appropriate materials and have them standing by... cleaned and ready for use... In this case a good supply of Black and White Stones for the design.. Large ones and small ones...
Next you would take your finger or a stick and draw in the wet sand bed that you have prepared... draw out the picture that you want to duplicate then do its outline with stones.
-You may need to do this by first making a Graph pattern and drawing your design to scale inside the area you have prepared for it.
It is best to Keep the design simple... like the type of simple black and white line drawings you would find on the walls of most tattoo shops... Remember that you can look for them in Google images and then just print them out.... If you need to, you can modify them in Paintbrush and also add graph lines if you need that to help you.
- Line it out in the wet sand...
- then do the outline of it with stones..
- White stones for the white lines...
- Black stones to outline the Black areas...
- then just fill it in.
Its that simple... now move on to the next step.
Shovel in the sand
After you have your first 10 -15 rows or so laid and ready... shovel some wet sand onto your stones being careful not to disturb them... you want the sand to fill in the gaps between the stones... This locks the stones in their proper position.
Now...Wet the sand so it settles and flows around the base of the stones... you can use a garden hose with a shower end... But... Do NOT "Blast" them...
This Gentle Sprinkling will settle the sand in and around the base of each stone making the position a little more stable...
After the sand has been wet settled around the stones you should have about a 2" space from the top of the stones down to the sand and the stones should be about ¾"- 1" apart.
Do this wet settling just before you Mortar in the next step...
You want the stones to still be damp from this step when you pour in the Mortar in the next step.
This will give you a better bond between the mortar and stone.
Soupy Cement
Mix your Concrete Mortar
sort of soupy... You want it "sticky"
Now bucket by bucket carefully pour the mortar into the gaps between the
stones. It should just overfill the gaps... Leave the excess alone!!! Don't
mess with it yet!!!
Let the mortar set up for a little bit... half an hour or so before troweling
off the excess. You want the mortar to set up sufficiently that troweling off
the top will not disturb the stones.
Finishing
After Troweling off the excess mortar you can also take a damp sponge and clean the tops of the stones. You can wipe the joints and make them a little lower than the top surface of the stones so that the water runs off easily.
Be careful...
Don't use too much water,
and... Don't walk on or move these stones.
Protect your work... Keep people and animals off of your work...
When your work is complete... fence it off so no one walks on it...
Cure Time
You want to give the concrete plenty of time to cure before putting a load on it... Keep people off of it for several days... Keep cars off of it for at least a week... trucks? This is Cobble stone.. it is not a thick concrete slab...
If you need a "Cobblestone driveway" that will support the weight of loaded trucks etc... I recommend you first prepare a suitable Concrete driveway and then "Cap" the drive with Cobblestones.... If you do this.. it's a different process... "How to cap a driveway with Cobblestones" This uses mortar under the stones... and Grouting mortar around them. This is a harder and more involved process that usually requires a professional to achieve the desired results. I may write an article on this later as time permits.
If you have any questions.. Please
click my name above and write me a message... I will get back to you soonest.
Hope this article helps... Let me know how you did... you can even send some
photos of you work... if you like Ill even see if there is a way to post them
to the article... Hmm that sounds like fun. See your projects created with my
article...
Have a great
weekend
Mr Maranatha
Tips and Warnings
- Plan your Work and Work your plan
- Don't get ahead of yourself
- Follow the steps provided
- Don't Over Exert yourself: This kind of work can give you a sore back if your not used to it, so take your time and take rest breaks.
- Drink lots of water when working outdoors... especially when you are sweating.
- Don't let yourself get dehydrated: You don't want a Heat Stroke.
- Dehydration is also a good way to have Kidney Stones.. (as some of my friends in the workplace have found out the hard way.)

