Protecting Shrubs and Moving Perennials for a Home Makeover

Scrutinize the Gardens Close to House
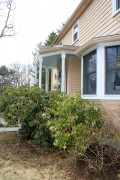
After moving all of the shrubs that I could, I still had many plants to consider moving or wrapping. I had to look at every side of the house that the workers would be renovating, take a count of how many shrubs were going to be wrapped, and determine what to do about all of the perennials.
As you will see in the rest of the article, each one presented itself with its own set of problems and solutions. For the perennials, moving the Japanese ferns was going to be the easiest. I saved that part of the project for last. First things first, wrap the shrubs. That would also allow me the space to move the perennials without stepping all over them myself.
Tools for All Projects in This Hub
Tools Needed for Shrubs
| Tools for Hostas, Irises, Ferns & Grasses
|
|---|---|
5 Foot Stakes 3 for Each Shrub
| Spade
|
Burlap at least 3 feet wide
| Shovel
|
Tie Wraps
| Hand shovel
|
Hammer
| Tape Measure
|
Stool
| String
|
2 Tent Stakes
| |
Garden Hand Tiller or Pitch Fork
|
Project Difficulty


How to Wrap Taller Shrubs
I had a few shrubs that were over three feet in height that needed to be protected from the exterior renovation. Shrubs of this height can be very difficult to move without additional help from machinery. I decided to tie back the shrubs using plant stakes, burlap and tie wraps. This way the construction workers could still access the house, but the shrubs would not get damaged.
Each shrub would be pruned to shape and remove any dead branches. I first determined the length of burlap needed for an individual shrub by using a tape measure. The stakes I have chosen to use are five feet tall, have a plastic outer coating and can be reused in my yard for other purposes once the stakes are no longer needed around the shrubs.
After getting the length measurement, I cut the burlap for the single shrub. I placed a pole on one end and attached the burlap with tie wraps. I did the same to the other end of the burlap. I placed both poles in one hand and lifted it up to determine where the middle was. I placed a third stake in the middle pocket, having the burlap on the back of the pole, and tie wrapped the burlap to the stake.
- If the shrub was over four feet tall I placed the burlap at the top of the stake. If it was less than four feet tall, I placed to burlap down a foot from the top of the stake.
Now that I have a wrap ready for a shrub, I grabbed a hammer and placed on of the end poles at about three o’clock (I stood in front of the shrub at six o’clock). I set it in at least eight inches into the ground. I then placed the other end stake in the ground as close to twelve o’clock as possible. Pull the burlap as taut as you can. Do not worry if the first stake leans a bit. Hammer this stake in place and repeat the process for the final stake that should be at nine o’clock position.
If the stakes are leaning towards the back, get some string. Make a double loop as indicated in the photo, and place the loop (on the three o’clock pole) that has the string leading away from it close to the lowest tie wrap and attach the loop with a tie wrap. You should have one loop hanging down. Take the string and wrap it around the pole (nine o’clock) above the lowest tie wrap and bring the end to the hanging loop. Put end through the loop, pull towards the nine o’clock pole and tighten/straighten the pole. Tie off string to itself.
I repeated this method for every shrub. In my case, I had six different shrubs that needed this protection. Once I was done, the construction workers had plenty of room, my shrubs would not be disturbed and all I had to do from this point forward was to make sure any bad storms did not disturb the wraps I had created.


Making a new Hosta Garden
Once I determined the quantity of hostas I would need to move, I wandered about the yard to where they may be needed to fill in areas not yet established. I found an area by the mailbox that would give the driveway some curb appeal and give the irises already residing there some companions.
As I began to walk up the drive, I noticed that the two raised beds I had added in the yard for starting plants and herbs looked, well, like raised beds stuck on the edge of the lawn. They really did not fit with all of the other gardens in the yard. I decided to make two new hosta beds in front of the raised garden beds in hopes to anchor them in with the rest of the scenery.
I went to my shed and retrieved a tape measure, two tent stakes and a roll of string. My guide to making this new hosta bed was the front board of the raised garden. Measuring from the left corner, I placed a tent stake at sixteen inches. I did the same measurement from the right corner and placed the second stake in the ground. I tied off the string to one stake, pulled the string over to the second stake and tied it off. To make sure the string was where I needed it for my cutting guide; I placed the tape measure close to the middle and made sure the string was at sixteen inches.
I cut an edge with a spade right along the string line. I removed the two stakes and string, weeded the bit of grass by using the spade to scoop the top inch off the soil, then went to fill the wheelbarrow with enough compost for both of the hosta gardens. Instead of pulling out the small rototiller, I used a tool called the Garden Claw. It easily tills up the soil to a depth of four inches and mixes in the compost at the same time. I find this method to be much easier and less time consuming in a small garden. If the rototiller is being stubborn, I could spend up to fifteen minutes just trying to get the thing going.
Having both of these gardens prepared any ready to go; I brought over all of the hostas that still needed a home. Some of the hostas , I noticed, needed to be split before transferring to their new home.


Creating a Hosta Garden From Cuttings
There are two times of the year that is recommended for splitting hostas. Spring and Fall. You can split hostas in between these seasons but the demand for water on the plant to establish roots and produce leaves will be greater during summer months.
By dividing a hosta plant, you will be setting back the overall maturity of the whole plant. Hostas only improve with age and the right growing conditions. When hostas reach their space limit or are in poorly suited conditions, moving or splitting off a piece from the main plant are excellent solutions depending on the plants problem. If you wish to fill in a garden area with more of a particular species of hosta already established in the garden, here are a few suggestions.
- Take off a side piece without disturbing the main plant. Do this for each of the full size hosta plants. Plant the cutting just a foot from the main plant. When the hostas are in full bloom during the summer, this will create an illusion for the viewing eye that the area seems full.
- Remove all of the hosta plants and split each one into thirds. Lay them out in the garden area, space them equal distances from each individual plant, then begin to replant the garden. This method is particularly handy when doing a tree ring garden. By summer, the hostas will fill in the space and it will appear to be a full, well established garden.
The method I show in the photographs is the removal of a side plant from each main hosta plant. As you can see, the hostas filled in the garden nicely and will cover the raised bed boards from view as the hostas begin to grow.


How To Move Iris Plants
Spring is a good time to move irises when the leaf fans are just starting to show. If you need to move them at a later time, try to let them fully bloom. Disturbing them while in bloom can put additional stress in the iris plant and they may not move as well. Once they have finished blooming, cut the leaf fans and bloom stem back to six inches tall. This will allow root production to begin again when you move the irises to a new garden.
- If you are moving to a new place and are looking to take your irises with you, pot them up in a container that will allow two to three inches all around the rhizome and at least 8 inches deep. If the new place is out of state, the iris may take up to two years before they will produce flowers. It is due to acclimating to a growing condition (zone 4 to zone 6).
To move irises, you do not have to dig very deep. Irises grow on a rhizome and the root system it creates does not grow very deep into the soil. You can use a hand shovel or a long handled shovel, depending in the size of the iris clump, to remove the group from the garden. Slowly begin to pry the rhizome out of the soil. Remove any rotted parts that are no longer producing leaf fans.
To replant the iris, make a hole two to three inches wider that the rhizome. Shovel down about five inches, add in compost, and fill the hole back in leaving about two inches from the top of the hole. Place the iris plant9rhizome) in and carefully back fill with remaining soil. When you are finished, you should see the top of the rhizome sticking just a bit above the ground. Make a soil or mulch ring around the iris to help keep water near the root base. Water daily for ten days, do not water when it is raining, and check to see how the iris is doing.
- In the spring, after ten days you should notice more leaf height and in the summer you will see that the iris is holding its own in the soil and not falling over. If you touch the rhizome and it is hollow or squishy, the plant has completely died back.


Transplanting Japanese Ferns
Moving these ferns would be very simple other than sometimes the ferns do not like being disturbed. Instead of moving them to an area that was mostly sun with some shade, I chose an area that had more shade than sun.
I began by removing to full Japanese fern plant with a long handled shovel. I removed any weeds from the base, and brought it over to the area that I was transplanting to. I dug a hole two inches wider and three inches deeper than the plant. I mixed in compost with the soil that I removed, placed the plant in the hole, and then backfilled while tamping lightly around the plant base to make sure it was in the hole securely.
You can use this method with any of the perennials you may have to move. As stated before, most plants prefer a springtime move than a summer one. If you know this type of work will be done on your home over the summer, plan ahead. You and your garden plants or shrubs will appreciate it greatly.
Conclusion
I rated this project 3 out of 5 stars for difficulty. Most of this project is just the reverse of how you planted your perennials. The shrubs took the least amount of time to do and the hardest part was looking to see where new gardens could be made in the yard.
Please leave any questions or comments you may have below.
© 2013 Susan McLeish