How to Change Your Lock
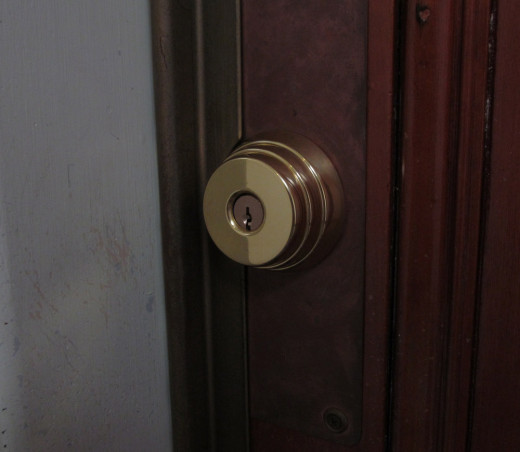
This article illustrates how to rekey an Arrow E61 tubular deadbolt as shown below. The principles of rekeying discussed can be applied to most standard pin tumbler type cylinders.
Overview
Tools required:
- Phillips and standard point screwdrivers
- Keying kit
- Plug follower
- A small screwdriver, scratch awl, lock pick or other thin metallic object to act as a poking device
Also required will be a set of keys that have the same keyway as the lock you want to rekey but have different cuts than the key that currently fits that lock.
To Begin:
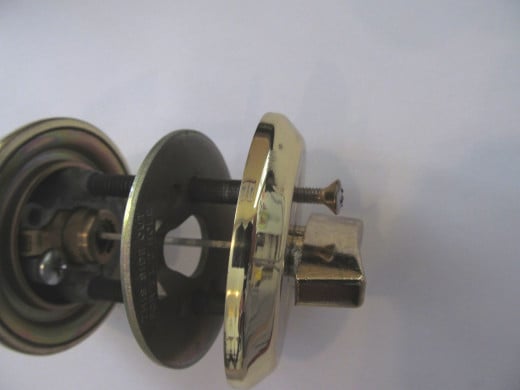
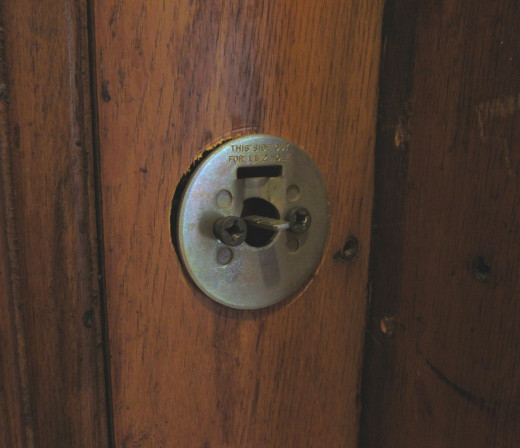
Tubular deadbolt cylinders are usually small cylinders that are enclosed in rather large outer housings. Therefore you need to remove the lock from the door so that you can access the cylinder. Usually the outer housing is held in place by screws that extend through the turnknob escutcheon on the interior side of the door, however, some locks - like the Arrow D61 deadbolt shown below, are held together by throughbolts that are concealed by the interior turnknob escutcheon. This make little difference except that instead of two screws, on must remove four screws in order to remove the lock.
Removing the Lock
To remove a single cylinder deadbolt from the door for rekeying, open the door and turn the interior turnknob so that is is out of the way of the screws. Often this will extend the bolt. That's okay. Next, hold the outside housing with one hand while removing the screws from the interior turnknob escutcheon plate with the other. In case these screws are the only fasteners holding the lock together you need to hold the outside cylinder housing so that it does not fall off and become damaged. If this first set of screws only attaches the inside escutcheon but not the entire lock, remove them and the escutcheon and set them down in a safe place. The concealed throughbolts will now be exposed. Usually these take a Phillips screwdriver, but there is no standard as to what head is used on these fasteners. It could be a socket head or Torx screw. You'll find out soon enough. Remember to hold onto that outside housing as you remove the throughbolts.
When you have removed the throughbolts, carefully gather the interior fasteners and exterior housing. Place the mounting parts down in a safe place and bring the outside lock housing with you.
Below is a little video introduction I've made for you about rekeying this type of cylinder.
Rekeying Video
CAUTION
A lock is a spring-loaded device. Spring tension is the force that makes it work. When you rekey a lock you are both working against and working with spring tension to accomplish your task. Here are some of the unfortunate things that can happen:
- If you key a 6-pin cylinder to a 5-pin key (as shown in the video) there will be an empty sixth chamber. If, for example, you turn the key before the plug is fully inserted, the 5th pin my drop into that empty sixth chamber. Then you have a real challenge on your hands, getting that top pin out of the plug so you can get the plug out again.
- If there is any gap between the plug and the follower, pins may pop out of the bible. The lock will not work right unless you get them back in.
- If, when you remove the plug, you find that it contains more than one pin per chamber in the plug, that means that your lock is master keyed. That means that there may be master pins still inside the bible. If you dump a master wafer from the plug and replace it with a bottom pin that is bigger than both put together, you may not be able to insert or remove your key.
Any of these situations could create a lockout situation that would challenge the best of us, and might mean that the lock must be destroyed in order to gain entry.
So be careful, and if you feel out of your reckoning, seek the help of a professional locksmith before things get out of hand.
Rekeying the Cylinder
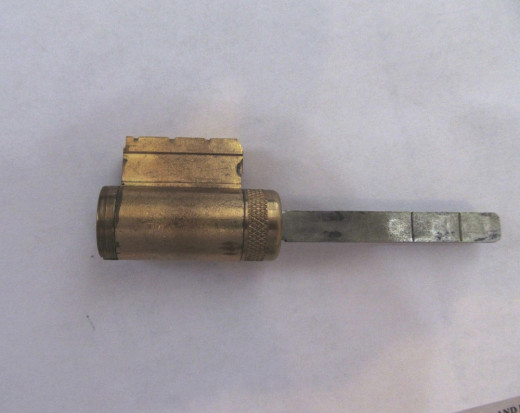
- Remove the cylinder from the housing, if applicable. (Some deadbolts have cylinders that are integral with the cylinder housing. Those cylinders must be rekeyed as they are since they cannot be removed.)
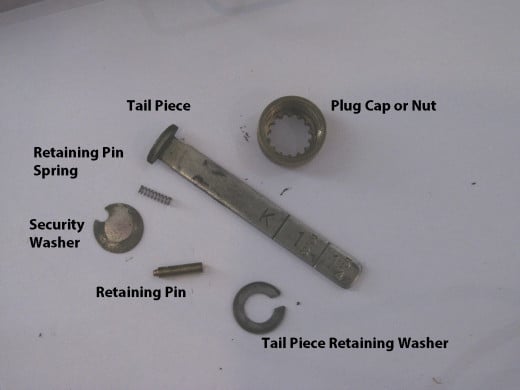
- Remove the tailpiece assembly (see parts breakdown above.)
- Insert the key that currently works the lock and turn it 90 degrees in relation to the cylinder bible
- Remove the plug, following it with a plug follower
- Remove the old pins
- Remove the old key
- Insert the new key
- Insert new pins, choosing them so that they are flush with the surface of the plug with the new key inserted
- With the key turned 90 degrees in relation to the cylinder bible, use the plug to drive the follower out of the back of the cylinder
- When the plug is fully inserted, turn the key so that the cuts align with the bible
- HOLDING THE FACE OF THE PLUG IN PLACE WITH YOUR THUMB gently remove the key
- Re-install the tailpiece assembly
- Test the key
Wrap Up
If your key works well and you haven't messed the lock up along the way, go ahead and re-install the deadbolt onto the door. The tailpieces on most tubular deadbolts are timed. Before you start screwing in the fasteners, turn the tailpiece with the turnknob to see if it throws and retracts the bolt smoothly, without forcing the outside housing to turn. If it does, go ahead and tighten down those throughbolts.
With the door closed, check to see that the bolt throws without resistance and the key turns without a hitch. Sometimes locks are installed into crooked holes, so they have a tendency to bind and not work smoothly. This condition can often be amended by repositioning the inside escutcheon or outside housing so that everything lines up correctly.
Once everything is back on the door, try it one more time to make sure it's right. Then you can walk away knowing that no one is going to be locked out because of your work.
I wish you good luck in all your lock adventures.
© 2014 Tom rubenoff


