DIY project:Making Musician Figurines from used materials Around Us.

Plastics, plastics, plastics in any kind of forms tend to give threats to environment. Those who have concern about the effect of polluting plastics make various efforts for the solutions, and here I share one way in minimizing pollution caused by plastics :
How to make Musician Figurines for home decorations from plastic wastes around us.
Materials
The materials needed for this project is easily accessed around us, just grab
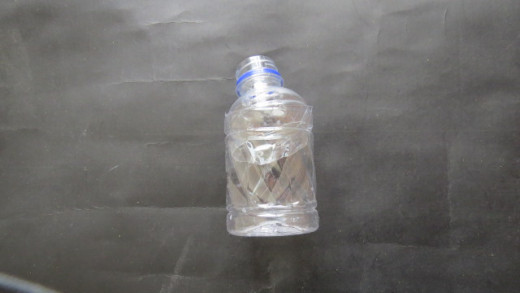
- 2 used plastic bottles: 1 of 300 ml and 1 of 600 ml sizes.
- sellotape
- PVC glue
- Thin or tissue paper
- decorative paper or used colorful fabrics.
- water color.
- water
- Some bottle caps
- some tooth picks
- A small round object .
Do you agree that making musician figurines from wastes is useful for recycling activities ? ?
Materials for the band drums :
5 small plastic caps
1 medium sized plastic cap (normally from 1-gallon-sized water jar)
some plastic straws
some tooth picks
Thin styrofoam
Tools
- Scissors
- cutter
- small paint brush
- medium paint brush

The Drummer making :
The 300 ml bottle for the body and neck :
Cut the bottle 20 cm from its bottom, we 'll use this lower part for the body.
Cut the rest of the bottle (the upper part) 10 cm from the bottle mouth. We'll use this part as the head and part of the chest.
Combine the lower and the upper parts together to make body and head.
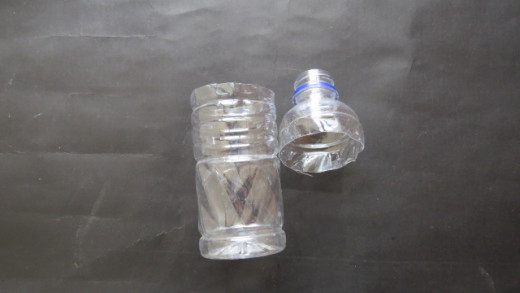
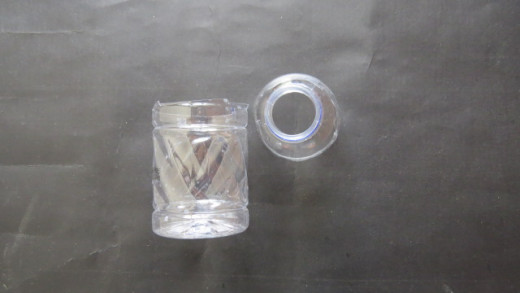
The 600 ml bottle for the hands and legs.
Cut the bottle at the bottom and the neck (2 cm below the bottle screw).
Cut the middle part into 4 sections.
Roll the four pieces longitudinally and secure every roll using sellotape. We'll use them as legs and hands.

Place the arms and Legs :
Put the hands and legs at the body and secure the joints between the hands and the body using sellotape. Do the same way with joints between the legs and the lower body.
Bend the hands and legs into positions they're supposed to look like when a person plays a musical instrument.
Put the head :
Put the round object as the head on top of the neck which is the spiral of the bottle. The round object should be bigger than the bottle hole so that it won't plunge into the cavity.
Secure the head using sellotape.
I give some weight first before putting the head onto its place. The weight will make the band player sits more steadily on its position. To make the weight, put some cement into the body through the bottle hole then add some water. Let the cement harden for some minutes. You can put the head on the neck after the weight hardened to avoid the cement breaks into pieces and create strange sounds inside its body.


Layering :
To hide the plastic patterns and for the shake coloring steps later, we need to cover up the whole body, hands, and legs with some layers of tissue paper.
Dilute 30 grams of white PVC glue with 100 ml water and stir evenly.
Cut some white tissue paper into small pieces.
Using medium size paint brush, glue the tissue paper onto the whole body with diluted glue, starting from the head go down to the lower parts.
Let it be totally dry.


The hands and Feet :
We make the hands and feet while we wait for the wet body to dry. The wrist and foot are prepared separately from their fingers and toes (if the musician is barefoot).
Firstly, to make the wrists, you can cut a carton or a short wood/bamboo of 2 cm long and 0.5 cm for the diameter. If you use carton, roll the carton and make it the same size.
Insert the rolled carton or the wood/bamboo into the hollow ends of the right and left hands, and legs.
Secondly, to make the fingers, cut one ply tissue paper in 1 cm wide and 20 cm long then twist it. Damp the twist with diluted glue above so that it will keep the twisted tissue stay in its shape when it's dried. Let the twist dry.
It will take one whole day (+/-24 hours) to make the wet twist dry totally.

Cut the dried twisted paper into small chunks to make 10 fingers. Put some white glue on the tip of every finger and put it on the wrist . Let the glue dry.
After the glue on the fingers dries, give one or two layers of tissue with diluted glue on the wrist and palm. Let the wet layers dry.
The hair :
The hair can be made from black cotton felt or you can cover the head with a hat which can use other materials to make it.
The eyes :
You can use small beads or grains as eyes.
Coloring :
Coloring can be done after all parts dry. You are free to use any colors.
Clothes :
Clothes can be made from fabrics, color paper or other wrapping papers.
The Drum Making :
Prepare some bottle caps to make the drums.
Just for additional information, the band drums consist of Bass Drum, Snare Drum, 2 toms, Floor Tom, crash cymbals and Hi Hat Cymbals.
So, this activity can also become a media for you to teach children about musical instruments and their part names.
Here are the steps how to make Bass Drum, 2 Toms, Snare Drum, Crash Cymbal, and Hi Hat Cymbals.
To make 2 Toms :
- Glue two small plastic caps and pile up together. Make it two.
- Cover them with white thin paper
- Give color to make them look like real toms.
- Place the toms on top of the bass drum, give small stands to support the toms so that they sits properly on top of the bass drum.
To make the Bass Drum :
- Use a medium size plastic cap to make a bass drum.
- Give some thin white glue on the surface of the cap then cover it with thin paper.
- Color the frame and I prefer to let the membrane in white.
- Give it a stand to make it sit steadily at its place.
To make the Snare Drum :
- Prepare one small plastic cap. Put some glue on its surface and wrap it with white thin paper.
- Give it a stand made of a plastic straw and tooth picks. Giver white cover on the stand too.
- Color the drum and the stand to your liking.
To make the Crash Cymbal :
- Cut a plastic bottle bottom which has concave shape. Smooth the outer area using sand paper.
- Color it in black or silver.
- Put the stand made of plastic straw and toot picks. Also color the cymbal stand with suitable color.
To make the Hi Hat Cymbals :
- Prepare two plastic bottles with concave bottoms. To get the concave part for making cymbals, cut around the bottom and smooth the edges.
- Make a hole in the middle of each cymbal then put together face to face and connect both with a pin needle.
- Insert the sharp point of the pin into a plastic straw which acts as the stand of the crash cymbal.
- Give three or four feet at the stand to make it able to stand up.
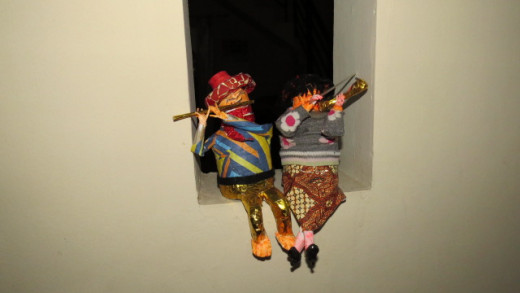
Now have finished with the musician figurine and decorate a corner somewhere at home. You can try to make other figurines as seen in the pictures.
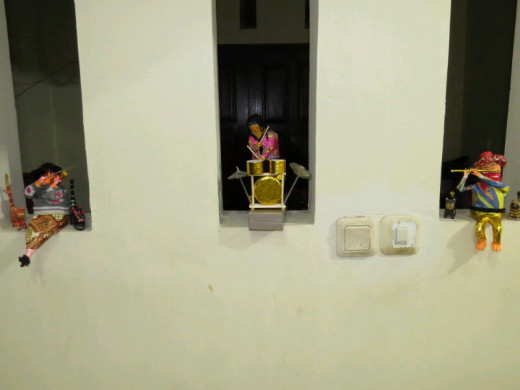
Another creation to make home decorations.
- How to Make A Sitting Cat from Plastic Bottle Waste.
Plastic bottle wastes are always found abundantly in our environment. Here is another hub which hopes to give help in recycling plastic bottle wastes.
How about making flamingos ?
- Recycle Your Plastic Bottle - Make it into a Flamingo Figurine.
I'd like to share another way to recycle PET plastic bottle : Make it into a flamingo figurine. Just follow the easy step-by-step instructions and you can make a pretty flamingo of your own !.
Cat figurines.
- For Cat Lovers : How to Make A Cat Figurine from Used Plastic Bottles.
This is another fun activity how to change polluting plastic bottles into something attractive: A Cat Figurine !. Just read and follow the instructions in this hub how to make it.