How To Know If Your Bathroom Suffers From UTS (Ugly Tile Syndrome)

UTS Found In Millions Of Homes
No need to feel ashamed; UTS, or Ugly Tile Syndrome, can happen to anyone.
I have witnessed UTS in countless homes throughout the almost thirty years of being in the housing and design business. I discovered the case of Ugly Tile Syndrome, illustrated here, when visiting a real estate open house in a suburban townhouse complex on a sunny Sunday afternoon in July.
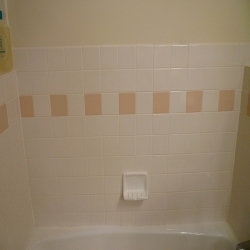
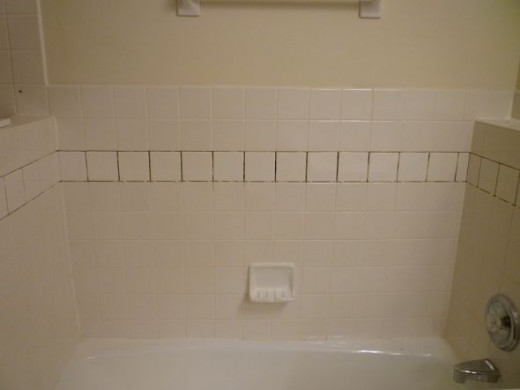
Found in a master bathroom, this mauve-y pink 4" X 4" accent tile in the tub and shower surrounds perfectly matched the 2" X 2" mauve-y pink master bath floor tile.
Eeeewww. Ugly!
Follow me through this article as I share step-by-step instructions on how to diagnose and cure a case of UTS, even an extremely advanced case, such as this one. By the article's end, you will be prepared to tackle a DIY UTS project or know what to ask for from a professional. In either case, no home of yours should ever again have to suffer from UTS.
Image:KateHon
Do You Know The UTS Warning Signs?
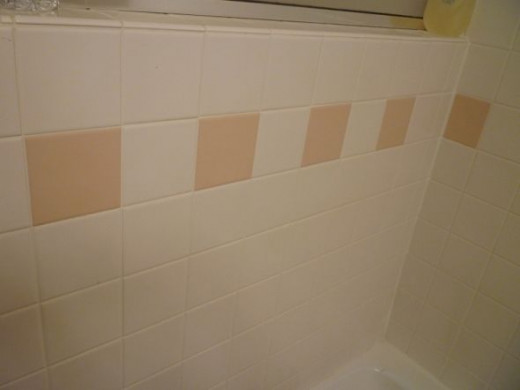
Image:KateHon
How do you determine if your bathroom suffers from UTS?
One Caveat Before We Continue
If you are living in a rental property that contains a bathroom(s) with UTS, please refrain from doing anything to the tile unless, and until, you ask for and receive specific permission to do so from your landlord.
Videos Showing Other Methods To Combat UTS
It Is Possible To Paint Tile

Four Things To Consider Before Replacing UTS Bathroom Tile
It is important to consider the following points in any DIY project that involves demolition and mess-making. Can you commit the time, energy and resources to get the job done in a timely fashion? Please do not start on this job, or any job, if you do not feel confident of seeing it through to completion.
- Do you have enough DIY skills to do the job?
- Do you have enough time to complete the job?
- Do you have the right tools for the job?
- Do you have enough money to see the job through to the end?
We Consulted With The Homeowner About The Possibility Of Painting The Pink Tile - It was a mutual decision to remove the pink tile and replace it with something
In the past, my husband and I have made use of the technology which allows ugly tile and bathtubs to be painted, as shown in the videos above.
However, there are drawbacks to the finished product. Two of the main ones are:
1. The finish can be chipped somewhat easily, even by dropping a razor onto the tub surface.
2. There are major restrictions as to what type of cleaners that can be used on the newly-painted surface.
We were very fortunate to meet the woman who bought the townhome several months after I had been through the property during the realtor's open house. She hired us to paint the lower-level bathroom, which led to other projects in the home, including dealing with these ugly bathroom tiles.
The townhome in which this bathroom is located was built in 1991. I am guessing it was the original buyer who decided on the mauve-y pink floor tile and accent wall tile.
In another Squidoo article, I discuss how we dealt with the 2" X 2" pink floor tile, found on the home's hallway guest bath floor, as well as the master bath floor. Find out how we were able to lay completely new tile floors in both of these areas without first demolishing the old ones - another DIY project.
When we were considering how to best deal with the pink accent tile in the tub surround, I really thought we could just paint them with porcelain/glass paint, but then I opened the shower door and realized there were two (?!) rows of the same pink accent tiles inside the shower surround. Since I was not confident that painted tile could or would stand up to repeated cleaning, we decided we needed to come up with a plan B.
Since it would be almost impossible to remove the pink tiles without damaging the white tiles on either side of the pink ones, the obvious solution was to take out each of the three horizontal rows containing the pink tiles, one in the tub surround and two in the shower surround.
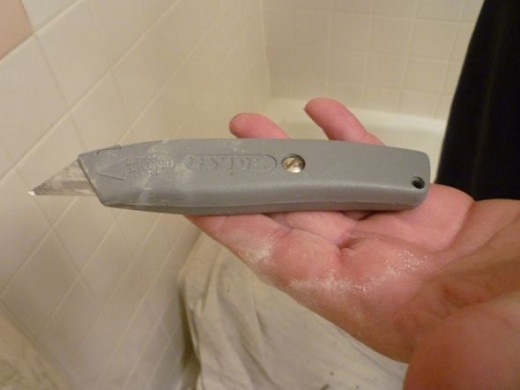
We researched how we might best remove the tile and came up with three options:
1. A grout saw
2. A Dremel tool with a grout saw attachment
3. A utility knife
After trying the grout saw, we realized that the blade was too thick for the very narrow grout line. We knew if the grout saw blade was too wide, the Dremel blade would be too wide also, leaving only the utility knife as a possible option.
The utility knife is a simple, inexpensive tool, one that works very well.
So the utility knife it was.
Image:KateHon
Start Cutting Around The Tile In The Grout Line Using A Utility Knife - The idea is to go through the grout line and through the outer paper sheath of the wallb
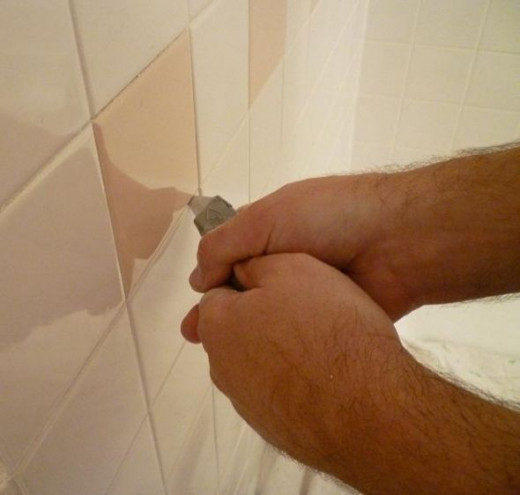
Image:KateHon
Get a Good, Basic Utility Knife - And some replacement blades

Would You Be Willing To Undertake The Removal Of Ugly Tile As A DIY Project?
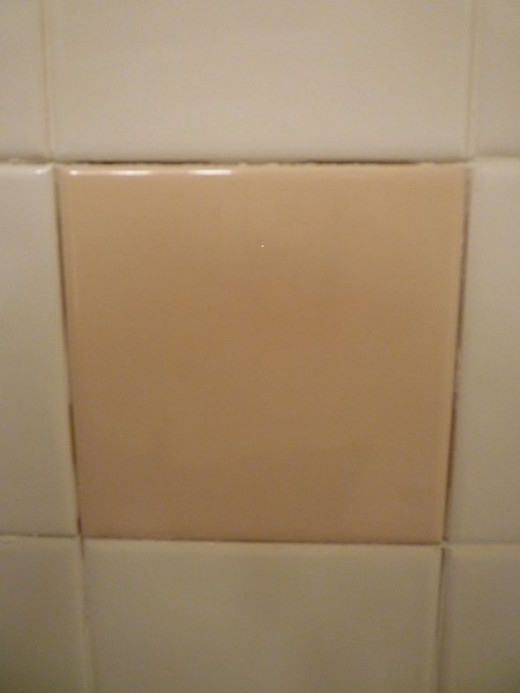
Image:KateHon
Do you have the confidence to dive into a project like this as a DIY project?
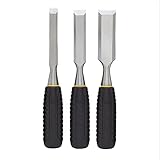
After Cutting All the Grout Lines With The Utility Knife, Start With The Outside Tile And Work Your Way Around - Use a hammer and chisel to gently loosen each t
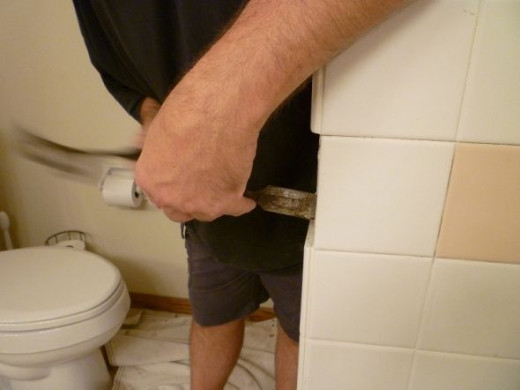
Image:KateHon
The Right Tools Make Every Job Easier - Everyone can use these basic tools
![TEKTON 3020 16-oz. Wood Claw Hammer [Older Model]](https://m.media-amazon.com/images/I/41xsisTIHHL._SL160_.jpg)
Take Your Time And Use Gentle Pressure To Loosen Each Tile - Try not to break through the wallboard behind the tile, but do not fret it some wallboard does give
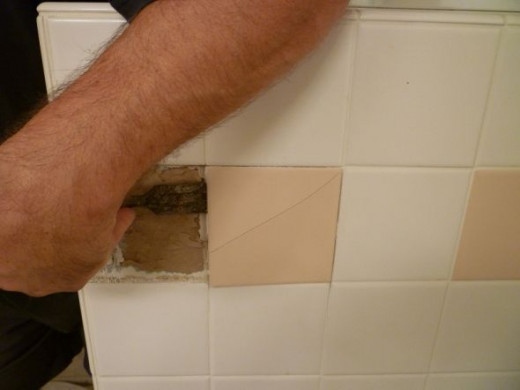
Image:KateHon
After Part Of The Tub Surround's Ugly Pink Tiles Have Been Removed, There Is No Time To Rest - There are still a lot more tiles to take off!
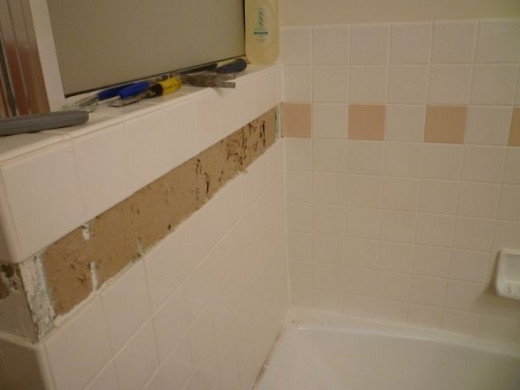
Image:KateHon
Finally! All The Ugly Pink Tiles Have Been Removed From The Tub Surround - There was some wall damage
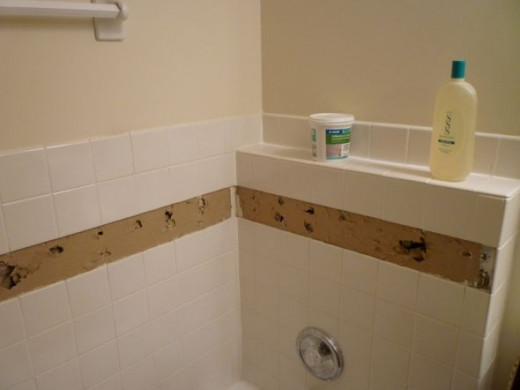
Image:KateHon
The Shower Surround's Ugly Pink Tiles Were A Little Harder To Remove And Left More Wall Damage - What is the proper solution?
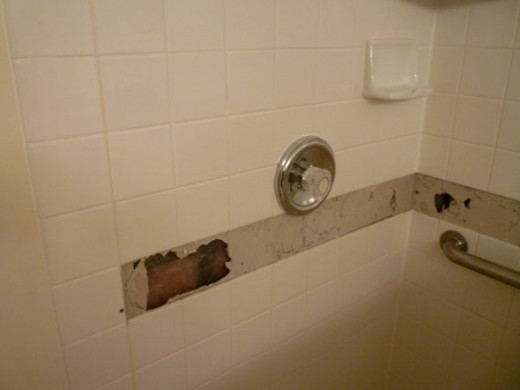
The solution?
For the shower surround - Cut out the damaged cement board and replace with new cement board, screwed to the studs with cement board screws.
For the tub surround - Cut out the damaged green board (green board is drywall for bathrooms and other wet environments) and replace with new green board, screwed to the studs with drywall screws.
Image:KateHon
Using the Right Tools Makes Every Job Easier - Even installing cement board


After The Correct Wallboard Has Been Installed With The Correct Screws, Begin Installing The New Wall Tile - Start with the full-size tiles first
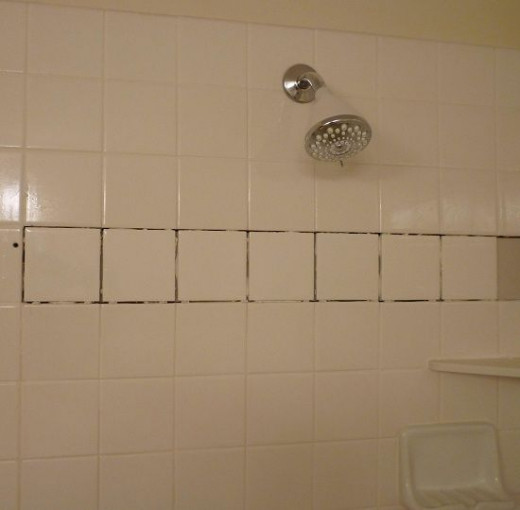
Because the existing wall tiles were just white 4" X 4" wall tiles, after much thought and deliberation, we all concurred it would be best to keep things simple and put in new white 4" X 4" tiles. I found a very inexpensive white 4" X 4" tile at Home Depot for $.13 each and bullnose tile (for outside corners) for $.82 each.
The cost for replacement tile came to under $15, but there are additional costs to the job, the green board, cement board, tile adhesive, grout, and the biggest cost, by far, the labor needed to do the job.
The easiest way to begin to add the new tile is to set the full-size tile first. Just back-butter a piece of tile (slather a layer of tile adhesive to the back of a tile) and press it onto the wall.
Image:KateHon
Problem: The Old Tiles Were A Bit Larger Than The New Tiles - How do we fix the problem?
Once we realized the older tiles were larger than the new ones, it was immediately clear we would have to adjust the grout lines for each new tile, in order to minimize the difference between old and new tiles.
The problem was easily solved by using spacers to keep all the new grout lines spaced properly.
It helped enormously that we were using white tile and white grout. In the end, the difference in grout lines was not noticeable after the tiles were grouted.

Be Sure To Check Each Tile As You Set It To Ensure Each One Is At The Correct Depth - The new tiles should not be sunken nor protruding from the tiles above and

Just grab whatever piece of scrap wood you have available, as seen above. It does not have to be special or pretty, as the only function it has to fulfill is to make sure each new tile is set at the proper depth in relation to the other, existing tiles.
Once a new tile has been put in place, hold the board on the tiled wall in a vertical position. The idea is to have the board span above and below the new tile to check the depth of the new tile in relation to the existing tile. Adjust the new tile as necessary so it is flush with the depth of the existing tile.
By always checking each tile's depth, the end result will look planned and professional.
Image:KateHon


Once All The Full-Size Tile Are Set, Cut The Remaining Tiles To Size
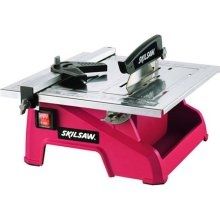
Please refer another of my Squidoo articles, 'How To Lay A Floating Tile Floor', for specific directions on how to cut tile using a tile saw. Because we do not do tile jobs every day, we have chosen not to invest in a very expensive wet tile saw. Ours cost only about $80, priced similarly to the saw shown above, and has served us admirably over the last five or more years.
All The New Tile Are Set, They Need To Be Grouted
Allow the tile adhesive to set up and dry for several hours, or overnight. Once the adhesive has dried, the tile is ready to be grouted.
Image:KateHon
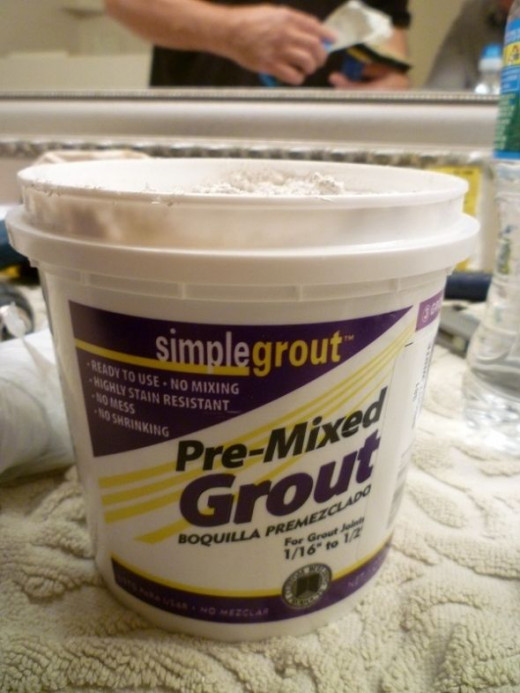
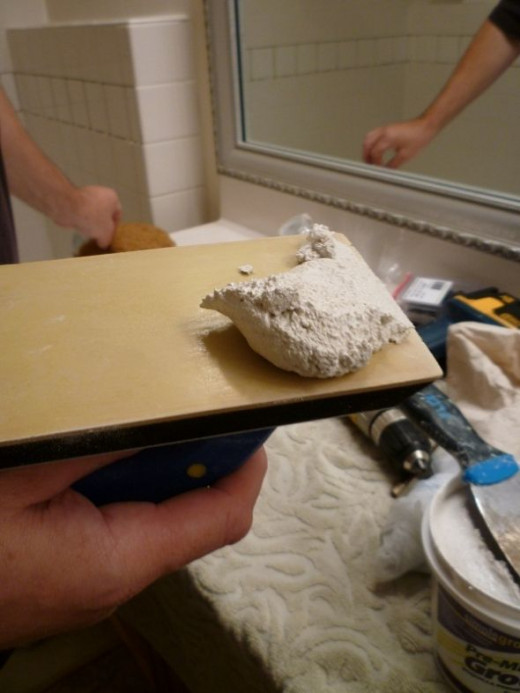
We Use Pre-Mixed Grout On Small Jobs Like This One - It elminates the need for mixing up a small batch of grout
Notice the reflection of my husband in the mirror as he loads a broad-knife-full of grout onto his grout float. Start with a smallish blob of grout on your float, as it is much easier to handle.
Image:KateHon
Use Just A Small Amount Of Grout On Your Grout Float - Be sure to keep your grout sponge close at hand
Okay! We are ready to grout!
Image:KateHon
Are You Ready To Grout? - Or are you ready to throw in the towel?
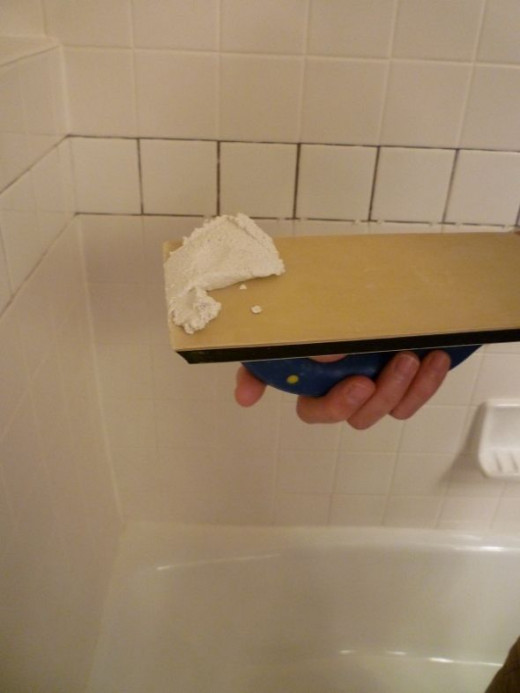
Image:KateHon
Have you followed along through this article and feel ready to take on grouting the new tile?
Ready, Set, Grout!
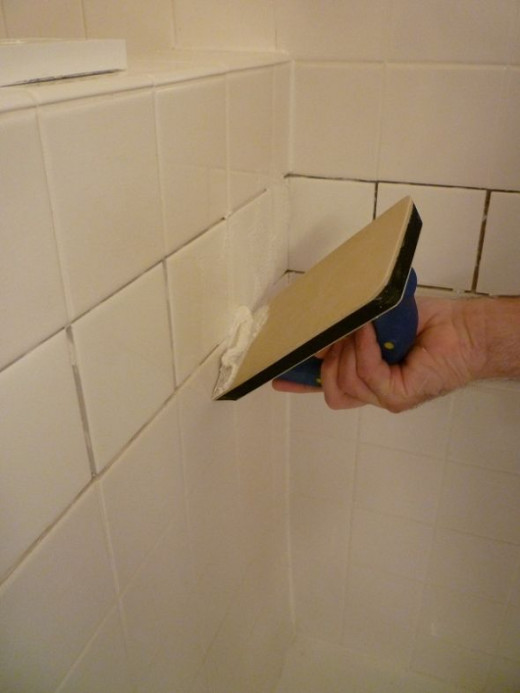
Remove the tile spacers and save for another project.
Wet the surface of the tile with a damp sponge. This allows the grout float to move more easily across the surface of the tile.
Set the grout float at a forty-five degree angle to the tile and firmly slide your float over the grout joint, forcing grout into the opening. Repeat as necessary to fill the grout joint opening.
Clean off the excess grout with the grout float, then wipe down the tile surface with your grout sponge, using a circular motion. Any remaining grout will form a haze on the tile's surface, which can easily be removed later.
Image:KateHon
How Your Grout Should Look After Grouting The First Few Tiles
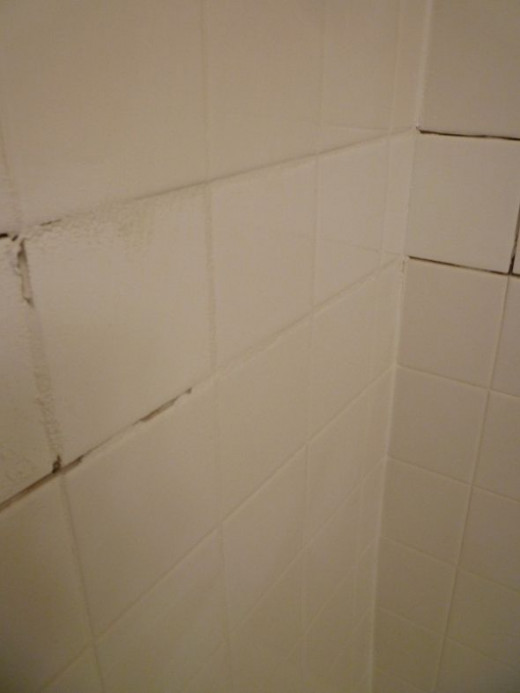
The two-and-a-half tiles closest to the corner have been cleaned off, but not the one on the left side, nor is it completely filled with grout. We did this to give you an idea of what clean and unclean tile will look like.
Grouting is not rocket science, but there is a bit of a trick to it. The main idea is to fill each grout line with grout and clean up what you can as you go. Cleaning any remaining grout haze can wait for later.
Image:KateHon
Before The Shower Surround Could Be Replaced, We Had To Install A Replacement Bullnose Tile - Then we had to drill a hole into that new tile to accommodate a wa
By this time, quite a bit of effort had gone into the project and we were understandably a little reluctant to drill the necessary hole into the bullnose tile for the requisite wall anchor needed to support the shower surround. However, we knew the hole had to be drilled in order to get the shower surround re-installed.
Certainly we were not the first people ever to face this problem, so we went to our friendly big-box home improvement store to look at drill bits made for this purpose.
Guess what?
We found just the thing!
Image:Kate
The Perfect Ceramic Tile Drill and Drill Bit For The Job


Using The Ceramic Tile Drill Bit On The Bullnose Tile Was Like Putting A Warm Knife Through Hard Butter - Another perfect example of how using the right tool ma

Image:KateHon
The Shower Surround, After Grouting
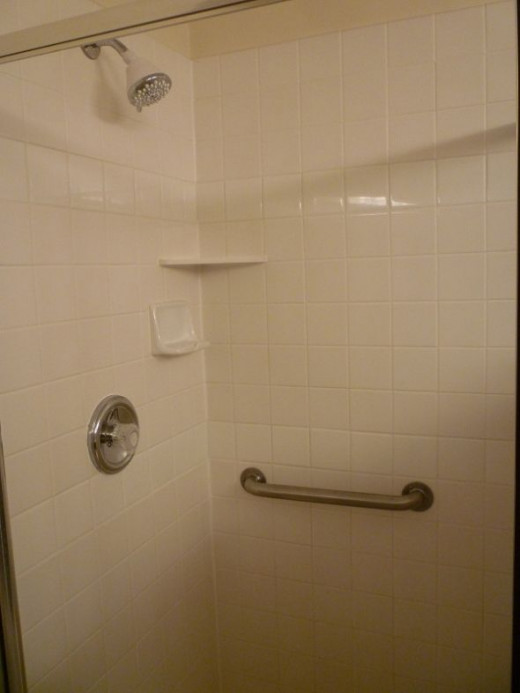
Once the shower surround was re-installed, my husband caulked every area that had been originally caulked, in order to prevent water from leaking where it should not go. Refer to one of my other Squidoo articles, How To Paint Like A Pro, for details and information on proper caulking techniques.
Image:KateHon
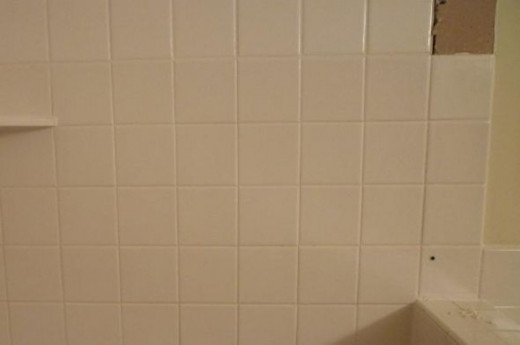
The Tub Surround, After Grouting - Did you notice anything?
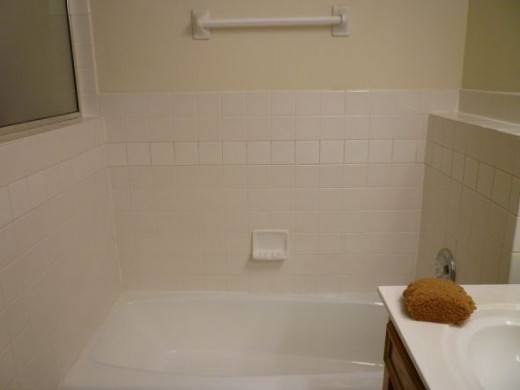
Soon after starting to set the new wall tile, we realized the new tile's color was slightly different from the existing tiles, which is not surprising, since more than twenty years had gone by since the original tile job was done.
I actually rather like the difference between the two colors of white, and will consider it to be a benefit, not a detriment, and leave it at that.
Image:KateHon
How Much Did This Project Cost?
Tile - $15
Sundries, like greenboard, cement board, screws, tile adhesive, grout, ceramic tile drill bit, caulk, etc. - $100
Labor - $275
Total - $390
Time - The better part of two days for the project and one additional day for the shower surround caulk to dry before the homeowner could use the shower
Was The UTS (Ugly Tile Syndrome) Successfully Cured?
Image:KateHon
What do you think about the final result?
Have A Question On This Or On Any Of My Other Articles?
Please feel free to contact me. I love talking with people about their homes and their projects. I would be honored to do what I can to help you transform your home into your haven!
KateHon


 Outlet")

