DIY Nail Art Designs: How to Make Nail Stickers at Home

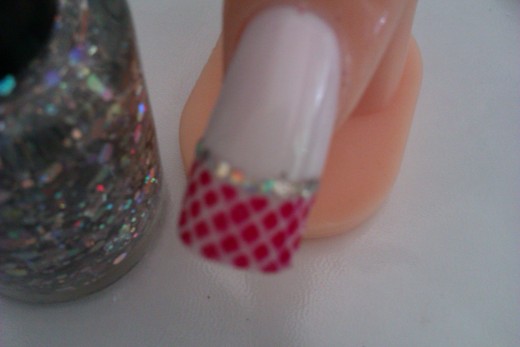
This is one of my most recent DIY nail art designs discoveries and I’m having so much fun with this technique. It’s going to sound odd or strange at first, but it really does work, and if you’re still doubtful, have a look at the picture to get an idea of what the end result looks like. The secret to this technique is sticky tape. Yes, you read that right. I never knew that you could use that as part of a nail design, but I saw it done on Pinterest the other day and I just had to try it!
Making the Nail Art Stickers
Getting the design onto the tape is the first step. There are a number of ways you could get the design you want to use onto the tape, and believe it or not, nail polish really does stick to the surface. You could use a stamping set, which is what I’ve done for the pictures, or you could use nail art pens to draw the design onto the tape. You could also use regular nail polish if you want to do broader strokes of color.
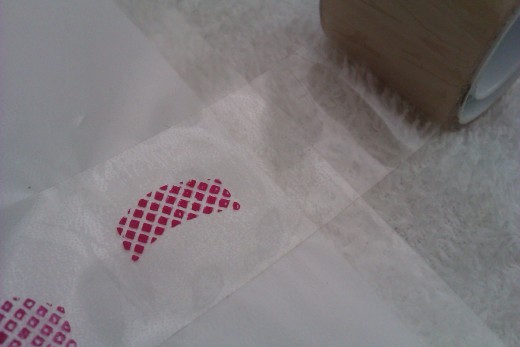
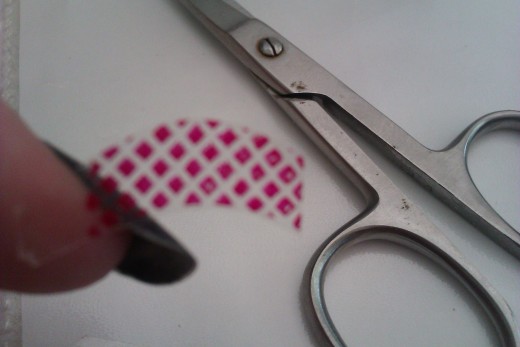
Next, allow the design to dry fully and then use a small pair of scissors to cut it to size. It seems to be best to make the sticker as small as possible, so I cut along the outline of the stamp to make the sticker smaller.
You should now be able to place the tape onto the nail and position it where you want it. If you place the tape onto a plastic surface first, like I did, then it might not stick as well. If that happens, use clear nail polish to stick it on.

Once the sticker is on the nail, apply a coat of clear nail polish or top coat to help keep it in place. Last, you could use any other decorations with this method as well. I used hexagon glitters to create a border around one of the stickers I made, and it looked stunning.

What I Love about This Technique
The stickers are super easy to make and the whole process shouldn’t take more than a few minutes. If you’re not very good at positioning nail art stamps correctly, then this idea should save you hours and lots of nail polish! It’s the easiest way I’ve found to position French tips exactly right without having to redo it about 20 times.
The other thing that I really like about this is that it wears very well. I’ve not seen any chipping with nails I’ve decorated this way, so I guess this might be a cheaper alternative to other, more costly, nail decals out there.
Have you tried it?
If you’ve tried this DIY nail art designs technique, let me know. I’d love to hear your thoughts on it! I’m still playing around with it myself, but if anyone has questions or need ideas, then feel free to leave a comment and I’ll help where I can.


