Creating Videos in Movie Maker (A Step by Step Guide)

Step One: Understanding the Interface in Movie Maker
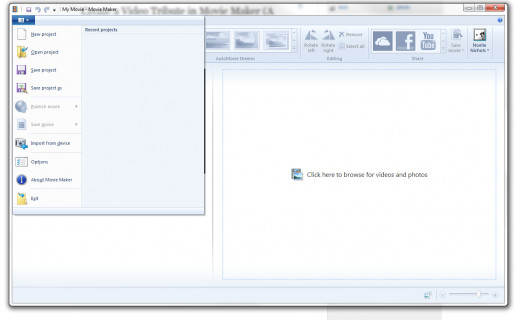
Movie Maker has drastically changed over the years, so if you haven't cracked it open in a few years, there's bound to be confusion. However, once you learn the basic layout of the program, you'll be able to edit your video without problems - everything is very graphical and hands on.
When you first open the program, you'll notice that there is a huge window in the right that says "Click here to browse for video and photos". This is where you will be doing your editing, once you've imported your footage. It turns into your video editing timeline.
To the left, you'll see a video player. This is your video preview window.
You'll also see a couple different tabs on the top of your screen.
Home - this is the main navigation where you can choose a preset theme, import more videos and when you're done, you can use the shortcuts to export your video straight to YouTube, Video or other sites.
Animations - This is where you can find all of your transitions and camera moves.
Visual Effects - This is where all your filters are located.
Project - Where all of your audio editing, aspect ratio and project settings are located.
View - Change whether you see waveforms or how large your thumbnails will displayed.
Video Tools - Allows you to trim, speed up and apply transitions to your video clips.
Text Tools - (shows up after you click on "caption" in your home menu") allows you to add and edit text overlays for your video.
Step Two: How to Import Your Videos and Photos
To make your life easier, you may want to consider creating a folder to hold all of your images before you open up Movie Maker to edit your video. However, it is not necessary and there are multiple ways you can import footage into the software.
Import Directly from Your Device
This is a good option if you want to import and edit your photos as one process. The photos/videos will be imported into your Photo Gallery. You will have options to split your videos into different folders and after they are in your gallery, you can apply filters with a click of a button.


- Connect your camera to your computer or connect your SD card.
- In Movie Maker, go to your file menu and select "import from device".
- A box will pop up and you should be able to select your device. Click Import.
- You'll be given two options on the next screen. a) Import all new content or b) select which files to import. This will give you the option of importing only selected videos/photos. Click on Import.
- I've selected to review the files I'm importing. This gives me a screen that will allow me to unselect what I don't want to import and also give me the option to name my own folder and choose how I want to split my files. To change how many folders you want to split the files into, use the slider at the bottom to toggle between 1 hour, 1 day, etc. This makes organizing each day if you have multiple days to import.
- After choosing which files I want to import, I'll simply hit import and wait.
- After importing, Photo Gallery will automatically open the folder(s) that you've imported to. To easily import these to Movie Maker, select all the clips you want and under the "Create" tab, click on the Move Maker icon. This will open your clips into movie maker and automatically place them into the timeline for you!
* to select multiple clips, you can left click and drag which ones you want, or you can hold down the ctrl key and left click to select them one by one.

Import Your Photos and Videos in Movie Maker
This is the easiest method if all your files are already on your computer and ready to edit.
- Open Movie Maker
- In the right side of the program, you'll see a section that says "Click here to browse for videos and photos". Click inside the window.
- Navigate to where your files are and select "Open". You can open multiple files by holding down ctrl and left clicking.
- To add more clips or photos later on, in your home menu, simply click on the "add video and photos" button.
Step Three: Editing Your Video
Now that you have your footage imported movie maker, it's time to edit your video! You've no doubt noticed that when you imported it, Movie Maker automatically laid out your video. If you're fine with just any video, feel free to skip to the next section and save your video for sharing.
If you want to learn how to customize your video by adding text overlays, changing the positions and adding transitions between your clips, keep reading.
How to Edit Your Clips
This is a little confusing at first, but after you are familiar with the process, it gets easier.
When you select each clip, you'll notice that there is a black line that goes in front of each clip. This more or less works as a cursor. You can move the cursor by click through your clip. This will allow you to select your video by each frame. Each box represents a certain time frame in your video, or a second that your photo is displayed.
You can move your clips easily by left clicking and dragging and dropping where you want them to be.

Trimming Your Clips
You can move your cursor through your video or photo. You can trim it easily by selecting where you'd like the video/photo to start and then right clicking and selecting "set start point" or "set end point". Depending on if you want your video to start or end at the selected point. You can also find the same option in your Video Tools menu. Right clicking on your clip saves time and I find it to be a lot easier.
How to use Text Tools
In order to use the Text Tools, you must first select a clip you want to add text to, and then in your home menu select "caption" this will bring up a text box and a whole new menu where you can change typeface, text size and other options.
How to use Video Tools
Click on any of your video clips and this menu will become available. You can mute the video's audio by click on the speaker and dragging the slider down to mute it. You can also turn up the audio this way.
You can speed up the clip by using the "speed" section.
You can also use the "Fade in/out" to create a nice transition between your clips.
How to use Transitions
Your transitions are located in the Animation menu. Simply click on the clip/photo you want to add the transition to and click through the available transitions. You can preview how it will look in the preview window. You can change the amount of time it takes by editing the number next to "duration".
You can apply the same transition to all clips by selecting a transition and then hitting "apply to all".
You use the camera moves the same was as the transitions.

Adding Music to Your Project
You can't have a tribute video without the music. To add music, in your file menu, next to the add video and photos file you'll see add music. Click on this button, select your track and hit open. Your music track will now be added to your timeline, automatically.
You can fit your movie to your whole audio track, by going into your project tab and selecting "fit to music".
To edit the length of your song, use the Music Tools menu. You will be able to set the in and out points, like you can with your photos and video files.
Recording Narration
You can add narration to your video by selecting the "record narration" in your home menu. You will need a microphone connected to your computer to do this.
Adding Sound
You can also add sound, like sound effects. In the home menu, hover over the "record narration button" and choose "add sound."

Step Four: Saving and Exporting Your Video
Saving Your Project
Go in your file menu and choose "save project". You'll then be asked to give a name and choose where to save it. This will save your project so you can come back and make changes.
Saving Your Project as a Video File (Rendering or Exporting)
To render your video out, go into the file menu and choose "save movie". You will be given different options, like burning to a DVD, choosing recommended settings, or you can select from the other options.
To save as an HD file, be sure to choose "for HD display".
For a smaller file, and a lower resolution choose "for your computer"
If you know what setting you want to use, you can scroll down to the bottom and customize how your video will be saved out. It's under the "custom settings". This will allow you to change bitrate, video resolution (width and height), audio bitrate and your framerate. The estimated file size will also display below.
Quickly share to Facebook, YouTube, Vimeo and other websites inside Movie Maker
There's quick shortcuts in your home menu help speed along the upload process. Once you're finished, click on the button for the website you want to share to and follow the onscreen prompts.
Be sure to save your project file so you can go back and make changes!
You can hit ctrl + s to save as you work, or you can choose save project from the file menu.
Step Five: Share Your Video!
Once your movie has been saved out, you're ready to upload or send it to your friends and family! If you change your mind and want to export your video in a different resolution, just go back into your project and export again.
It's sometimes best to export multiple ways so you are familiar with what each option does. This way you can find what fits best for you.


 Resolutions - What Does Resolution, Aspect Ratio, ppi Mean For Your Smartphone, Tablet, TV, or Monitor")