Gmail Email Set Up

Allow Windows Live Mail to Access Your Gmail
Setting up your Gmail email is a bit more involved than other email services such as AOL email and Yahoo email. In order to allow Windows Live Mail on your computer to retrieve your mail from your Gmail account you need to adjust the settings in your Gmail account first allowing Windows Live Mail to access it. This isn't difficult just follow the instructions step-by-step.
In the following paragraphs you will find bulleted instructions clearly explaining the steps to setting up your Gmail email in Windows Mail.
Whether you choose IMAP or POP Mail is up to you. Gmail supports either one. To help you with choosing which to use, some of the major differences are listed below...
IMAP vs POP (POP3)
IMAP
| POP (POP3)
|
|---|---|
Your email is kept on the server, not your computer.
| Email is downloaded to your computer including junk mail, spam, etc..
|
Mail is not downloaded until selected.
| All email and its attachment is downloaded to your computer when the mail is checked
|
You can create multiple email boxes on your computer and/or server.
| Mailboxes can only be created on your computer. The server only has an inbox.
|
Filter options allow mail to be directed to any mailbox regardless of where it is.
| Filters can only transfer mail to the local machine.
|
IMAP & POP (POP3)
As you can see from the table, IMAP and POP (aka POP3) mail are similar; both deliver your email to your computer.
The major difference, or factor affecting choice, is with IMAP your computer doesn't bear the brunt of all your email messages, the server does. Whereas POP downloads all the email to your computer which can be a heavy burden for some slower running computers or computers running low on virtual memory. POP mail downloads any spam, virus laden emails and Trojan emails along with your personal emails. If you don't open them your computer should be unaffected. With IMAP the email never gets to your computer unless you open it.
For those of you who already know how to set-up your Windows Live Mail for the most part, but need the port numbers and server info just refer to the tables below.
For those of you that need the full walk through of setting up your email account in your Windows Live Mail program, the instructions are below the tables starting with IMAP settings in Gmail.
Just Give Me the Info for an IMAP Set-Up
OUTGOING MAIL
| INCOMING MAIL
| |
|---|---|---|
Check Mark:
| This server requires a secure connection (SSL)
| This server requires a secure connection (SSL)
|
Server Port Number:
| 465
| 993
|
Server Address:
| smtp.gmail.com
| imap.gmail.com
|
Just Give Me the Info for a POP Set-Up
OUTGOING MAIL
| INCOMING MAIL
| |
|---|---|---|
Check Mark:
| Outgoing Server Requires Authentication
| This Server Requires a Secure Connection (SSL)
|
Server Port Number:
| 465
| 995
|
Server Address:
| smtp.gmail.com
| pop.gmail.com
|
IMAP Settings in Gmail
When you're ready to set-up your Microsoft Mail account with Gmail you need to go to your Gmail account online and allow access. The following are the steps you'll need if you chose IMAP for your mail service.
Set up for IMAP email:
- Go to your Gmail email account online.
- At the top right of your email page there is an icon of a gear, click on it. (pictured)
- Select Settings.

Along the top of the page you will see several tabs to choose from.
4. Click on FORWARDING POP/IMAP.

5. Select Enable IMAP.
6. Click Save Changes at the bottom of the page and you're done with the IMAP set up on Gmail. Now you can set it up on your computer.
POP (POP3) Settings in Gmail
For POP (POP3) follow the same instructions as for IMAP set up except when you get to the Settings Page:
1. Select Enable POP for all mail or Enable POP for all mail that arrives from now on.
2. Make any other selections for your pop mail from the options available.
3. At the bottom of the page click on Save Changes and your done!
Now it's time to set up your email on your computer.

Gmail On Your Computer
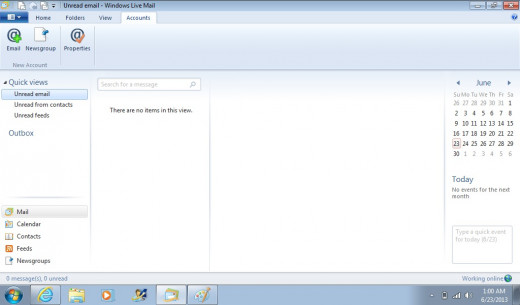
1. In the lower left hand corner of your screen Click on Start, then click on Windows Live Mail. Windows Live Mail program will come up.
2. Across the top of the Windows Live Mail program are tabs. Select Accounts then select Email (the icon with the @ sign and a + sign )

3. In the window that pops up enter your Gmail email account name ie: johndoe@gmail.com.
4. Enter your Gmail password.
5. Enter the name you wish to be used for your sent messages.
6. Place a check mark in Make this my default email account if you want this to be your primary email account.
A message telling you to enable IMAP on your Gmail server may appear. If you already enabled your Gmail as instructed above then click next.

A message with Your Email Account Has Been Added will appear. Click Finish. Windows Live will automatically download the files available from your Gmail account and you are done!