How-To Use the Samsung Galaxy S7 Camera Modes
I have been the owner of a Samsung Galaxy S7 phone for 9 months and have already written a review, based on my experience to date. You can read the review here.
This article is a Guide on how to use the Samsung Galaxy S7 Camera Modes and describes the camera modes on the Camera Mode screen shown below.
The Galaxy S7 and the Galaxy S7 Edge modes work similarly, therefore, I will only reference Galaxy S7 in this Guide.
Guide To Samsung Galaxy S7 Camera Modes
Here, we show you how to use the Galaxy S7 camera modes, including all of the modes shown on the Camera Mode screen.
To select the camera modes, the Galaxy S7 must be set for Standard Mode as you will not be able to see the modes if set for Easy Mode. The only modes available in Easy Mode are Auto and Panorama.
How to use the Camera Modes
From the front screen choose Apps.
- Choose Camera.
- Choose MODE
- Select the mode you want to use.
The Camera Mode screenshot of options is shown below:
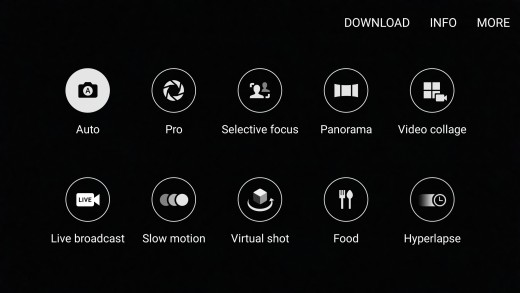
Auto Mode - The Auto selection allows the camera to set the required settings automatically for each photo.
Pro Mode – The Pro screen allows the user to tweak and customize the shutter speed, ISO, focus, flash, etc. This allows experienced photographers to control their own camera functions.
Selective Focus Mode – Samsung's Galaxy phones have included Selective Focus since the Galaxy S5. This mode allows you to select the focus for depth-of-field shots, whether you want the focus on closeup objects or on background objects, which are further away. The Galaxy S7 takes a number of photos with one push of the shutter button, switching between near and far focus as it goes. Then you have the option to select the focus of your photo after it's been taken. The three options are Near Focus, Far Focus and Pan Focus.
How to use the Selective Focus Mode
Reminder: The Galaxy S7 must be set for Standard Mode.
From the Camera Mode option screen:
-
Choose Selective focus
-
When taking a picture, select a location on the screen where you would like your camera to focus.
-
Choose Capture.
-
After the photo has been taken, choose Preview.
-
Select the picture to change which focus you would like.
Below, I have shown three Selective Focus samples taken with my Galaxy S7 as a test of the feature, with a Near Focus, Far Focus and Pan Focus of the same shot.
Selective Focus samples
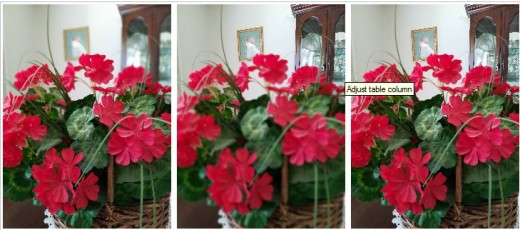
Near Focus
| Far Focus
| Pan Focus
|
|---|---|---|
This sample shows the flowers have a sharper focus than the background picture & china cabinet.
| This sample shows that the background has a sharper focus than the flowers.
| This sample shows the whole picture in focus.
|
Note: When in Auto Mode, you can also touch the screen to select an area to focus on. In Auto Mode, there are no options after the photo has been taken, as there is in Selective Focus Mode.
Panorama Mode - The Panorama photo option allows you to capture a wider area of the scene by stitching together successive images to create a panoramic photo.
Aim the camera at the subject and press the Shutter button while moving the camera slowly in one direction. The screen will show an alignment box to help you keep the scene aligned as shown below.
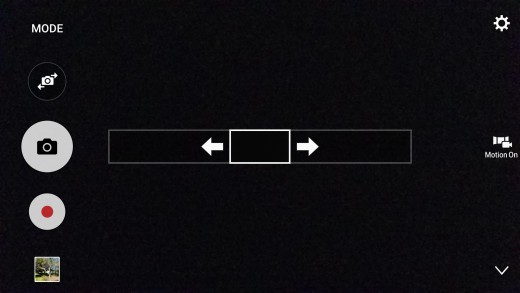
The Panorama photo will be saved to the Gallery.
My experience with the Panorama Mode has not been great. I have trouble keeping the camera moving in a straight line within the alignment box. My recommendation is to use a tripod when using the Panorama Mode.
Video Collage Mode – Video Collage lets you shoot up to four 6 second individual video clips at 24 frames per second and then merge them together into one video collage. Of course, sharing your photos is fun, but putting together a collage of memorable videos can be even better.
Once you’ve selected the ones you want to compile, you can personalize your collage with different layouts, edit video length and even give them that realistic look with HDR. To make your videos really stand out, pair them up with audio or music for their own individual soundtrack.
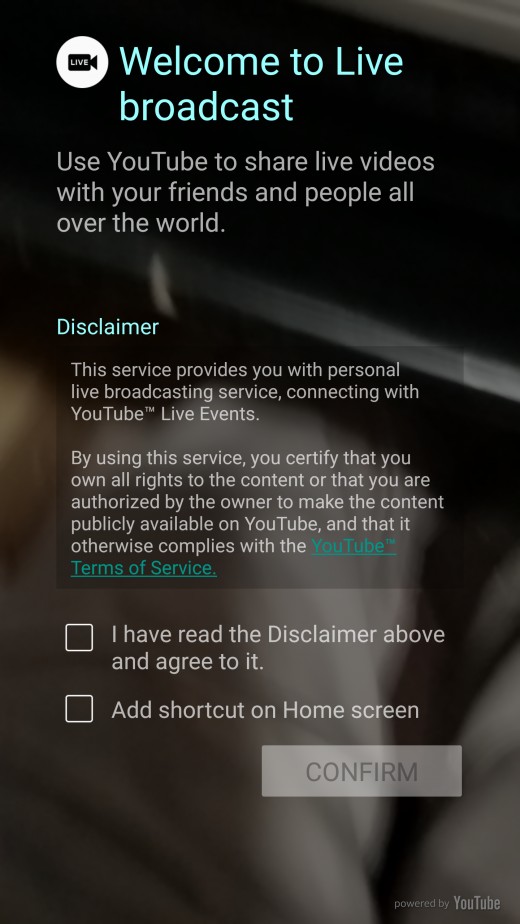
Live Broadcast Mode - Live broadcast lets you stream your moment as it’s happening to friends and family in real time, on YouTube, so they can all join in the fun through their smartphones, laptops or tablets.
Initial Welcome Screen To Live Broadcast Mode
To start a live broadcast, launch your Camera App, tap the Mode menu and select Live Broadcastto enable the functionality. You'll be prompted to sign in and verify your YouTube account, and then be presented with additional streaming options—like sending invitations to your contact list or whether or not you want to enable video archiving on YouTube.
In streaming your Live Broadcast, you'll have the option to enable public or private YouTube streaming, so there's no risk that you'll broadcast to the public when you want to stay private. To send invites to your Contact list, simply select "Invite" on the Live Broadcast screen and choose the contacts you want to see your broadcast. You will need to send them your video id link. You can also send invitations via email or your favorite social network.
You can share your live broadcast with contacts before recording, or share the link after you have finished recording and it has been posted to YouTube.
Slow Motion Mode – The Slow Motion mode on the Galaxy S7 allows users to record a video for viewing in slow motion. The Samsung Galaxy S7 is capable of recording video at various quality levels and frame rates. 4K UHD capture is possible at 30fps, 1080p at up to 60fps, and there is a 720p options which can be toggled to 240fps for smooth slow motion playback. All of these options are complete with HDR contrast enhancements too.
To record in slow motion playback, when in the Camera Mode screen, select Slow Motion from the list of options, line up your target recording and hit the red button to record video in slow motion.
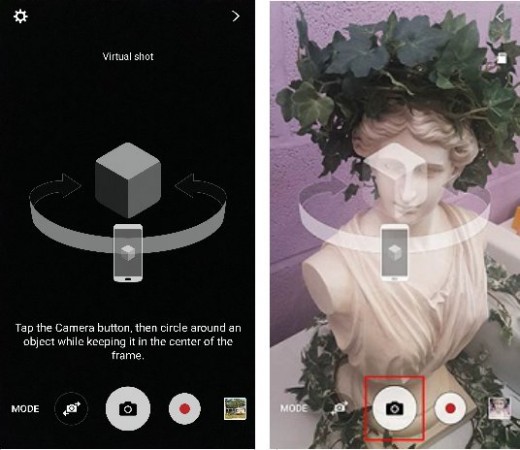
Virtual Shot Mode - Virtual Shot allows you to create a series of photos so that you can easily view the subject from different angles.
From the Camera Mode screen, choose Virtual Shot.
-
Focus the camera on a subject you can easily spin around and choose Capture to begin the shot.
-
Start slowly spinning around the subject until either the camera automatically finishes, or you choose Stop.
-
When viewing the picture, tilt the phone or swipe the screen to move around the subject.
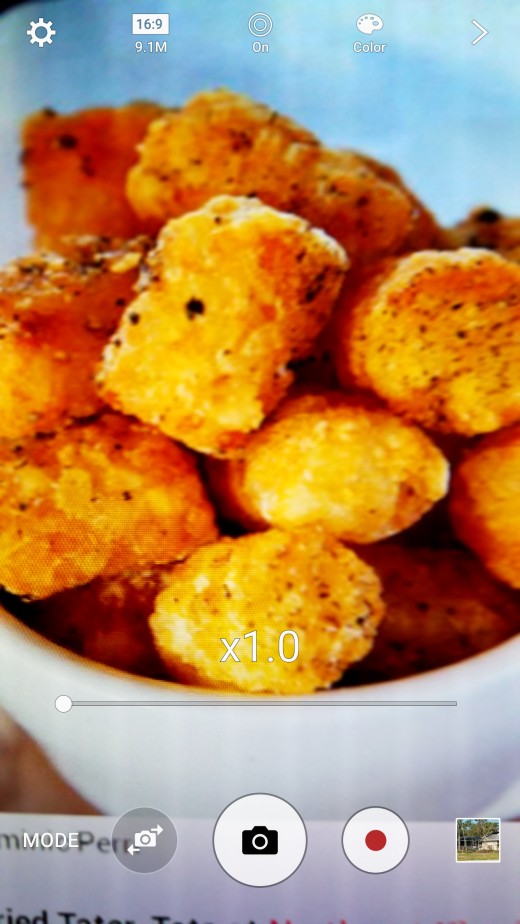
Food Mode – The Galaxy S7 comes with Food Mode pre-installed. This mode can be used to take photos that emphasize the colors of your amazing desserts or homemade meals. If you love to cook and want to brag about it, take the best photos to show your friends as proof that you know what you are doing? Galaxy S7 makes it easy to convince them.
How to Use Food Mode on Galaxy S7
-
In the camera mode, select Food Mode
-
Tap and hold the circular frame and drag it over the subject. The area outside the circular frame will be blurred.
-
To resize the frame, drag a corner of the frame.
-
Tap Color icon and drag the adjustment bar to adjust the color tone.
-
Tap Camera icon to take a photo.
Hyperlapse Mode - Hyperlapse is a feature that allows you to create your own time-lapse videos. It records at various frame rates which automatically adjust to what you're recording. It snaps photos in very quick succession and afterwards stitches them together in a video.
You may want to experiment between several shooting speeds, which will greatly affect your video. By default, hyperlapse shoots in Auto mode, but you can change this setting and set the speed from x4, which creates smoother videos, all the way to x32, which will produce some rather fast-paced ones.
If you set the frame rate to Auto, the Galaxy S7 will automatically adjust the frame rate according to the changing rate of the scene.
The most common and easy way to create a hyperlapse video is from within a moving vehicle.
To use Hyperlapse:
-
In the camera mode screen, select Hyperlapse.
-
To change the Hyperlapse speed (frame rate), choose the arrow icon. (Optional)
-
Select the speed you want to record your video in. (Optional)
-
To add a timer to the start of your hyperlapse video, choose Timer. (Optional)
-
Choose how long you'd like your timer to be for. (Optional)
-
Choose Record.
-
When finished, choose Stop.
This concludes my Guide on “How-To Use the Samsung Galaxy S7 Camera Modes.”
If it has been useful or help to you, please let me know via a Comment or Rate this Article below..
You can read my Hub on “How-To Use the Samsung Galaxy S7 Camera Settings” here.

