- HubPages»
- Technology»
- Computers & Software»
- Computer Software»
- Digital Photography & Video
How to create text images using Adobe Photoshop


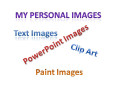
When you write an article, you would like that article to be appealing to the eyes of readers. Images, photos and diagrams help to bring this attraction by adding more information that complements the purpose of the article.
Although there are many free-to-use images online with Creative Commons licenses, it is very difficult to get a text image that match to the author’s needs.
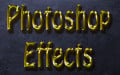
This hub will illustrate how one can create original text images using Adobe Photoshop 7.0 with customized backgrounds, colors, layers and styles like the one shown here.
Creating text images using Adobe Photoshop 7.0
This article assume that you already have Adobe Photoshop 7.0 application software or a higher version. Adobe Photoshop 7.0 is a premium software from Adobe company but you can download a trial version here just to get a feel of it before you can purchase the premium one.
Once Adobe Photoshop is open and ready, we need to create an image canvas first. On the menu bar, Click on File>>New. You will get a dialogue window like the one shown below.


From the above dialogue window, enter your preferred image name. Select the custom option from the Present Sizes dropdown list so that you will be able to enter your preferred image Width and Height, you can enter your own measurements or work with the one shown (280 by 300) and a Resolution of 72 pixels/inch
Width and Height can be in pixels, inches, centimeters, millimeters, points or picas. Select RGB Color for Mode and Background Color contents, click Ok and you will get a plain white image canvas like the one shown here:
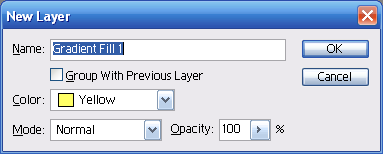
We are going to add a new layer on the canvas so that we can use our own customized and favorite colors. On the menu bar, click on Layer, select New Fill Layer and then Gradient. (You can also try to work with Solid Color or Pattern options)

On the New layer dialogue window, enter the gradient name and then select your preferred color, select Mode as Normal, Opacity as 100% then click Ok.
On the Gradient Fill dialogue window, select the preferred Gradient, Style, Angle and Scale. Other than your own preferred gradient, you can leave all the other options (Style, Angle and Scale) to the default settings.

There are several gradient styles to choose from, here I have selected Orange, Yellow, Orange gradient.

On the left hand side of the Photoshop application, pick the text writing tool as shown on the image below:

Normal formatting on text can be performed here. You can Bold text, increase Font size, Sharpness and align text to your preferences. Select the Font type that will bring out the best output, here i have selected "Arial" font type.
The font size you select should match the image canvas in proportion such that if you have a large image canvas the font size will be a bit larger unless you want your images to have multiple lines of text where the font size will be smaller.
You can set your text formatting properties before you start typing or you can format text later after typing. The formatting properties tools are found at the top bar just after the menu bar as shown on the image below:

Using the text tool, click where you want to start typing on the canvas and type text of your choice.


After you have typed the text, now it is time to apply some text Swatches and Styles. On the right hand side of the Photoshop application you will find different tools windows grouped together. Locate the one with text styles. It should look like the one shown here:
Note: If you are unable to locate this window, it could be de-activated, so click on Window on the menu bar and select Styles.
Now, select the text on the canvas and experiment with different styles by way of clicking on the preferred style. See some options below:

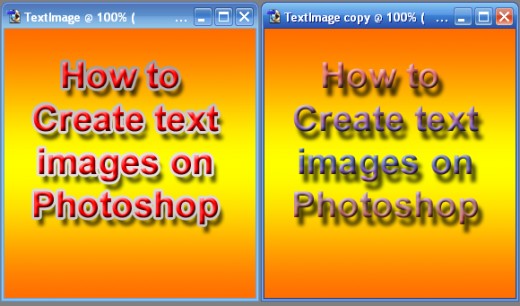
Our text image is almost ready, to make it even better, we are going to stroke the text layer style. Select the text you want to stroke, then on the menu bar, click on Layer >> Layer Styles and then select Stroke.

You will get a dialogue window like the one shown below and the text will automatically be stroked with the default stroke settings.

Using various Styles, Bledning options, Fill types and Stroke properties, experiment with your text until you get your best stroked text. Here are a few from our original text.

Photoshop is one of the handy applications that can help you to design that text image that you always desired. The images you create on Photoshop can be edited to suit other needs and can also be saved in popular formats such as JPEG, PNG, TIFF, BMP, GIF e.t.c. I hope this tutorial was helpful.
Other related Hubs...
- How to Create a Business Card in Photoshop CS6
Quick tutorial on how to format and make a business card using Photoshop. - Making Desktop Wallpapers in Photoshop
This tutorial will take you step-by-step through a sample process for making your own desktop wallpaper in Photoshop. - How to Use the Patch Tool in PhotoShop
How to use the Patch tool in PhotoShop - a very basic step by step tutorial. This tutorial will take a beginner through the whole process with clear easy to follow instructions. Each step you have to do is illustrated and each illustration has the pl - What is Adobe Photoshop? What Can I Do with Photoshop?
What is Adobe Photoshop? What can this program do for your photos? It can alter them greatly, from changing the color to deleting items to completely creating a new and interesting photo.