- HubPages»
- Technology»
- Computers & Software»
- Computer Software
How To Set Up Transaction Log Shipping in Microsoft SQL Server 2008R2
Introduction
Microsoft SQL Server Log Shipping provides a means of creating a warm standby SQL server database on another server. This is one method that can be used in a site disaster recovery solution.
The servers that are involved in Log Shipping can be in distant cities.
What is Transaction Log Shipping
Firstly, let’s understand what a transaction log is. A Microsoft SQL Server Database has typically a database file and a transaction log file. SQL transactions are executed in memory and get written to the log file. Every transaction and every database modification gets written to the transaction log file.
Transaction Log Shipping is basically the method for backing up a transaction log file at regular intervals and copying those backup files to a destination server, and restoring those backup files at regular intervals.
Requirements
You need at least two servers running Microsoft SQL Server.
The database that needs to be “shipped” must be configured to use the Full recovery model.
In this model, the transaction logs are not truncated after a full backup. The transaction logs are required to be backed up separately. In this way, it is possible to restore to a point in time by restoring the logs if need be.
However, when you are going to be doing Log Shipping, you MUST turn off any other Transaction Log backups for the database, otherwise it will interfere with the sequence of the transaction log backups.
Setting Up
- Install the “primary” SQL Server on Subnet A, in location A.
- Install the “secondary” SQL server in subnet B, in location B.
On the primary server:
- Select the database that is going to be “shipped”.
- Create a folder on the drive of the SQL Server so that the Logs can be generated in one of the sub folders.
- Create a Windows account that has the same name as the account that is used for the SQL Agent service on the secondary SQL server. Make sure you use the same password.
- Share the folder and assign appropriate NTFS security permissions. Give the account above Read access permissions.
- Modify firewall rules so that the host on Subnet B will be able to map to the shared folder of the host in Subnet A.
- I find that I need to allow NB Session (TCP Port 137), ND Datagram, SMB . NB-name to be able to net use into \\servername\sharename .
Full Recovery Model
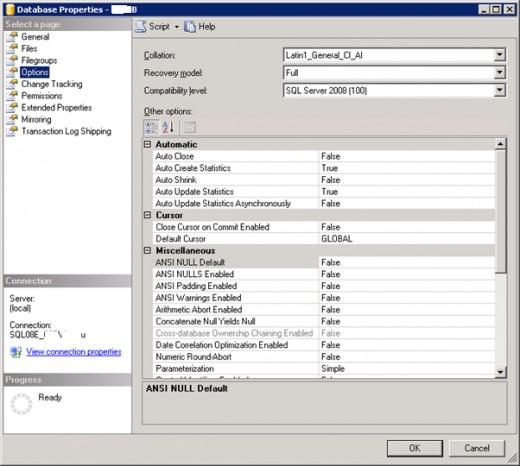
Set the Database to Full Recovery Model
Right click and select Properties of the Database, and select Options. Make sure the recovery model is set to Full.
Hit OK.
Restore and Leave as Read Only
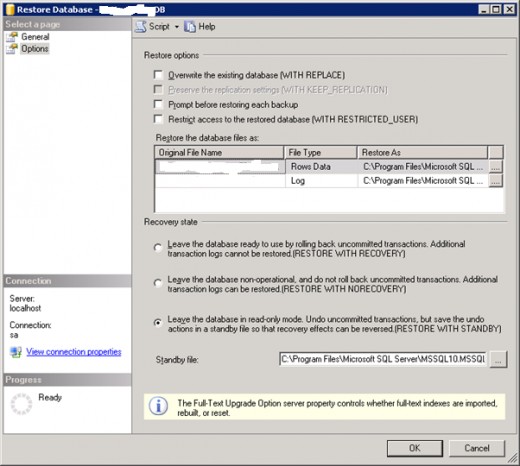
Initialize the Secondary Database
On the Primary server, make a Full Backup of the database that will be "shipped".
Transfer the backup file to the Secondary server and Restore the database.
Give the database a name. It is best to use the same name as the original since it will save time when you need to turn this “warm standby” server to a live one if the database already has the correct name. This is especially true if you have many databases on this server.
Click on Options and make sure Leave the Database in Read Only mode is selected before you complete the Restore. You can choose "Leave the database non-operational..." but then you won't be able to read the data in the tables, etc.. I find putting the Database in Read Only mode would be ideal in a lot of situations.
Configuring the Primary Server for Log Shipping
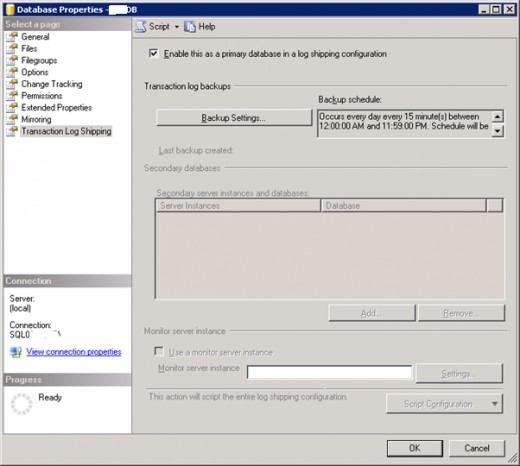
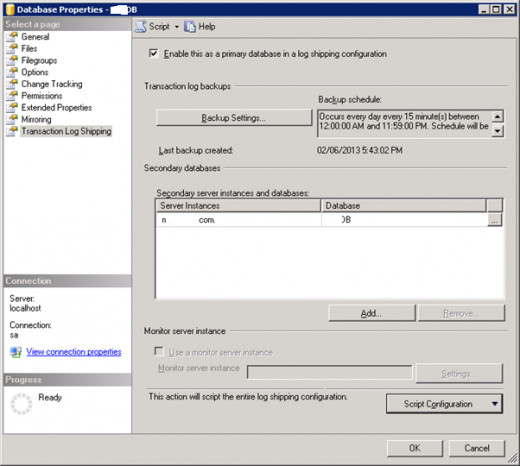
On the primary server, Right Click the Database that is going to be shipped and select Properties.
Select Transaction Log Shipping.
Tick the Enable this as a primary database in a log shipping configuration
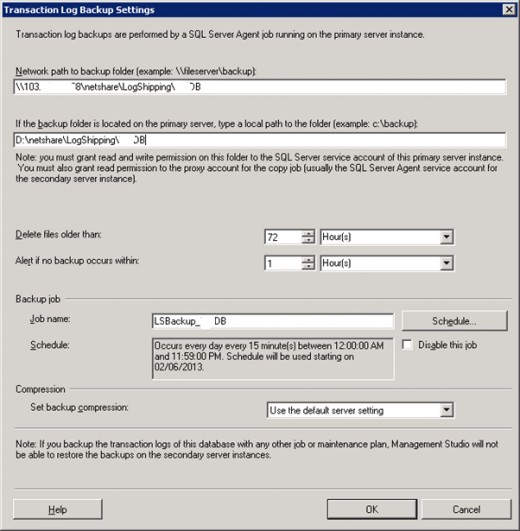
Click on Backup Settings.
For the network path, use a UNC path and the hostname should be something that can be resolved externally from this subnet (i.e. from the internet). This should be a path to the folder that will contain the transaction log backups to be shipped.
For the backup folder location, enter the path to the same folder above but using the drive:\folder notation. You can use the default values for the other values.
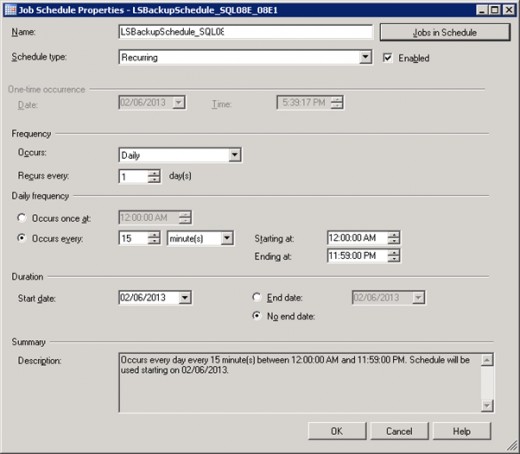
Click on Schedule.
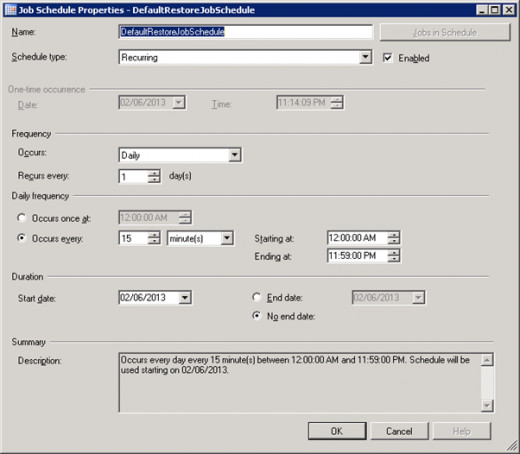
Change the values to the desired frequency for the transaction log backups. Hit OK, and Hit OK again.
Configuring the Secondary Server for Log Shipping
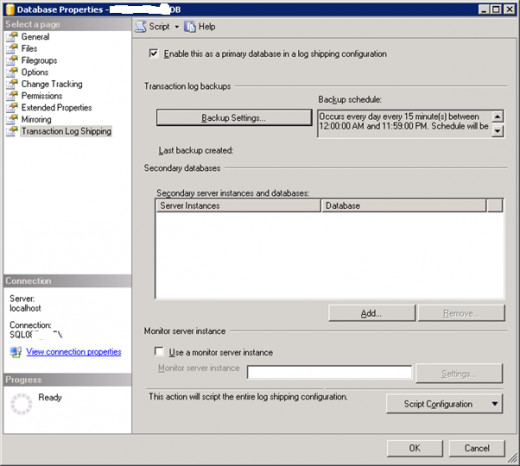
In the Secondary Server instances and Databases section, click on Add.
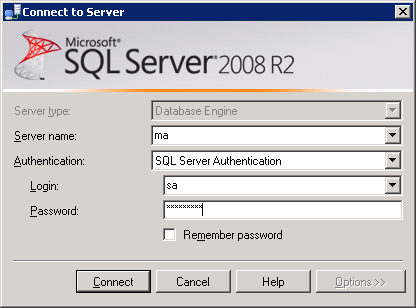
Click on Connect.
Then enter the details of the secondary server in the Connect to Server dialog box.
Configuring Secondary Database Settings
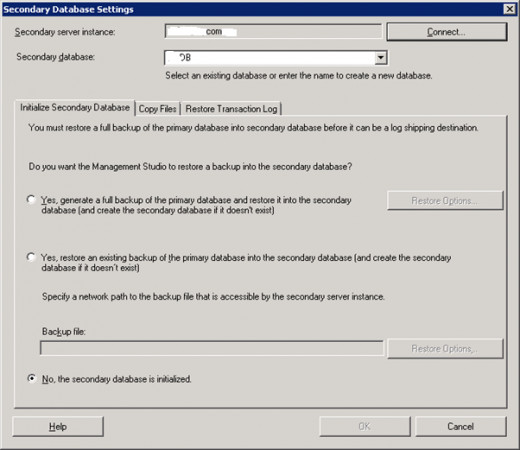
After you have successfully connected to the secondary server, you will get the following screen.
Because we have already restored a copy of the full backup, we can select No, the secondary database is initialized.
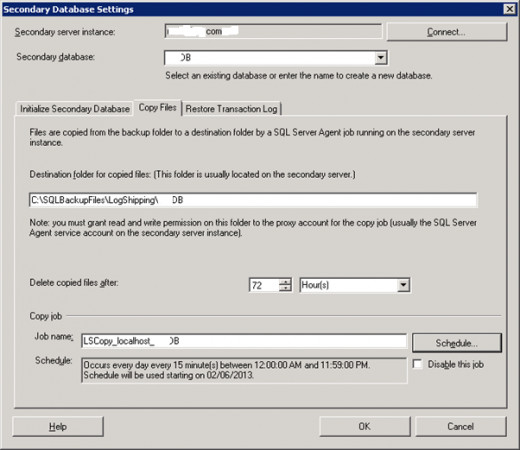
Click on the Copy Files tab.
Enter a local folder path that is on the secondary server in which the backup files will be copied to from the primary server.
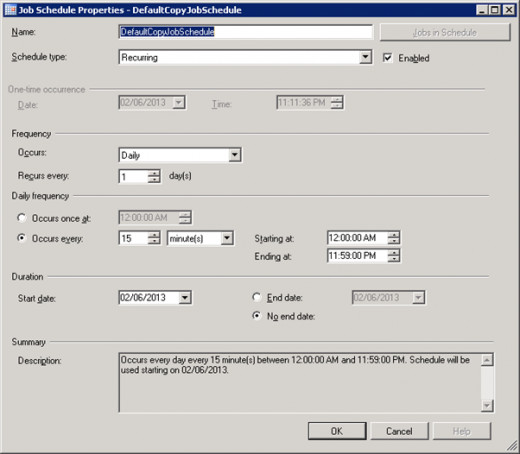
Click Schedule, and you may leave it on the default settings. Click OK.
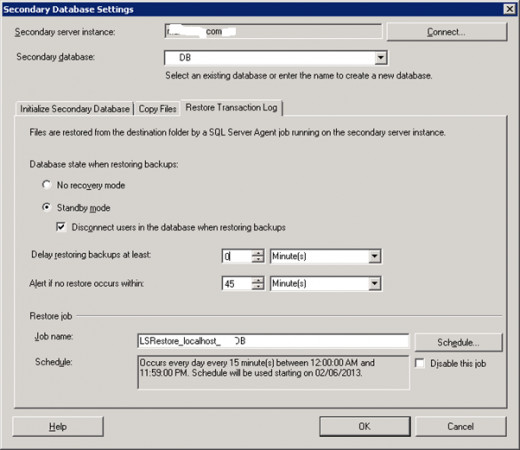
Click on Restore Transaction Log tab. .
Select Standby mode, and tick Disconnect Users in the database when restoring backups
Click On Schedule. You can use the default settings.
Hit OK. Hit OK.
In this article we will not be using a monitor server.
Finished
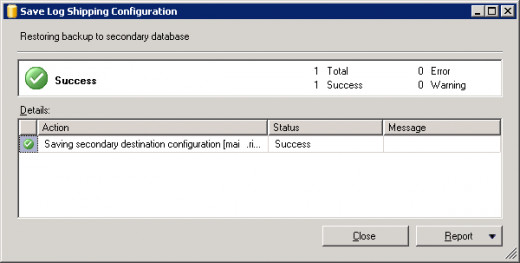
Once you have configured the Secondary server, you will see the following screen. Press OK again, and the SQL jobs will be created on the Secondary server.
The jobs are :
1) Copy the transaction log backup files from the Primary server to a local folder
2) Restore the transaction log backup files from the local folder.
Transaction Log Shipping have now been set up.


