SolidWorks Tutorials For Beginners_How to Use Extrude Cut Feature in SolidWorks 2012

Extrude Cut
The Solidworks 2012 is one of the best CAD software which mainly used for design purpose in the engineering applications. The Solidworks helps to model the components in 3D and also make 2D drawings of it. The sketch tool provide different approach to make drawings of parts and features let you to add materials into the drawings.
This is second video hub about Solidworks tutorials for beginners. It contains step by step showing how to use extrude cut feature in SolidWorks 2012. Extrude cut is feature which used to cut or remove materials from solid model. It allows to remove the materials in one or two directions.
Let's see step by step example, How to use extrude cut feature in Solidworks 2012.
Step-1
First Open the Solidworks 2012. Then go to menu bar and click on File. From the sub menu select the "Part" and click OK.
File -> Part -> OK
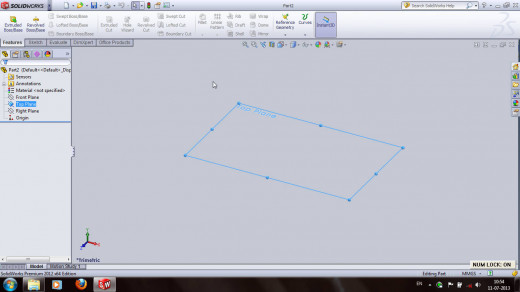
We can see the user graphic interface of Solidworks 2012.From the left side tree items select the plane. For this example. select "Top Plane" is as show in the above image.
Step-2
Click the right mouse button. From the pop-up menu, select the "Normal To" option.
Right mouse button -> Normal To.
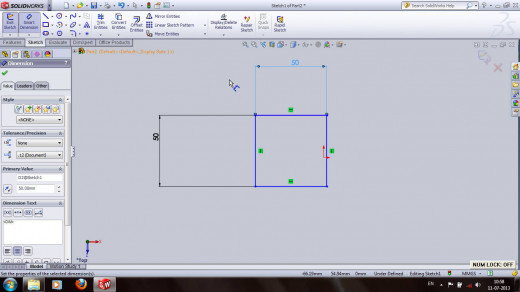
Go to "Sketch". Select the rectangle option from the sketch menu and draw a 50 x 50 mm rectangle by dragging. Add dimensions by using "smart dimensions" option.
Sketch -> Rectangle -> Drag mouse to draw rectangle.
Sketch -> Smart Dimensions -> set dimensions by selecting the lines.
It is show in the above figure.
Step-3
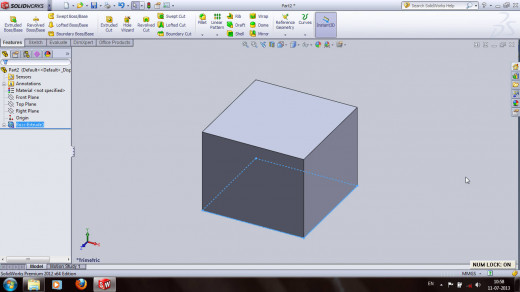
Click on the "Exit Sketch". Select the sketch-1 from the left side tree. Then go to "Features" and select "Extrude Boss/Base" button. From the pop-up side menu, set the direction and dimension (say 40 mm).
Features -> Extrude Boss/Base -> Set the direction as "Blind" and Dimension as "40 mm" -> OK.
Step-4
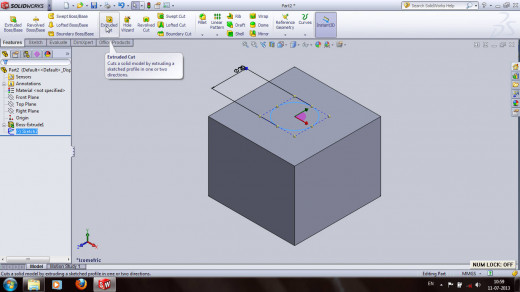
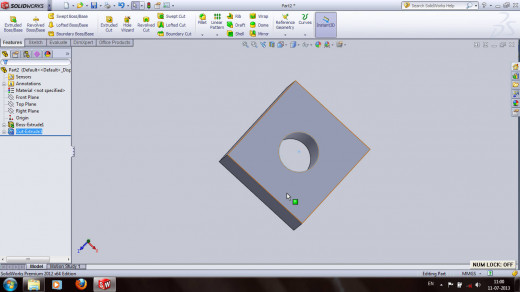
We want make a hole on the top surface of the rectangular box. For that, go to sktech and select "circle" and click on the top surface to select the center of the circle and drag it. Using smart dimension, set the diameter of circle as 20 mm.
Select the Top plane -> Sketch -> Circle -> Draw the circle and set dimension as 20 mm -> OK.
Exit the sketch and select the sktech-2. Go to features and select "Extrude Cut". From the side menu select the direction as "blind" and click OK.
Step-5
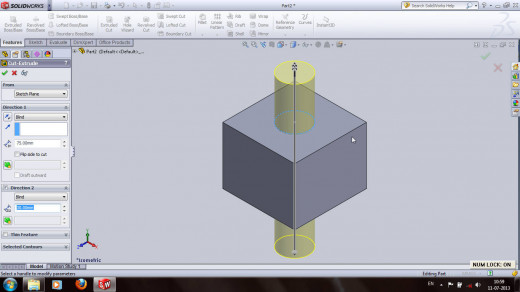
Features -> Extrude Cut -> set direction as "blind" and dimension as 40mm -> OK.
Note: Extrude cut has various direction options like Blind, through all, up to next, up to vertex, up to surface, offset from the surface, up to body and mid-plane.
Step-6
Step-7
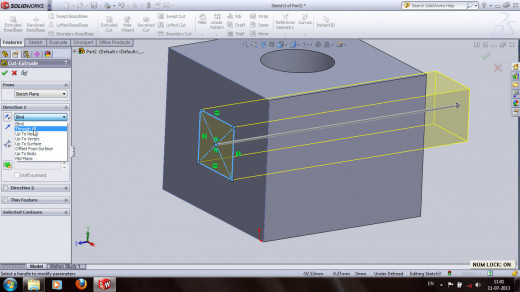
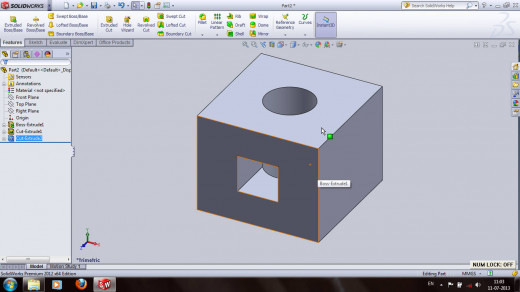
We have to also make a rectangular hole in side of the box. For that select the side plane and Go to sketch. click on the rectangle and draw it on the selected side plane.
Select the side plane -> Sketch -> Rectangle -> Draw and dimension it.
Exit sketch and select the sktech-3. Go to features and select the extrude cut again. Select the "offset from the surface" and set the offset distance also.
Select Sktech-3 -> Features -> Extrude cut -> set the direction as "offset from the surface"and dimension of of extrusion.
It is shown in the figure.
Step-8
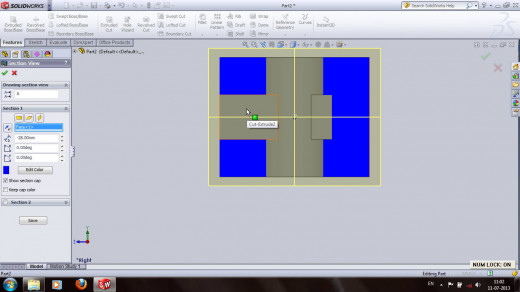
The above figure shows the section view of final 3D model.
Final Model
Conclusion
Extrude cut feature in Solidworks 2012 is very useful feature. It contains various options like blind, through all, up to surface, offset from the surface, mid-plane etc. We can use each options in extrude cut as our requirements. To get more view SolidWorks Tutorials for Beginners
If you got any problems or confusion feel free to contact me or write your questions as comments.


