The DIY Complete Home Energy Assessment


As you have read in previous chapters, installing green energy at your home doesn't need to be expensive nor hard to do, if you use a DIY Energy kit and follow the steps in it. However it is extremely important to see how you can conserve energy before you start to generate it from solar, wind or any other source of renewable energy source.
A home energy assessment which is also termed: home energy audit, is the first step to calculate how much energy your home requires and consumes, and to define what measures you can take to make your home more energy efficient.
An assessment will highlight weak points in energy efficiency, and identify cost-savings measures.
During an assessment, you will detect where your home is losing energy, heat and cooling, and also conserve hot water and electricity.
It is important to keep in mind that it is a lot more efficient to correct energy consumption imbalances first before installing solar or wind power at home.
I recommend you pick up a note book and a pencil to start listing all the things that you can correct in your home. Below is a list of things to keep an eye out for.
If you have already checked for these and completed the tasks described in them, then you are fully prepared to install your new renewable energy system at home. As you have already read in previous chapters of this article, you may be eligible to receive state incentives and rebates to make the entire process of converting to green energy a whole lot sweeter.

1- Detect Air Leaks
Do you feel drafts in your home when you have all windows and doors closed?
This is the most important item to correct when performing a home audit because it can save you between 5% and 30% on energy costs every month.
To check for air leaks, you should pay attention to:
- Junctures of walls and ceilings places
- Around and under doors
- Window frames
- Electrical outlets
- Attic hatches
- Mail slot
- Fireplaces
- Relevant cracks
Check to see if air is flowing through or around these. Check if they are in good condition and if the caulking and stripping is well applied, without any gaps where air could possibly pass through
Tips:
If you can see daylight around your doors and window frames, and if your windows rattle, then that means you have air leaks around them.
You can use a burning incense stick to see exactly where an air leak is coming from. Where the smoke makes a quivering motion and wavers is where you leak is.
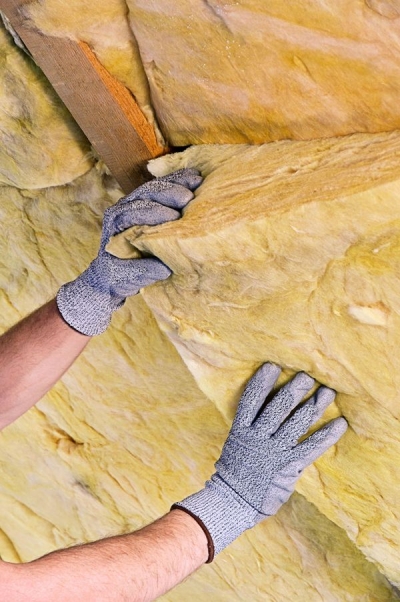
2- Check Home Insulation
You can be losing heat through ceiling and walls in your home. If your house was built a long time ago, then your insulation levels may be under the required minimum levels. Check to see if the insulation is all evenly distributed and that there are no leaks around ducts and wire passages.
Check to see if under your attic's insulation you have a vapor barrier, which is generally a paper or plastic sheet. This s intended to help keep vapor and moisture from passing through the ceiling to the insulation. If it doesn't have a barrier, the effectiveness of your insulation may not be at its max potential.
Check your attic door too. It has to be insulated as well as the rest of the ceiling.
Check for gaps between electrical fittings. Seal any gaps with an expanding foam caulk or any other permanent sealant.
In a well insulated home without drafts, it is generally more comfortable too.
3- Check Heating and Cooling Systems
In a previous section of this article where I mentioned heating and cooling systems, if you have any of these, you should check to see if they are working properly and if they are in good condition. Some systems may come with filters, which have to be cleaned or replaced from time to time. If those filters are dirty, the system will consume more energy to operate at an optimum level.
You should consider replacing old systems with energy efficient systems too, as these are much better for the long run.
Check system passages, pipes and air ducts too. If any of them are clogged, your equipment may not even be working properly, and you will be losing energy.
4- Install Energy Saving Light Bulbs
Replace non-efficient and incandescent bulbs and tubes to energy efficient / energy saving light bulbs and fluorescent tubes. They may be more expensive, but they will last up to 300 times longer and save you so much money in the future.
There are sometimes campaigns in supermarkets where you can pick up an energy efficient bulb for free in exchange for an incandescent bulb.
Although this can be a do-it-yourself job, whenever there is a risk associated with the existence of electrical cables, it would be better to hire professional help.
Recommended articles for you to read
- Renewable Energy Options for your home
A look through all the renewable energy options for your home or small business, alternatives and solutions. - Complete Guide on How to Convert to Green Energy
A guide on how to switch to green energy without having to sacrifice comfort. Save money, save energy, and save our planet.
Energy Assessment Poll
How many times a year do you do Home Energy Assessments?
Related

How Facilities Maintenance Finds Water Leaks

The Spiritual Link Between Vitality and Hoarding

Home Remodeling Improvement I Love Metal Roofing - In Shake or Spanish Tile Style Roofs

Energy-Saving Tip #1 - Coffee as Electricity Reducer

Istiqlal, Eco-Friendly Mosque and Energy Saving Religious Building