3D Printing: How to Make Sure Your Design Will Work


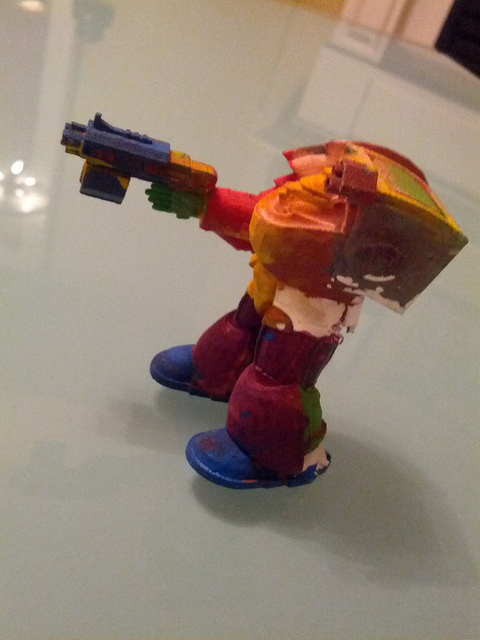
Which of these would you prefer to print on a 3D Printer?
How to Make Sure That Your Design Will Work
Most 3D printer modelling software has roots firmly in the computer aided design lineage of programs, and while there's nothing wrong with that, it does mean that designs are often treated differently for the screen rather than their destination in the real world. For example, modelling software such as 3ds Max will build most models out of hundreds of separate segments or pieces. This is fine for the most part, but unless you're planning on bonding all those segments together after they're printed, it's a tad useless.
The model destined for the 3D printer needs to be a single, seamless piece. lt can be several pieces that you later bond together to make a whole Starship Enterprise, for example, but each edge and vertex needs to be merged together until you have a solid segment to print. If you have something from a few years ago, before 3D printing was around, which you designed in a 3D modelling package, and you definitely want it printed, then it's worth going back over it and smoothing out the edges, merging the segments and generally cleaning it up until it's a single segment that can transferred to the printer.
Hollowing The Cost
Although you may have spent significant time preparing your model in the 3D software, take a moment to consider how it's going to be printed on the 3D printer. How big is it? Does it have a flat bed or a raft to work on? And is it hollow?
By default, every item modelled and printed is going to be solid, which naturally means it's going to use more of the plastic consumable, which is obviously going to rackup the cost of the printed item considerably; plus, if there's an area of it that's potentially weaker lower in the design, then the solid structure above it could cause the print to warp when the layers are building up.
Generally, most 3D packages will be able to hollow out a model for you by creating an inner and an outer shell of the design. The distance between the two is the thickness of the model, which can then be tweaked to make the model hollow, without compromising the sturdiness of the structure. It may take some trial and error, but hollowing out the model makes it cheaper to produce and more effective when printing.
Geometry 101
Non-manifold geometry is one of the biggest problems when it comes to printing out a custom designed 3D object, and it's the single most important design issue that stops you from achieving a successful print. Basically, non-manifold geometry is any edge shared by more than two faces, and the common problem inherent to 3D designs is when an edge is extruded, but not re-positioned, so the result is two pieces of the same geometry on top of each other, which therefore won't be printed correctly.
Fixing this can be relatively simple, but it's entirely dependent on the software you're using; different 3D modelling packages eliminate non-manifold geometry in different ways.
Check Your Face
It's easy in modelling software for the outward face of an object to be reversed either accidentally or through an overzealous modelling tool. Naturally, should this happen, the vector point becomes a little messed up and instead points toward the insides of the model instead of the outside. When this is all converted or transferred across to G-code and the 3D printing side, the deign itself becomes incompatible or at the very least confuses the printer and can end up being a bit of a mess when it comes out.
Solving the problem is easy enough, by reversing the faces, but as with the non-manifold geometry it can be different for each modelling package, so either check the help files or the software's forum or website for more specific details.
Lost In Conversion
Finally, making sure your design will work and checking that every facet is true and geometrically correct is an absolute necessity, but it can all be undone in an instant when it comes to converting your design to something the 3D printer and its software can read. Most of the software that comes with the 3D printer will accept a wide variety of file types and convert them perfectly fine. However, there are examples where the conversion process can significantly alter the design in such a way that it becomes an unprintable mess. It's a difficult problem to solve, as each item of software, both modelling and from the printer side, can be radically different from one printer to the next. As with most elements of 3D printing, trial and error are key here, and do your research before committing.
Check the printer software capabilities for what can be one 100% converted and what can't. Are there certain issues involved when converting from one 3D package to the next? Is there any loss in design when converting? A good hour or so of research will eliminate most of the headaches you may come across later. It's also a good idea, when designing your model, to avoid any over-technical tools in the modelling software. Most tools can be converted or bypassed by the printer software itself, but some tools can radically alter the geometry of your design and confuse the printer.
Getting Started
The trick to starting with 3D modelling software is to take it slow and keep it simple to begin with. Opening up the software and expecting to render an exact replication of the Empire State Building is only going to frustrate you and more than likely turn you away from using 3D modelling software for the future. Unless you have previous experience of 3D modelling software, the best place to start is with an object that's easy to design in the real world: a book shape, Lego bricks, coffee mug, toilet roll - an everyday object that's very basic in its design, but one that you can build up and get used to the software with.
Next, with the object in hand, start to build it using voxels in the modelling software. Take your time, and build it up as you see it in the real world or as close as possible. Be careful not to start too big or complex; if you're new to 3D modelling, there's nothing as disheartening as failing at the initial design stages. Save it or export your finished model as an STL file, and should your modelling program ask to fix anything that has become corrupt during the saving or exporting process, then answer yes but check what changes have been altered.
With your 3D printer software open, load up the design you've just made in STL and run it through the slicing program, if your software has this function (otherwise you could use Repetier-Host and Slic3r to convert the model to G-code). Once done, you can further manipulate the model on the print bed, move it around and pre-heat and select the temperatures necessary for printing. Finally, print off the model. If all goes well, you should have an exact replica of what you've just designed.
Moving On
With the model you've just created sitting in the palm of your hand, you could be forgiven for thinking that this is all there is to it, and in some ways it is. However, if you want to increase your 3D modelling skills and eventually produce even more complex and impressive 3D models on your printer, then you're going to have to step up a gear and delve deeper into the modelling program you've decided to use.
Taking the model you did at the start of this process, have a closer look at the tools that are available and what they can do with the various lines, faces and points you've already created. Consider moving some of the points and faces, and see what you can additionally create. Purely out of interest and to get a better understanding of 3D models, try to create a non-manifold geometry, and perhaps try to hollow out your design. If it's small enough, then you shouldn't have too much of a problem.
Once you've improved the model in question, save it as something new, and if you're able to and you don't mind the extra expense, then print it out and compare the two together. It's worth seeing how just a simple alteration on screen can have dramatic effects when the object is printed. Plus, if you managed to create a non-manifold geometry, then you'll soon come to realise what's possible to print and what ultimately isn't.
The Final Stage
Assuming you've now spent considerable time using the many and varied functions of your 3D modelling program, it's perhaps now time to look back on the first model you made and use it as something you can start again with, but now using everything you've previously learnt.
While we're not trying to teach you how to suck eggs, what you could do now is open up the modelling program with a blank canvas and recreate the first model again. This time, though, you can use the multi-face, multi-points tools; you can create complex polygons and actively avoid the dreaded non-manifold geometry; and you can recreate the model so that it's economically viable for the 3D printer - in other words, it doesn't use as much material and it's capable of being printed relatively quickly to cut down on the amount of power used while the printer is switched on.
Once you get to grips with almost everything your modelling software can do, you can then move on and research certain areas in particular, such as topologies, edge flow and contour modelling. There are plenty of resources available online to guide you through the more complex steps of 3D modelling ready for 3D printing. The trick at this stage is experimentation; by now you'll know what works and what doesn't, and you won't print off something without first running it through various checks to see if it's cost effective and viable, so experiment away and see where it takes you.
Experimentation Is Key
As with most of 3D printing in the current generation, many of the tools, applications and ideas you have will be achieved through trial and error and getting your head into the product as much as possible.
Each 3D-modelling application is different, and each will go about the same way of doing things in a different manner to the next. Most will allow you achieve moderate success in 3D printing, and most will help you through the process of building your models in an effective and error-free way. However, they differ radically, and without using a selection of them, you'll never really know what one modelling package can do in comparison to another modelling package.
Experimentation is the key to working out how to use your chosen software and its accompanying tools. Generating a complex 3D model only takes a few weeks of work to get to grips with, and by then you'll no doubt have worked out the intricacies of your printer too, so the overall effect will be a print that's economical, fast and pleasing to the eye.


