How To Decoupage Old Furniture With Paper

In this article we are going to take a look at how to decoupage any old furniture that you might have lying around. We will tell you how to decoupage using paper and how this form of upcycling can spruce up old furniture and making it look good as new. Hopefully there will be some ideas on this page that will inspire you to create your own pieces of art and the easy step by step guide can get you started in the art of decoupage.
The art of decoupage first came into being back in the 18th century. Back then it was known as Japanning as this was where it was thought the practice first started. Pieces of furniture were covered in bits of paper then varnished over several times to give a smooth finish. Ever since then people have been decorating things with paper, this practice is now sometimes called to upcycle. In other words improving scruffy old items and giving them a new lease of life. Really though in this article we are concentrating more on the art of decoupage and how to go about it. So let's get you started.
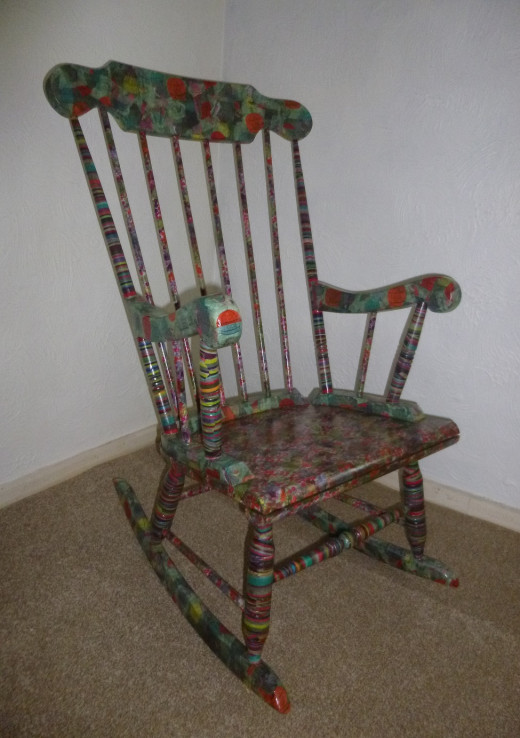
Our Decoupage Rocking Chair
What Can You Decoupage With Paper?
So first of all what can you decoupage and what do you need in order to do so? Well the answer to the first question is pretty much anything. It can be a small stool or a large wardrobe, a little table or a long wooden bench. Obviously if you are just starting out it makes sense to start small, but once you have mastered the art there really is no limit on what you can upcycle. For the purpose of this article we used an old rocking chair, this was bought cheap at a charity shop and given a new lease of life using decoupage. The steps we used can simply be recreated on any furniture you might want to use.
So now you know what you can upcycle, what exactly do you need? Well there are a few things such as sandpaper, PVA glue, varnish, paint brushes and of course the paper you are going to be using. When it comes to the type of paper you use this is very important. The whole idea of this art form is that you can create your own unique style. Do a search online for decoupage and you will see various different styles of design. Some people use maps, old comic books, newspapers, advertising leaflets, sheet music etc...
One clever idea though is one we use, tissue paper. You can buy specially printed paper from online suppliers and these come in various designs. The paper is also quite cheap to buy if you order online and there are so many different designs to choose from so you really can create lots of unique designs using different styles of paper. Tissue paper though is very easy to use and cheap to buy so this is a good suggestion. For our rocking chair we used three different designs of paper, sometimes though we just stick to one design. It really is down to personal preference. One of the good things about this is that if you start using one kind of paper and decide you don't like it, you can simply paper over it with a different style. So how exactly do you go about upcycling your furniture, well here is a simple step by step guide.
Start On An Easy Section
Getting Started On Your Furniture
Step 1 – So first of all you need to prepare your furniture for the paper you are going to put on it. Sometimes you won't need to do anything, if the surface of the item is quite rough then you are good to go. However, if the surface is varnished or painted then you may struggle making paper stick to it, so you need to lightly sand down the surface to rough it up a little bit. This is not a major job, you are not trying to take off a coat of varnish or anything like that, just rough the surface up a little to ensure paper will stick to it.
Step 2 – Now your furniture is ready it's time to get your paper ready. When you have selected the paper you will be using you need to rip it up into little strips a few inches long. These don't have to be precise, in fact in some ways it looks better if they are all slightly different. Some people prefer to cut accurate sized strips of paper and this is also fine, but when using tissue paper we find the best way is to get ripping.
Step 3 – You also need to prepare the glue. The PVA you buy in the tubs is a little to thick and sticky and will dry to fast. So you need to add a small amount of water and mix it in. This will thin the glue and make it last longer and it won't be quite as thick and sticky.
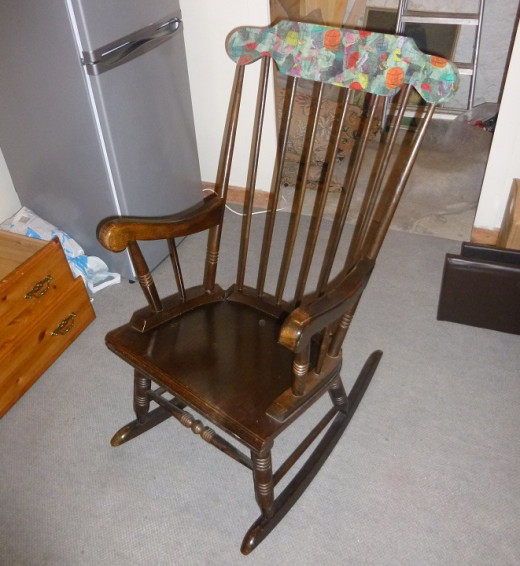
Step 4 – Now it's time to get sticking your paper on. Start on a simple flat area like we have done in our picture. This large flat section at the top of our rocking chair was one of the easier sections to complete. By starting on an easy section you can practice a little bit. So using a paint brush spread a thin layer of PVA glue on the surface of the furniture. Now stick on a strip of paper and then add another layer of glue over the top. Then simply repeat the process covering the surface you are working on.
Step 5 – This step is really an optional one. When you have finished a section allow it to dry and then decide whether or not it needs a second layer applying. The rocking chair we upcycled only has one layer of paper, whereas some other items we have done in the past have had two layers. Sometimes you may even wish to add even more layers, again it's all down to choice.
Small Pieces Of Paper For Tough Sections
Papering Those Tricky Bits
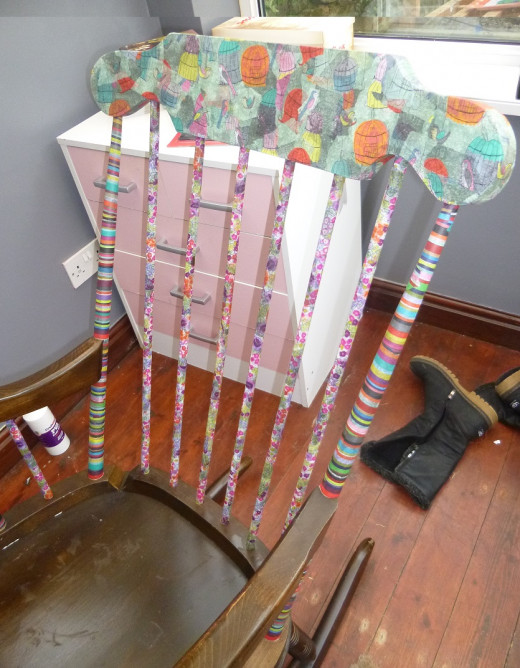
Step 6 – Once you have done the easy sections there may be some more tricky sections to get into. As you can see from our rocking chair there were a few fiddly bits to get into. For these use smaller strips of paper and a smaller brush for applying the glue. Don't worry if the paper rips or does not go on right, you can always go over it with another piece.
Step 7 – As you get further along with your progress you will find there are a few issues. You may need to turn your furniture over to get in hard to reach places, make sure the area you have finished is dry before doing this. You don't want it going on the floor while the glue is still wet or it will pick up things from the floor and ruin the finish.
Step 8 – If you are using different designs of paper you need to work out in advance where these are going to be used and make sure that you do not overlap the papers as this tends to look a little odd. Make sure one section is dry before starting a new one also.
Step 9 – Once your item is finished and you have covered it in paper you need to leave it for at least a day to dry off. It may feel like it is dry to touch but you need to make sure even underneath the paper the glue is dry and hard. So leave in a warm place with lots of ventilation.
Varnish The Furniture
The Finishing Touch To Your Furniture
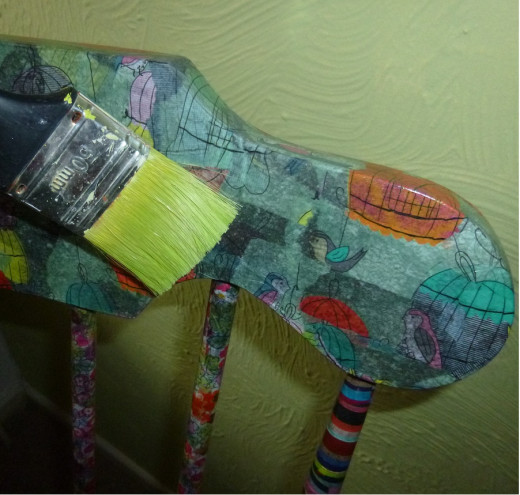
Step 10 – So when the glue is dry you should have a nice looking piece of furniture. However, if you want it to last you need to seal it. To do this you must add a few coats of varnish. Using a paint brush cover the entire item with varnish and then allow to dry. Then you need to repeat the process at least three times. For our rocking chair we used four coats of varnish, some people like to use even more than that. Doing this though will give the furniture a nice smooth feel and it will hold the paper in place and keep it there.
So there you have it, ten simple steps to creating your very own decoupage furniture. This process takes a good few days and it is hard work, but once you have finished you have a piece of furniture that you can be proud of. The great things about upcycling is that the design is completely unique and you can create all your own styles. The rocking chair that we did took around a week to complete and it should last many years. The chair was bought for cheap and yet has been done up to look like a really good quality piece of furniture.
Some may even use this as a business idea. Really nice examples of decoupage can sell for good money so if you can get the furniture for cheap or even free and then do it up for very little expense, then selling it on at a profit might really work. There are so many design ideas you can use and so many different styles you can create. Decoupage really is a fun way of adding some color and life back into old furniture.


