The Dummies Guide To Photography - 101
Photography 101
Two years ago, I ran an internet business. We had the top of the line cameras and editing software. When I eventually left this business and began my work as a freelance writer, I realized one important thing. That it was a real shame I never properly learned how to use any of those fancy cameras or software and could not afford them anyway.
Since when has not knowing how to do something ever stopped me in the past? Well, you may not know me but the answer is never. Stubborn me learned the basics of photography the hard way. No books, no outside help, nothing more than a standard Windows based PC, internet connection, and a digital camera. The simple fact that you are reading this article online implies that you may in fact already have two of the three. And according to Meatloaf, "Two Out Of Three Ain't Bad."
Anywhay, back to the topic. I went about learning this new skill by trial and error. That does not imply that I am now an expert by any means, but I would like to think that I've picked up a few tricks that can help the average Joe (er' Jane) like myself.
Tip #1 - Lighting
When scouting locations, it's as important to decide when as it is where. I am not spending money on fancy lighting and I doubt you would either, unless you are a professional. Which I hope you are not (or you are probably not a good one and may loose your job at any time, especially if your boss sees this article in your browser history).
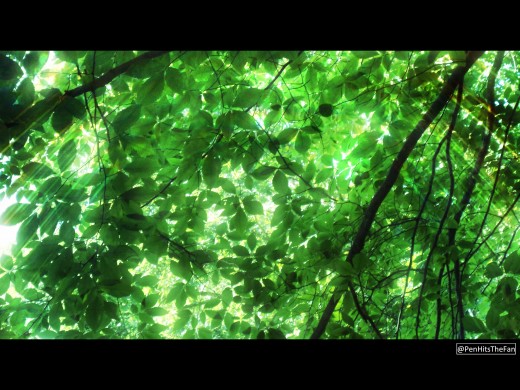
So you've found your location, now you need to consider where the light is coming from? As always in life, common sense goes a long way. If you take a photo when the light is behind the object you are photographing, there will be a glare. To avoid this shoot with the sun behind you, If the sun is strong that day. If you are capturing an image of a large item such as a building or tree, you may use the object to partially block the sun, which will create interesting shades and coloring. The image of the trees below is an example of this.
Also important to know is that photos tend to come out better when there is ample light. Therefore if you want to photograph a garden for example, go in the afternoon when the sun is out. Sometimes, the weather does not cooperate and that's fine. There are free online filters you can use that will help lighten or crisp up your image if it is dark or hazy. (See tip #4 for more on this.)
Applying What You've Learned About Lighting
Tip #2 - Angles
Luckily there are no protractors involved in this. What I mean by angles is simply choosing an interesting reference point for the camera. If you simply took a photo head on, it's going to look rather plain. By taking a few steps to the right or left and pointing the camera, it completely changes the look of the photo.
Tip #3 - Try Try to Try Again
Elaborating on tip #2, try alternating some photos from below, some from above and some from each side. I've learned that you probably will not get the best shot the first time. When I went to the fireworks show last fourth of July, I took rapid fire shots of the sky and the payoff was enormous. I ended up with a ton of ugly pictures of blank sky but just as many of really magnificent bursts of color.
The convenience of a digital camera is that there is no reason to not overload your camera with photos. A few of them are bound to come out winners. Plus, with a digital camera you can easily delete the bad pics without it costing you a dime. (I won't tell anyone about your photography mistakes if you don't tell them about mine.)

Tip #4 - Editing
Pixlr-o-matic is a wonderful editing tool that I use all the time. It does not require a log in and unlike Instagram, you don't need to have a fancy phone. FotoFlexer is one I have used a few times as well. You just visit their site, upload the photo and walk through their options. Once you finish one photo, the others will go much quicker. I am sure there are more sites that offer the same services, but I can not personally verify how trustworthy they are.
I personally like to crop my photos using the very basic Windows Paint software. It comes standard on any PC with Windows. I simply drag the photo onto Paint and hit the "Select" button. Then using my mouse, I draw a box around the image as I want it. Then hit the keys "Control" + "C". Up top choose "New". If you asks you to save, say no. Then when a blank page comes up, hit the keys "Control" + "V". The image should be fine to save to your computer now. Take the image to one of these editing sites and have fun editing it however you want.
When I was finished, the web site I used allowed me to save the image to my computer.
Photos:
| Description
| |
|---|---|---|
Photo A
| The photo is au natural. Nothing has been done to it.
| |
Photo B
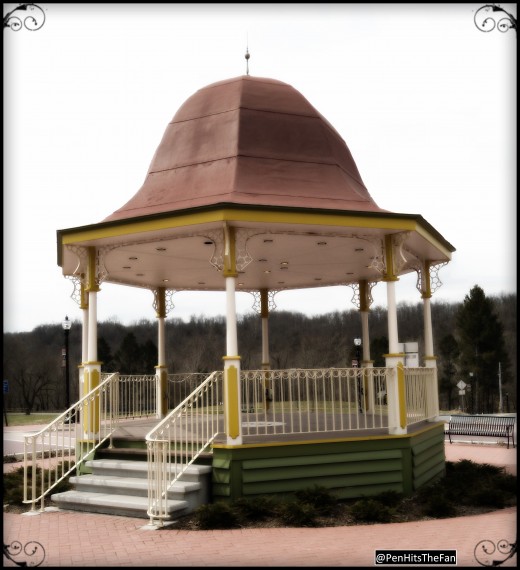
| I have used Paint to crop the photo, eliminating unwanted space around the gazebo.
| |
Photo C
| Once you get good, you can use Paint to take out other items. I removed the power lines in this photo. (But no one will blame you if you skip this step.)
| |
Photo D
| I have chosen the style of affect I wanted in the photo. This gazebo has a sleepy feel to it so I opted for a fuzzy filter.
| |
Photo E
| Finally, I chose the border that fit my photo the best.
|
From Start To Finish




Do you think you've learned the basics?
view quiz statisticsSo What Do You Think?
Do you think you will give this a try?
- Picking The Perfect Camera Bag
Protect your investment with the right bag. The ins and the outs of "Picking The Perfect Camera Bag".
- 17 Ways To Annoy Me
Since I'm new to Hub Pages, I figured I should introduce myself. And what is a better way to do so, then inform you of top 17 Ways To Annoy Me. Why a top 17 list? Because 10 is trite and 20 requires too much effort. Lesson one, I'm kind of lazy.
- Back To The Grind - Making Wheat Bread The Old School Way
Freshly ground wheat bread is yummy and satisfying. Try my wheat and almond bread variation on wheat bread.
Tell Me All About It.
© 2013 Amy L. Tarr


