5 Basic Car Fixes That You Can Do Yourself

Imagine your car breaking down an hour before you had to be at work. You are now flustered and you have no idea what to do next. Your mind is racing and your thinking a million words per minute. Your heart is pounding and your in denial about the price that it will cost to get your car fixed. Getting a tow truck, paying for parts, paying for labor, and finding a ride to work seems to be too much of a hassle and inconvenience. Hence, the reason for this article is to gain knowledge about basic car fixes that you can do yourself. This helps you to save money, save time, and is more convenient for your needs and wants. In the beginning, the simple things that you need will cost you money such as a funnel, fluid, small parts, etc. After you buy the parts that you need, you can then proceed to do the fixes yourself. By you doing the labor yourself, you can fix your car faster and you don't have to pay for outrageous labor prices that you would otherwise have to pay for at auto shops.

1. Oil Change
Tools Needed:
-Wrench to remove drain plug
-Oil filter wrench
-Oil drain pan
-Funnel
-Latex gloves
-Jack and jack stands
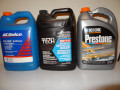
Materials Required:
-Oil
-Oil filter
-Replacement drain plug washer
Instructions
First, make sure you read your owner's manual or call an auto shop to ask what type of oil and the amount of oil is needed for your car. Second, make sure that you car is not hot otherwise you might end up getting really hot oil on you, which I would imagine would burn pretty bad.
1. Place on your gloves and clothes that you don't mind getting dirty.
2.Jack up your car and use jack stands so that you are able to get underneath to reach the oil drain plug and oil filter.
3. Make sure the drain pain is several inches from the drain plug in order to avoid oil spillage since it comes out at an angle.
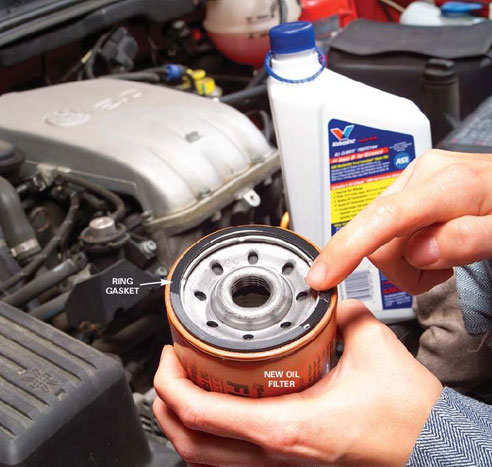
4. Remove the oil filler cap as a reminder that you must put new oil in and so that the oil can drain faster.
5. Now, it is time to grab the wrench and to remove the drain plug as slow as you can and to remember to remove your hands out of the way of the oil.
6.Now inspect your oil drain plug. This is where the plug washer would go if you needed one. If you do need to replace, make sure the old one isn't stuck to the oil pan.
7. After you are done draining, retighten the drain plug back onto the oil pan with the box end of a combination wrench.
8. Remove the oil filter by using your wrench at a slow place. Don't let go of the oil filter when it comes off
9. Hold the filter over the pain to drain it.
10. Clean the filter with rags and make sure the O ring isn't stuck to the surface. If this goes unnoticed, then a double O ring could pump your oil our messing up your engine.
11. Smear oil onto the new filter's O-ring.
12. Take off your gloves and install the new filter by hand. Refrain from tightening too much past when the O-ring first contacts sealing surface.
13. Make sure that the oil drain bolt and filter are in place and tightened. Pour in a quart less oil than the amount in the owner's manual.
14. Replace the oil cap, start your engine, and check under your car for leaks.
15.If nothing leaks, lower car off of jack stands and check the oil level making sure that the oil doesn't read that it is passed the second line or hole. Now you are done!
Remember that these instructions would be a little different for newer cars. In newer cars there may be an extra step such as a cover that is over the oil filter and drain plug underneath the car. On the other hand, the oil filter might not even be underneath the car and it might be on top of the car. The changing of the oil steps would be the same but when it comes to changing the oil filter it may be a little different.
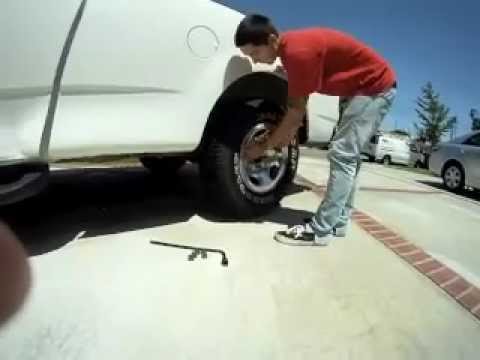
2. Tire Change
Materials Needed:
-Jack
-Replacement Tire
-Wrench
Instructions
1. Place a rock in front of the front and black tires.
2. Place the jack under the frame near the tire you are changing. Make sure the jack is in contact with the metal part of you car and not the plastic, in order to avoid cracking the plastic when you start lifting. Check for notches that might be in front of the rear tire and behind the front tires.
3. Raise the jack until it supports the car.
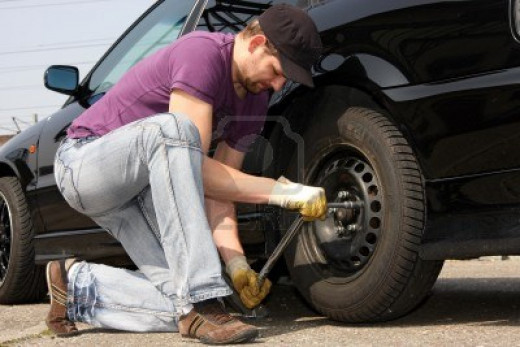
4. Remove the hub cap and loosen the nuts using the wrench by turning counterclockwise. Use a standard cross wrench.
5. Pump or crank jack to lift tire. Make sure the jack isn't lifting off the ground, if it does lower car and reposition so that it lifts up straight.
6. Remove the rest of the nuts by using the counterclockwise motion.
7. Remove tire
8. Place spare tire onto hub.
9. Tighten the nuts by hand and then use the wrench to tighten as much as possible. Make sure that they are all tight and tighten the nuts in a clockwise like manner.
10. Lower the car and remove the jack. Take your previous tire to a mechanic. You are now done!
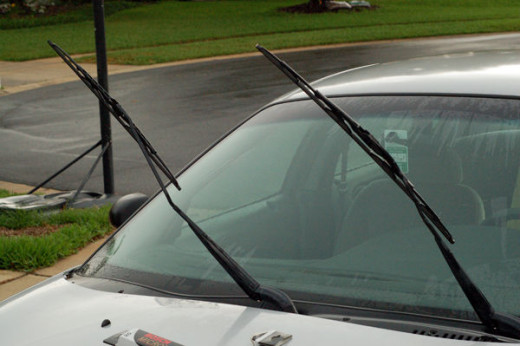
3. Windshield Wipers Change
Materials Needed:
Windscreen wipers
Windshield Fluid
Instructions
1. Make sure your windscreen wipers are lifted up and at a 45 degree angle.
2. Push lower part of wiper so that you can now pivot it.
3. Push the wiper blade so that its 90 degrees from wiper arm.
4. At this point, you should see a clip, push the clip down, which releases wiper arm from wiper blade clip.
5. Pull wiper blade from wiper arm hook
6. Position center clip on new windscreen wiper
7. Position wiper blade and push it upwards.
8. Ensure the clip is fitted and slowly set the windscreen wiper back down to windscreen. Now you are done!
Remember that after this is done to check the level of your windscreen wiper fluid. Pop open the hood and locate the cap that has a picture of it of a windscreen wiper and water. Check the level of the windscreen wiper fluid and add accordingly.
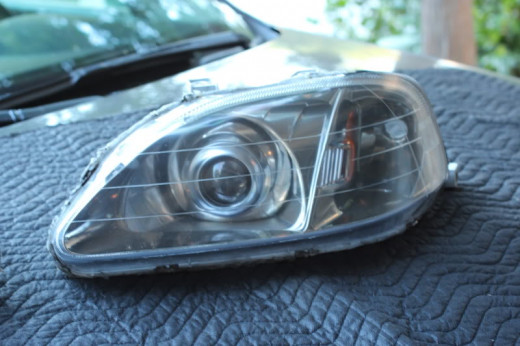
4. Change Lights
Materials Needed:
Replacement bulbs
Flat-head screwdriver
Instructions
1. Check that car lights work.
2. Check turn signals and rear lights. Check interior lights.
3. Use your owner's manual to identify the trade number to use to find the right light bulb.
4. Turn lights off and open the hood or trunk. Remove covering off of rear lights. Reach in behind the head lamp and remove the rubber boot by pulling it backward. Remove bulb socket by turning it counterclockwise.
5. Remove bulb and install a new one. Other exterior lights can be removed doing the same process. interior lights are replaced by prying off the cover using a flat head screwdriver, exposing the bulb that can be removed and replaced.
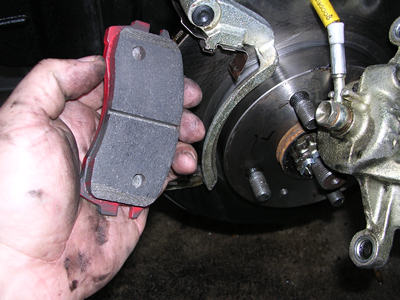
5. Change Brakes
Materials Needed:
-new brake pads
-lug wrench
-jack
-light tie wire
Instructions
1. Make sure the vehicle is cool
2. Loosen lug nuts using the lug wrench about two thirds of the way
3. Jack the car up, making sure you position the jack in the right place under the car.
4. Remove wheels, finish loosening lug nuts
5. You should be viewing the rotor (large metal disc) and the caliper (a large clamp like device around the top of the rotor).
6. Remove caliper bolts. Measure the difference between the pad mounting surface to the caliper at top and the bottom.
7. If you have a Japanese car, you don't have to remove entire caliper, you only have to remove upper and lower slider bolts.
8. Check caliper pressure. Caliper should move slightly if shaken.
9. Use tie wire to hang up brake line, so it doesn't drop to put weight on brake hose.
10. Remove Brake Master cylinder from under the engine and inspect fluid level. Squeeze the pistons
11. Remove pads
12. Put new brake pads on. Use lubricant and spread it on the edges and on the back of the pads, surface of shims and the piston pad contact area.
13. Check Brake fluid and add accordingly
14. Replace caliper by sliding back onto rotor slowly.
15. Put the wheel back on by sliding and hand tightening each lug nut snug
16.Lower the car and remove the jack.
17. Tighten the lug nuts all of the way using wrench.
18. Start your vehicle to test your breaks. If they seem normal, then you have done it. Now you are done!
Remember the overall how to's are simply to give you a general idea on how to fix your car. If your car is older, then these how to's would probably work for you. If you have a newer car, then the steps involved may be more than what I have listed and there might be extra parts or whatever you are trying to fix may be in a different spot. Hope this was helpful.
Here below are some links to other articles that I have written:
- How to Make Homemade Chocolate Chip Cookies Simple
A simple, quick, and easy way to make delicious chocolate chip cookies.
- 10 Tips and Techniques on How to Swim
Swimming is an amazing sport or activity that children and adults have tried to attempt at least once . Ever tried teaching someone to swim and failed? If so, here are some techniques that may help.
- 10 Tips and Techniques on How to Swim
Swimming is an amazing sport or activity that children and adults have tried to attempt at least once . Ever tried teaching someone to swim and failed? If so, here are some techniques that may help.
References:
- eHow | How to Videos, Articles & More - Discover the expert in you. | eHow.com
Learn how to do just about everything at eHow. Find expert advice along with How To videos and articles, including instructions on how to make, cook, grow, or do almost anything.
- Wiki.com
Search thousands of wikis, start a free wiki, compare wiki software


")