5 Quick and Easy Water Science Experiments for Kids
Water Science Experiments
The water experiments on this page are quick and easy to do – and require very little parental guidance if at all it is needed. Special care should be taken if any sharp objects are involved.
You will also learn various water-related Science facts on the way making the experiments fun and educational at the same time.

Ice Experiment
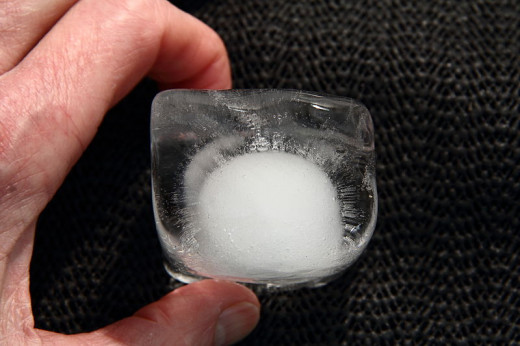
Water is a very unique substance. When it freezes, its volume decreases but then tends to increase. The ice molecules lock together in a certain pattern and this pattern takes up more room than liquid water. To see this happen, fill up an entire bottle with water and freeze it. You will see that the ice takes up more room and may come out of the top of the bottle.
Now how do you make an ice melt? One way as we all know is to put it at normal room temperature or anywhere warm and it will melt down soon enough. Another way is to apply pressure on it. This applies when you ice skate. When you skate, you are applying a lot of pressure on the ice beneath you which makes it melt. As you move ahead, the pressure is released and the water freezes again to its icy state.
Here are some simple science experiments you can try to learn more about ice.
Things you will need:
- An ice cube
- A spoon and a saucer
- A small strong, plastic bottle
- A glove
Directions:
- Fill up the plastic bottle with water – to its very top. Keep it in the freezer overnight. In the morning, the ice will be frozen and it will take up more space than it did when it was in a liquid state – making it stick out of the top of the bottle.
- Put the saucer in the freezer overnight. On this cold saucer, put an ice cube (use the glove to place the ice cube onto the saucer). Use the spoon to apply pressure on top of the cube. Water underneath will show that any kind of pressure applied can melt ice quickly.

Learn More About Osmosis
How do plants take in water and nutrients? Through their roots of course but it is because of the phenomenon called Osmosis that plants are able to do so. To explain it simply, the root hairs of a plant consist of a concentrated liquid which in turn consists of many dissolved substances. The water around the soil is diluted i.e. it does not have that many nutrients or minerals dissolved in it.
In the process of osmosis, water flows from the dilute liquid of the soil into the concentrated liquid of the root hairs. The skin of the root hairs (termed a membrane) consists of tiny holes which allow only water in the soil and nutrients to pass through.
You can get a glimpse of osmosis at work in the following Science experiment.
Things you will need:
- A knife
- 2 large slices of a root vegetable
- A spoon
- Some sugar
- A jug
- A large dish with a lid
- Some water
Directions:
- Cut out a large hollow from each vegetable slice.
- Take four spoonfuls of cold water in a cup and dissolve one spoonful of sugar into it to form a sugary liquid.
- Pour this liquid halfway into the hollow of one slice. Similarly, fill the other slice halfway with cold water.
- Place both these slices in a dish.
- Pour some cold water into this dish to a depth of one centimeter.
- Cover the dish with a lid.
- Now check upon these slices after a day.
Do you see any difference in water levels inside the slices? You will find that the water level of sugary liquid has risen whereas, in the other slice, the water level has not changed. This is because water entered the concentrated sugary liquid by the process of osmosis.
How Osmosis Works
Surface Tension Experiment
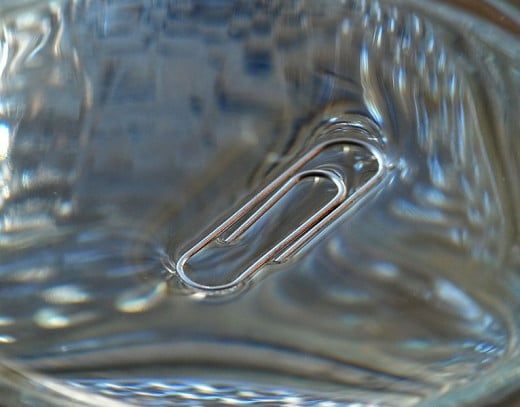
Try placing a needle on top of the water. You might expect it to sink, but it doesn’t. It in turn floats. How does this happen? The needle is actually resting on a thin skin composed of water molecules clinging together on the surface. This is what is known as surface tension. Now try pressing the needle into the water. It would now sink into the water. Surface tension is what makes a water strider walk on water.
Here’s a simple science experiment to test surface tension.
Things you will need:
- A small piece of paper towel or any other absorbent paper
- A glass of water
Directions:
- Carefully rub the needle between your fingers to make its surface a bit waxy.
- Put the dry needle on the paper towel.
- Place the paper towel on the surface of the water.
- You will see that the paper towel will take in water and will ultimately sink. The needle will stay on the surface due to surface tension.
Surface tension explained
Learn More About Density
Some objects might float on water whereas the others sink. Why is that? The sinking and floating of objects in water do not just depend on their size or weight. For example, it is possible for human beings to float in water while they are swimming but try dropping a pebble into the water and it will sink. From this alone, we can understand that an object’s size or weight does not contribute to floating or sinking in water. It depends on an object’s density. If the object is denser than water, it will sink. If not, it will float.
How can you say if an object is denser than water? If it weighs more than the same amount or volume of water, then it is considered denser as in the case of pebbles. Your body as a whole is denser than water but your lungs are filled with air, which makes you float.
Now let’s see in the case of ships. How can such a large object like a ship stay afloat on top of the water? That is because the inside of the ship is hollow and contains air. Also, the ship is made of materials that are denser than water. This makes the density of the whole ship lesser than that of water.
We can test this out with the help of a science experiment.
Things you will need:
- Modeling clay
- A bowl of water
Directions:
- Use the modeling clay to create a large ball and dump it into the water. You will see that the ball sinks. This happens because modeling clay is denser than water.
- Now take the ball out and shape it into the form of a ship or boat. Place it on top of the water. It will stay afloat. This is because the air in the hollow of the boat makes it less dense than water.
Water Taking Weight
Did you know that water can take some of the weight of heavy objects? The following Science experiment demonstrates this phenomenon.
Things you will need:
- A brick or any large stone
- String
- An elastic band
- A bowl of water
Directions:
- Take the brick and tie the string around it.
- Tie the other end of the string to an elastic band.
- Now try holding the brick with the elastic band.
- Lower it into the water.
Do you see any difference in the elastic band length before and after you put it into the water?
You will see that the elastic band is stretched less when you put the brick in water. This is because the water supports some of the weight of the brick.
© 2014 Kalpana Iyer


