A Wizard's Lizard Walkthrough: The Sewer


You've managed to survive the perils of the Cemetery, but your journey is only one-third complete. Next up is the Sewer, a gross, smelly, dank, dark, treacherous warren of a passage, one that will pit you against the perils of poison a thousand times over. Can you survive the Sewer and complete another third of the trip to Death's throne? Or is this Raga's final resting place...?
The Sewer
General Navigation
- The Sewer is a fair bit longer than the Cemetery. Expect to spend a great deal more time here. You also have more room to play hide-and-seek with enemies, so as long as you play it safe you may find some sections of the Sewer to be a little bit easier.
- The Sewer also has fewer safe zones. Don't expect to find as many merchants, if any at all. Be careful not to get your health sapped for stupid reasons.
- Blueprints move up from 5,000 apiece to 20,000. Ouch. Fortunately, Blueprints down here are for better items than what you'll find in the Cemetery.
- On the first floor you're likely to find one vendor who offers to sell you up to three golden keys, each worth 10,000 gold. These keys open the chests around his room. Some chests contain more gold than you paid for; others contain disposable items; yet others contain equipment. Problem is, there's no way to tell whether or not a chest will contain something you want. I only recommend opening these chests if you have an excess of gold.
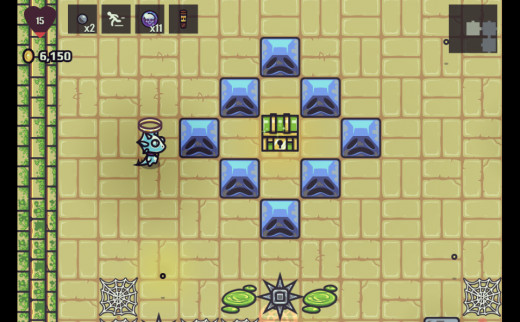
- Every now and then (maybe once per trip) you'll come across a small puzzle in the Sewer, consisting of three metal panels with coloured symbols. You need to hit these symbols in the correct order to open the doors in the room. If you hit them in the wrong order, bombs will appear throughout the room and explode a few seconds later. There's no way to figure out the order of the panels without simple trial and error, unfortunately. A pen and paper to keep track of the combinations you've already tried may help.
- Much of the Sewer is filled with rivers of green goo. Though sometimes annoying, these patches of filth are very much helpful in keeping land-based enemies away from you. Take advantage of the surmountable barrier by firing on and killing as many enemies as you can before going around the liquid.
- That said, beware the Lurkers and the Derpers in the water. They hurt. Watch the ooze for a few seconds before assuming that it's safe and turning your attention elsewhere.
- The Sewer is also lined with stone barriers. You can't shoot over these, unlike the goo rivers, but you can use them to create bottlenecks for easy shooting, as well as to set up totem killing zones. Anything that bounces (looking at you, Axe) will prove very useful in these narrow corridors. You can also use them to limit the number of enemies coming at you at any one time, as enemies always travel straight towards you, not around objects.
- Because the Sewer's rooms are so much bigger than the rooms in the Cemetery, there are bound to be areas that you don't have to explore. Take a good look at what's in each section and, unless you're feeling adventurous, don't bother wandering into places that need not be wandered. You need to preserve your health to get through this place.
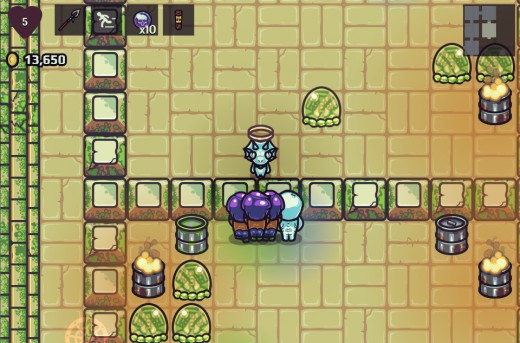
- On the second floor of the Sewer you'll find a green chest, surrounded by blocks that you can only bypass while alive. This chest can only be opened with the Slime Key, found in the Cemetery. It contains the Blood Key.
Enemies and Traps
(This article contains a full listing of the monsters and traps that appear in the Sewer.)
- Your starting weapons will not do so well down here. The enemies have a great deal more health, and a piddly Spear or Axe is typically not enough to wipe out, say, an entire crowd of Mutant Zombies. Save your money to purchase an upgrade... or make sure you don't leave the Cemetery before you get an upgrade. The yellow chest located after the Zombie Warlord may help you in that regard.
- Most of the rooms in the Sewer have at least a few Face Hugger eggs. So long as there are other enemies around, try not to hit these eggs. You won't get much from killing a Face Hugger, and though they're not too bad to bring down they're fast enough to be a real pain in a mob.
- You don't have to worry about them too much in the first level of the Sewer, but the second and third floors are at least sparsely populated by Muck Monsters. Be careful whenever approach a small, green pool. They don't give you much time to react before flying at you. Green Slimes may occasionally spawn Muck Monsters when defeated, so try to take them out at a distance.
- Speaking of Muck Monsters, they don't always count towards opening the doors in a room. If you haven't yet disturbed one - or if there are switches in the room - you can ignore the little blighters. Best you do it, too, as they're annoying to fight under any context. Just avoid green pools whenever possible.
- The Sewer is populated by a creature known as the Slime Crystal. A hearty (but not terribly difficult) enemy, the Slime Crystal is responsible for the lock on the door into the Sewers back in Amberfall. If you can destroy three of these things - on separate trips, unfortunately - the door will pop open, allowing you to completely bypass the Cemetery on subsequent playthroughs.
- There are looooots of Mushrooms, Green and Orange, in the Sewer. Though avoiding them is wise, there are times when it's just not feasible. Try to wipe them out from a safe distance rather than weaving through a field of the things.
(Got your own tips for surviving the Sewer? Let us know in the comments. I'll be happy to shove handy tidbits in with the rest.)
As with the Cemetery, the Sewer is three floors in length. At the end of it you'll come toe-to-toe... kinda... with a new boss monster: the villainous Sewer Hag. Have at you, muck dweller!