Call of Duty Black Ops 2 Zombies: Mob of the Dead Part 3- Solo Easter Eggs


Hell's Retriever
To get the Hell’s Retriever you need to feed 6 zombies to each of the 3 dogs. The 3 dogs are located at the Docks, Broadway and the Infirmary. I find that the Docks dog is the hardest to feed, but it is beside Juggernog so you can get Juggernog before feeding that dog quite easily. I try to have all of the dogs fed by round 6 but that I just my opinion. For a dog to eat a zombie you need to kill a zombie near to the dog and he will eat it. He needs time to chew and digest each zombie so you can’t just kill 6 zombies in 10 seconds and he will be fed. To feed the dogs, I would advise training when there are very few zombies left and waiting until the dog stops digesting before killing the next one. Once all of the dogs are fed you need to go opposite the 2000 point door to the laundry room, at the top of the spiral stairs, you collect the Retriever through a hole in the wall. If you press the throw button, hold it down and then at your feet you can see a ring of red appear. After two rings have appeared, the Retriever is at full power and will kill zombies until about round 15. It bounces to a maximum of 6 zombies and does not lose power per bounce. It can also be used to grab drops, such as double points, from afar making it useful when you are struggling to reach a drop.

Hell's Redeemer
The Hells Redeemer is the upgraded version of the Hells Redeemer. Just a quick note, you cannot get the Redeemer on Easy difficulty. To get the Redeemer, you need to go to the bridge, using the plane, and then only use the Retriever. If the first Brutus spawns a nuke, then don’t bother getting it as it will cancel progress. You need to survive two rounds on the bridge using only the Retriever, however I tend to survive three just to be sure. Once you have returned to the island you need to go to the dog on the Broadway, under the electric cherry, then go into the corner and throw your Retriever into the pit under the walkway. If you don’t get it back, you have done it correctly. Try a few times before you give up. Once you have done this, survive the round, you must survive the round to do it, not just for safety. In the new round, afterlife in the laundry room and then go to the Retriever spawn. It will now be blue and you can collect the Redeemer. The Redeemer can pulse three times, and with one pulse it is one shot until at least 70. This makes it the most powerful gun in the game. It also still retrieves drops and still bounces to a maximum of 6 zombies.

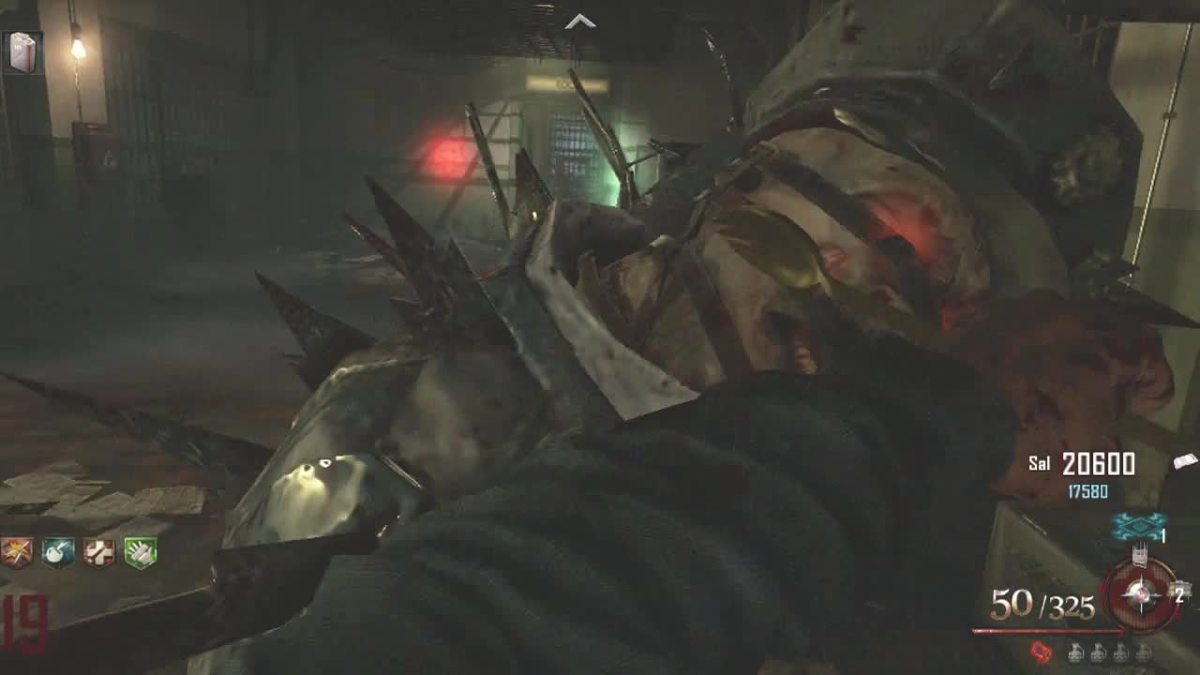
Golden Spork
The Golden Spork is a very powerful melee weapon, being one-shot kill until round 31. It is much better than any melee weapon we have had before however it is a bit complicated to collect it. To collect the Spork, you need to have at least a Hell’s Retriever and a Viltrolic Withering (may work with Acid Gat as well, but I have only done it with Viltroic Withering). You also need to have been to the bridge at least once.
The first step is to retrieve a poster off of the wall in one of the cells. The cell with the poster is at the Warden’s Office end of that corridor. Just look inside the cells until you see a poster on the back wall. Once you have located the poster, hit it with your Retriever/ Redeemer and when it falls off you will see an Afterlife symbol. You then need to go into Afterlife outside the Office and go into the newly opened portal right next to the Office. Once you go along there you will see a crack in the ground. Next to the crack will be a spoon. You must zap it until you hear a laugh and it disappears.
The next step is to go to the Cafeteria and go to the back window, where you can see more of the kitchen. On a table to the left through this window there should be a spoon. Hit that spoon with your retriever/ redeemer and you should hear Brutus shouting once you land it.
The 3rd step is to go into the infirmary and walk along the left hand side corridor. In the last room, where the mystery box can be found, there should be a bath tub filled with blood. Activate the bath tub with either X or Square and you should see a spoon stir the blood.
After this, you need to go down to the laundry room (does not have to be instantly after you stir the blood) and you have to survive there, using only your Viltrolic Withering. Once you hear a laugh- type sound, you need to head back up to the bath tub of blood. I tend to wait around for 2 rounds just to ensure I have done it. If you are doing this multiplayer, only people with the Viltrolic Withering can use weapons.
Once you return to the Bath Tub, activate it again, using X or Square, and a hand will appear out of the blood with the Golden Spork in its hand. You then grab the Spork and then, whenever you knife, it will use the spork.
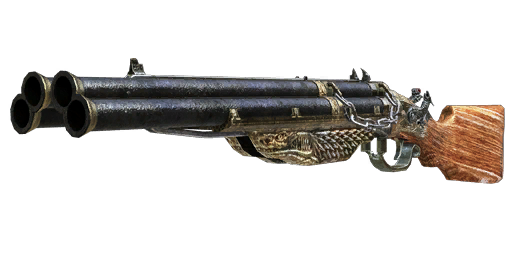
Free Blundergat
This is perhaps the most useful Easter Egg, as it gives you a free Blundergat. This can be done on solo in such a way that you can have an Acid Gat and a Blundergat at the same time! To do this you need a Hell’s Retriever or a Hell’s Redeemer. You need to go around the map collecting the 5 skulls. There are 2 at the docks, one just outside the library, one in the Warden’s Office and one on the roof. Please note that it does not matter which order you collect the skulls, only that you collect them all. If you have issues finding any of the skulls, just look up a video on youtube and you will fine them easily enough.
The first skull is on the roof. You need to go into the top left hand corner of the roof and you will see the corner of another building. Throw your Retriever at that corner until a blue skull appears when the retriever is returning to you.
The next skull is in the Warden’s Office. You need to go into the actual Office and then, at the window next to Speed Cola, aim at the wooden electricity post and you should collect the skull after a couple of attempts.
The third skull is just outside the library. When you leave the library, you can see, on your right, a skull surrounded by candles. If you turn 180 degrees then go up to the cell, you will that there is a skull in the cell. The blue skull is hidden in the toilet. Just throw your retriever a few times until you collect it.
The first skull at the docks is located next to the tower trap. Go down to the tower trap and face the area with PHD Flopper and Mule Kick on it. There are wooden posts on the side of that area. Aim at the 3rd wooden post from the left until you see a blue skull return to you.
The final skull, also at the docks, is located on a lamp post near Juggernog. Go to the Juggernog area and then walk up to the window. Go to the first corner on your left and then look up and you will see a lamppost. Try and hit that lamppost with your retriever. It may help if you jump. Another way to hit this lamppost is too take the Gondola and then hit the post with your retriever then. You just need to remember which lamppost you need to aim at.
Once you have all 5 skulls, enter the Warden’s Office and go through to the Speed Cola room. When you enter it, a fire will blaze from the table and you just need to run up to the table and collect your Blundergat. It spawns with full ammo and can be pack a punched immediately.
Songs
There are 2 songs in this map, and although they aren’t exactly necessary, you feel bad ass killing zombies to these songs! The 2 songs are ‘The Rusty Cage’ by Johnny Cash, and is, in my opinion the better of the 2 songs. It is also the song that plays in the second half of the solo introduction cinematic. The 2nd song is ‘Where are we Going’ by Malukah (I think this is the artist).
You activate The Rusty Cage by holding X or Square on all 3 whisky bottles. The first bottle is in the library, on the bookshelf that is in-between the 2 windows there. It is lying on its side, right in the corner. The 2nd bottle is in the Infirmary. When you first enter the infirmary, take the right corridor and search the tables for a whisky bottle. The final whisky bottle is at the docks. When you are facing the cage that holds the Plane Part that is kept at the docks, go to the left, not actually going into the cage, until you are facing the Sniper Tower. It is on the ground, just slightly outside the map.
Where Are we Going is activated by typing 935 into the machine on the spiral stairs, that you use to collect the rope. It is relatively simple to activate.
Thank you for reading this hub. I would just like to point out that I own none of the pictures used in this hub. I gathered all of them of off google images.
I would also like to just say that if you have any points to make or want me to write about a particular zombies or other topic, then just ask in the comments section and if it is a topic I know well, I will look into writing about it within the next couple of weeks :)
Other Zombies Hubs
Related

Collecting Crystal Skulls in Alcatraz: MOTD in "Call of Duty: Black Ops 2 - Zombies

Call Of Duty Black Ops Zombies Kino Der Toten Tips

How to Upgrade Hell's Retriever in Alcatraz in "Call of Duty: Black Ops 2 – Zombies"

The Best Tips and Tricks to Survive "Call of Duty: Black Ops 2 – Zombies"
"Call of Duty: Black Ops 2" Zombies: How to Get the Golden Spork in Alcatraz: Mob of the Dead


