Dark Souls II Walkthrough, Part Eighteen: Harvest Valley - Poison Pool


With the Skeleton Lords defeated (and possibly the Executioner's Chariot, if you felt like taking it on), the next leg of your journey takes you into the narrow canyons of Harvest Valley. Ignoring the happy intonations of its name, Harvest Valley is a land of mines, slaves, and poison. You'll be facing some hard times wading your way through this wasteland... as if that's anything new...
Harvest Valley
- After lighting your Bonfire, set back out into Harvest Valley. You will likely accumulate a fair bit of poison while going through the pool, and if it builds up too much you'll just be poisoned. I suggest stocking up on Poison Moss before going through here, as all of Harvest Valley threatens to poison your character.
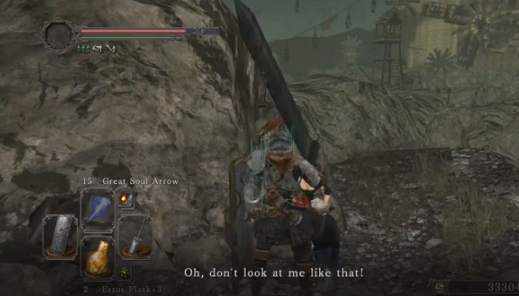
- To your right and straight ahead is a woman named Chloranne, who deals in orestones - namely Titanite Shards. Speak to her enough times and she'll move off to Majula.
- Head down the path to the left of Chloranne. At the end you'll find an area, covered in green mist, that's full of corpses burning with items. Watching over them is a hulking figure that lobs black mist at you, and it really hurts. Ranged fighters have an advantage over this thing.
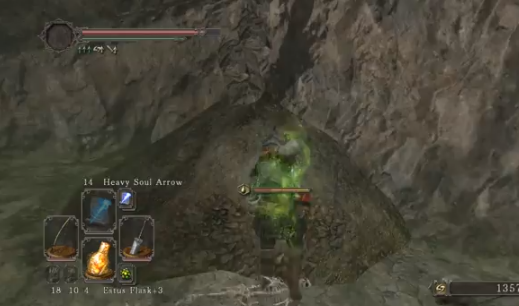
- Now for that poisonous mist. Step in it and your poison counter will quickly accumulate, but... treasure... if you have a low resistance to poison, use a Common Fruit to build up a temporary resistance before hunting around. In the pit you'll find two Small Smooth & Silky Stones, two Titanite Shards, five Fading Souls, ten Poison Throwing Knives, a Titanite Chunk, and, from the corpse hanging off of the ledge, a Lifegem. There's a skeleton that will rise up beside this corpse, and another appears in the pit not far from the corpse. Be careful on both.
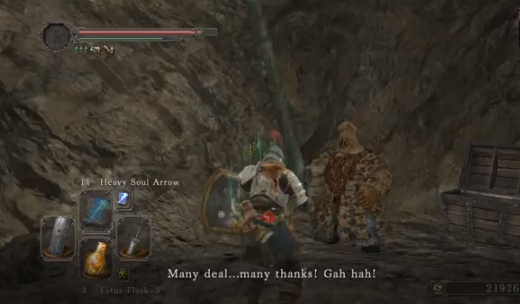
- Also in this pit, near the stairs, is a cave entrance. Run inside through the poison and you'll stir up a skeleton. Run out of the mist, up a nearby ramp, then destroy the skeleton. By this perch you'll find a corpse containing a Fragrant Branch of Yore and a Torch. It the room this leads to you'll find Gavlan, an NPC you met in No-man's Wharf. As before, he'll buy stuff you don't need. He also carries the aforementioned Poison Moss. Check the chest beside Gavlan for a Raw Stone.
- Return to the previous room. There's another small chamber at the bottom of the pit here. Go down into the poison and you'll find a Fire Seed and a Divine Soul inide a chest beyond.
- Go back outside and run up the ramp to your right. At the top is a corpse holding a Torch. Snag it and continue down the path.
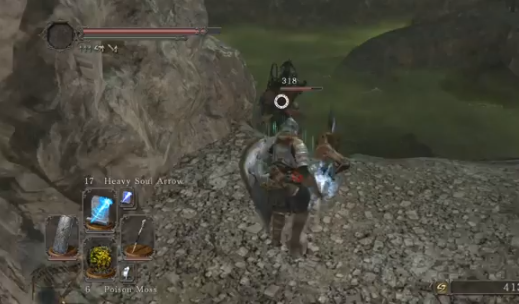
- The path widens, and ahead you'll see two more of the black ball-lobbing brutes. Again, ranged characters have the advantage here, and if you have to go melee I suggest drawing them to you one-at-a-time, if you can. On your right is a ladder leading to a perch where you can easily snipe the things. Also up here is a corpse carrying ten Hexing Urns.
- There are a number of minor enemies nearby which will make trouble if you close in on the brutes, but killed afterward they're no big deal. Mind the guy beside the next ladder on your right as you climb up. Kill the guy by the switch over the wooden gate, then hit said switch. Pass through.
- Inside, the mineshaft will split. Ignore the straight-ahead approach and take the right that's partially hidden as you walk through. At the end of this short diversion you'll find another Bonfire, The Mines. Light it up and you'll have a much handier save point that doesn't force you to wade through poison every time you want to visit this area.
- We'll address what lies ahead in the next article, but first, one little point: this is a really good area for ranged characters to grind with little trouble. Standing in the mineshaft, you can lob magic or projectiles at the energy-hurling giants back the way you came. They'll try to return fire, but their attacks will almost always hit the sides of the shaft and cause you no trouble. Woo!
Related
-
Dark Souls II Walkthrough, Part Twenty-Three: Iron Keep - Smelter Demon

Poisonous Plants: Lily of the Valley, Foxglove and Poison Ivy
-
Dark Souls II Walkthrough, Part Fourteen: Huntsman's Copse - Bridge Approach

Dark Souls 2 How to Get to Harvest Valley
"The Banner Saga" Walkthrough: Character Recruitment