- HubPages»
- Technology»
- Computers & Software»
- Operating Systems»
- Windows
Customizing the Windows 7 Start Menu
Introduction
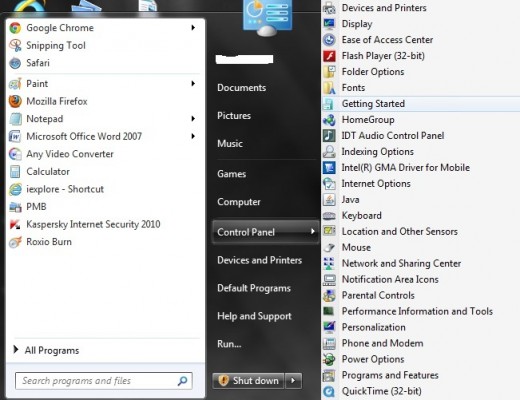
Work through customization options to tweak the Windows 7 Start menu so that it's optimized for you. You can change the icon size, pin programs to the Start menu so they'll always be there, add the Run command, adjust how the Shut Down button performs, modify what folders are displays and how they act, and even move the Start menu.


More Technology Articles!
- How to Download Free Audiobooks and eBooks From Your Library to Your iPhone, iPad or iPod Using Over
Learn how to get audiobooks or eBooks on your iPhone, iPad or iPod from your library for free using the OverDrive Media Console. - Troubleshoot Netflix Problems on Xbox 360
Common problems with Netflix on the Xbox 360 include content being displayed as temporarily unavailable, videos being pixelated or blurry, and the application simply not responding. Learn how to improve your streaming Netflix experience.
Pin Programs to Start Menu
If there's a program you use on a regular basis that you don't want to have to go digging through All Programs for all the time to open, you can pin that program to the left side of the Start menu for easy access. Pin the program to the Start menu by doing the following:
- Click the Windows orb on the Windows 7 taskbar and then click "All Programs."
- Navigate to the launch file for the program you want to always be displayed on the left side of the Start menu. Alternatively, if the launch file for the program you want to pin to the Start menu can't be found in the Start menu, you'll have to navigate to the launch file through Windows Explorer, which can be opened by double-clicking "Computer" on your Windows 7 desktop.
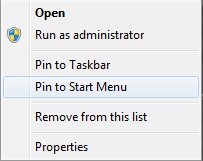
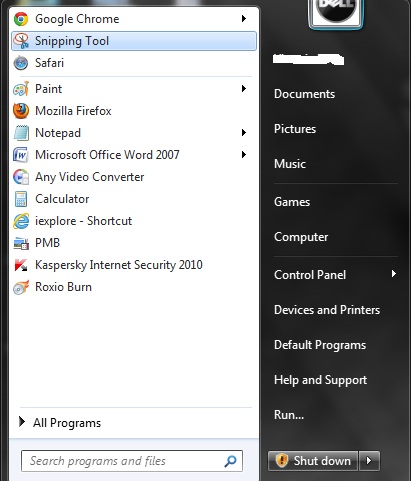
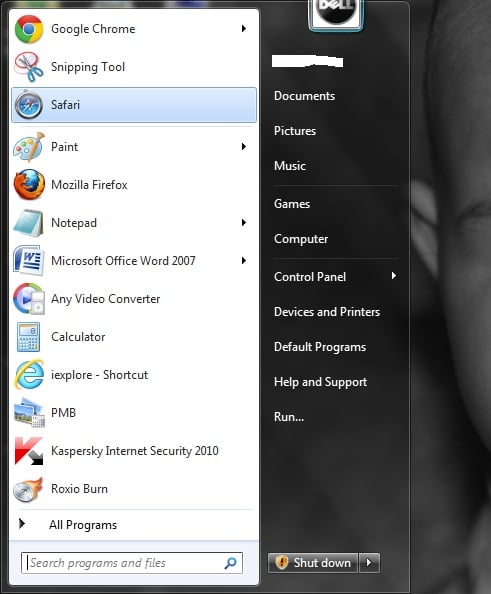
- Right-click the launch file and then click "Pin to Start Menu." The program will now appear in the top part of the left side of the Start menu, separated from the recently-run programs by a gray line.
- Repeat this process for any other programs you want to pin to the Start menu. You can change the order of the pinned programs by clicking, dragging and then releasing them in front of or behind other programs in the pinned section.
- Remove a program you no longer want to be pinned to the Start menu by right-clicking that program and then clicking "Unpin from Start Menu."
Change Start Menu Icon Size
By default, the icons that appear in the Windows 7 Start menu are large. If you're the type of person who has a lot of pinned programs and likes to display a lot of recently used programs, this can result in your Start menu taking up a huge amount of desktop real estate when it's open, and making it feel clunky to navigate. You can use smaller Start menu icons by doing the following:
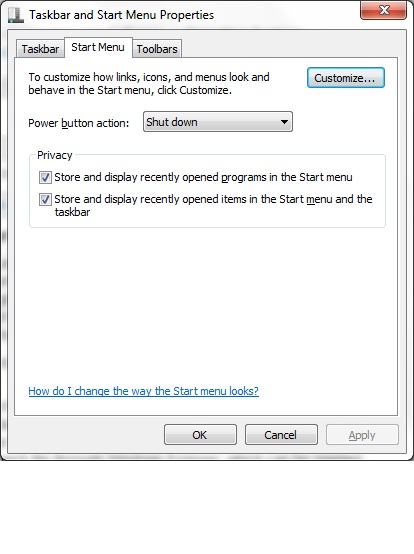
- Right-click the Windows orb on the taskbar and then click "Properties." The Taskbar and Start Menu Properties dialog box is displayed.
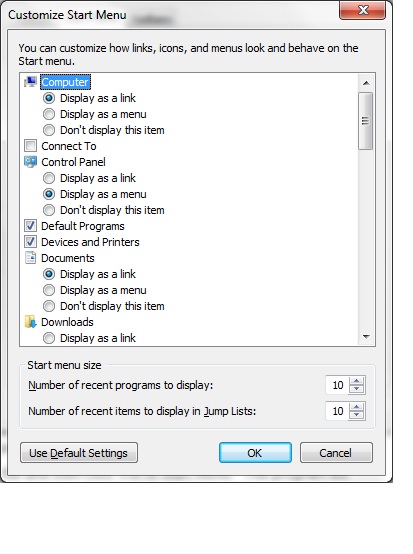
- Select the Start Menu tab and then click "Customize." The Customize Start Menu dialog box opens.
- Scroll down to "Use large icons." Click to uncheck the context box to the left of "Use large icons." Click "OK" in the Customize Start Menu dialog box; that dialog box closes.
- Click "Apply" and then "OK" in the Taskbar and Start Menu Properties dialog box to apply your changes.
- Click the Windows orb on the taskbar to open the Start menu and view your changes. You can reverse this change at any time by navigating back to the Customize Start Menu dialog box and then clicking to check the box to the left of "Use large icons."
Change Function of Shut Down Button
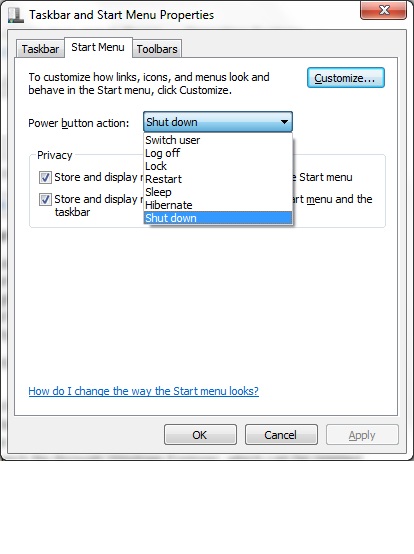
- Right-click the Windows orb on the taskbar and then click "Properties." The Taskbar and Start Menu Properties dialog box is displayed.
- Click the drop-down arrow to the right of "Power button action."
- Select the action you want the Power button in the Start menu to perform when you press it. Bear in mind that this doesn't affect what happens when you press the physical Power button on your laptop, but just the pixelated Power button in the Start menu.
- After making your changes, click "Apply" and then "OK" in the dialog box to save your changes.
Add Run Command to Start Menu
The Search feature in the Start menu essentially performs the functions of the Run command in previous versions of Windows. However, if you don't trust the Search box or you feel like your cheating on the Run command you relied on for so long, you can place the program back on the Start menu for easy access by doing the following:
- Right-click the Windows orb on the taskbar and then click "Properties." The Taskbar and Start Menu Properties dialog box is displayed.
- Select the Start Menu tab and then click "Customize." The Customize Start Menu dialog box opens.
- Scroll down to "Run command."
- Click to place a check in the context box to the left of "Run command."
- Click "Apply" and then "OK" in the Taskbar and Start Menu Properties dialog box to apply your changes.
- Click the Windows orb on the taskbar to open the Start menu. The Run command appears at the bottom of the right side of the Start menu. You can reverse this change at any time by navigating back to the Customize Start Menu dialog box and then clicking to check the box to the left of "Run command."
More Technology Articles!
- How to Use Google Voice for Free Texting on iPhone
Learn how to use Google Voice to send and receive free text messages on your iPhone. You can set your iPhone up to function exactly like the default Messages app on your iPhone. - How to Add Feedjit to Blogger
Learn how to track where your Blogger blog's visitors are from, when they visited, how they got to your blog, what page they landed on and how they left your blog by adding the Feedjit live traffic widget. - How to Remove or Block Gmail Chat Contacts
Learn how to block Gmail Chat contacts from seeing when you're online and from being able to send you messages. Additionally, learn how to hide contacts you don't talk to so you can free up space for the contacts you talk to regularly.
Modify Folders in Start Menu
You can adjust what folders are part of your Start menu and how those folders act. For example, by default, the folders in your Start menu are set up as links, which means that when you click a folder in the Start menu, it opens up in Windows Explorer. Perform the following to change how your Start menu folders react:
- Right-click the Windows orb on the taskbar and then click "Properties." The Taskbar and Start Menu Properties dialog box is displayed.
- Select the Start Menu tab and then click "Customize." The Customize Start Menu dialog box opens.
- Scroll down to the name of the folder you want to modify. If you want to change how a personal folder acts in the Start menu, you have to change how all of the personal folders react, which is done through the "Personal folder" option in the Customize Start Menu screen. Beneath the name of your folder you'll see three options: "Display as a link," "Display as a menu" and "Don't display this item."
- Selecting "Display as a link" opens the folder in Windows Explorer when you click it; selecting "Display as a menu" displays all of the folders or files in a context menu next to the folder when you click it, similar to how All Programs is set up; and selecting "Don't display this item" means the folder won't be displayed in the Start menu.
- Click "Apply" and then "OK" in the Taskbar and Start Menu Properties dialog box to apply your changes.
Move Start Menu Location
You can move the Start menu, but you also have to move the entire Windows 7 taskbar with it. Move the Start menu by doing the following:
- Right-click an open are on the Windows 7 taskbar to open a context menu. If "Lock the taskbar" is checked, click to remove the check mark and unlock the taskbar.
- Position your cursor over an open area on the taskbar and then click and hold down the left mouse button.
- Move your cursor to any of the four edges of your screen. The taskbar will position itself on the edge of the screen you're closest to.
- Release the left mouse button when your taskbar is positioned where you want it to.

