Maya Tutorials: Render Settings

Stop, Look and Render
Rendering can be one of the most enjoyable components of CG art. It's where you combine your models, textures, lights and animation. Gradually you bring your scene into the detailed and beautiful reality you want to convey in your mind's eye, seamlessly mending these individual entities into one mind bending piece. It takes some time and patience to achieve these never before seen realities, but that is a common theme throughout the 3D realm. You get what you put in when modeling, texturing, lighting, etc, and rendering is no different. So let's get to it, render settings for test and production quality.


Enabling Mental Ray
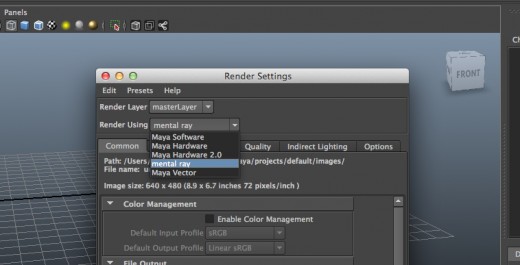
Mental Ray is going to be your best bet here for your choice of renderer. It's very beginner friendly and has tools and presets that ease you into the world of textures, materials, shaders, bump maps and more.
To enable Mental Ray you are going to want to open the render settings. At the drop down menu at the top for Render Using, select Mental Ray.
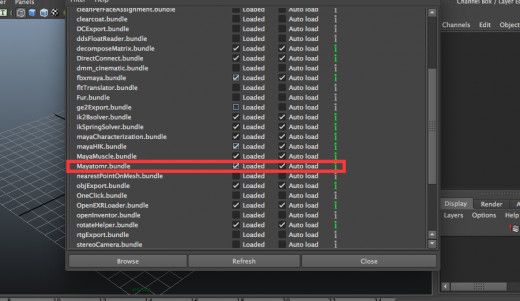
If it doesn't appear in the drop down menu you're gonna have to do a few extra steps. At the menu bar at the top of the screen go to Window>Settings/Preferences>Plug-in-Manager. Make sure Mayatomr.bundle is checked for both Loaded and Auto Load.


Camera Lenses
- Fish Eye: 2.5mm -- 14mm
- Wide Angle: 15mm -- 40mm
- Normal: 40mm -- 65mm
- Telephoto: 70mm -- Forever
This is Only a Test
To see the results of your altercations as quick as possible, you'll want to keep your render settings low. Mirror these settings for when your final render is a ways down the road. Get an idea for where shadows are, preview an applied texture and more with the right combination of render time and image quality.
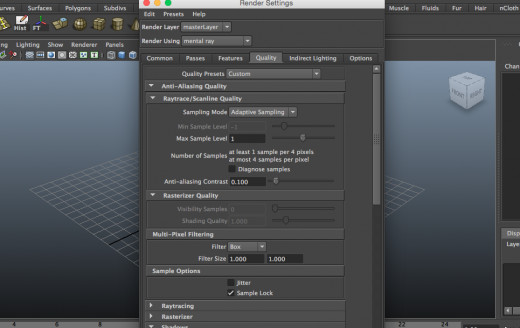
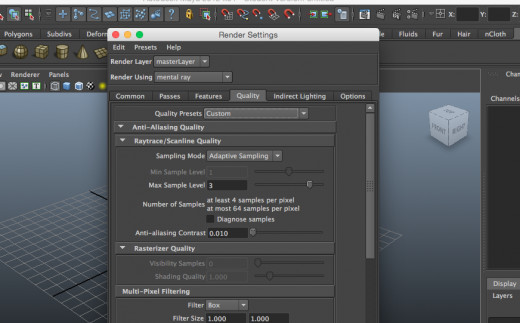
In render settings under the Quality tab, go down to Raytrace/Scanline Quality and change Max Sample Level anywhere from 1, to -2.
Open up the Render View and under Options go to Test Resolution and check off the boxes 50%, or 75% for a little more detail. Take things down to 25% for an even quicker render but considerably lower image quality.


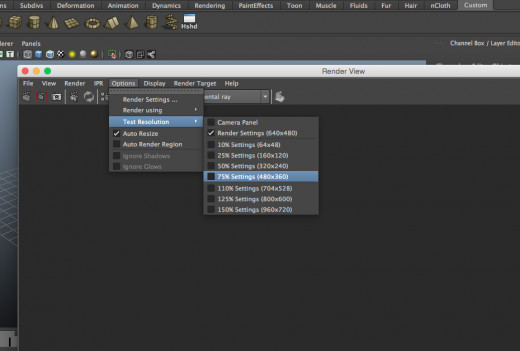


Take note rendering times will start to get lengthy at these settings.
Production Settings
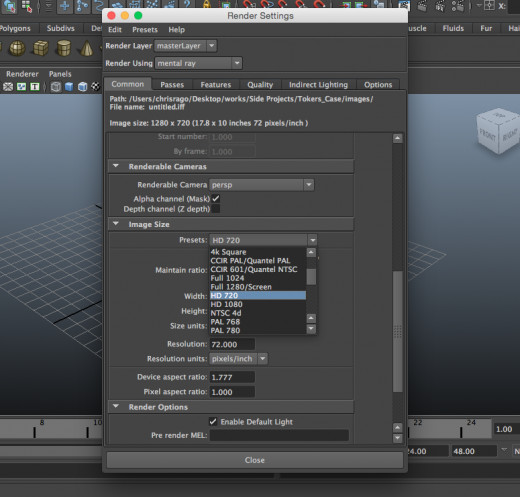
After making all of your changes and improvements to your models and or scene, its time to tap into the higher power of your render settings to really make your creations shine. Open up your Render Settings once more and under the Common tab go down to Image Size. In the Presets menu select your desired image resolution. HD 720 and 1080 are great presets for getting some nice looking renders. You can choose from resolutions and image sizes at higher and lower levels, all depending on what you want.
Going back to the Quality tab in the Render Settings, go ahead and bump the Max Sample Level to 2 or 3. The higher the samples the higher quality render. You will also see an Anti-aliasing Contrast slider as well. I personally bring the slider down to 0.010 but this will vary depending on your unique scene. Check out this website here to learn more about anti-aliasing.
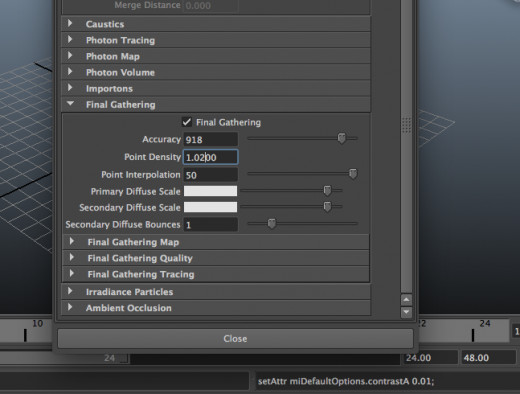
Lastly, you will want to go to the Indirect Lighting tab and head on down to Final Gathering. Final gather calculates indirect illumination. It enhances light effects and can push the realism and mood of your scene. Check the box to enable it and start with turning up the accuracy. Accuracy is the number of rays cast from Final Gather points. Values around 600-800 will reduce the noise in your renders. Point Density to 1.200, these are the number of FG points that are to be computed in the scene. Point interpolation to around 30-50. I usually turn down the diffuse scale on both primary and secondary scales to reduce blowout on the final render image, but feel free to experiment. Use Raytracing to get the most physically accurate results. Finally, add that secondary bounce or two for more accuracy.


Kick off the Final Render
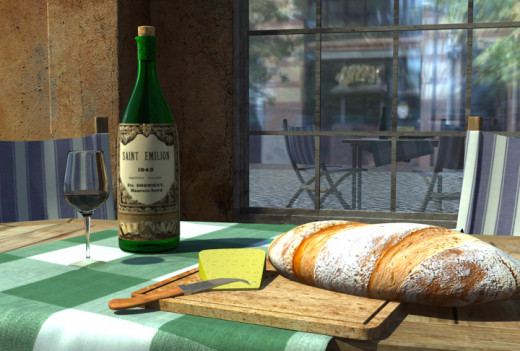
With all these settings enabled/augmented its time to kick off your final render. Be ready to wait several minutes to hours depending on the complexity of your scene and render settings. This is only the beginning of Maya's rendering capabilities. Stay tuned for more articles about rendering and Maya in general. Until then, enjoy your shiny new Renders.

More from the Odd Spartan
© 2014 Christopher Rago


