Darksiders 2 To Move A Mountain Quest
Darksiders 2 the Lost Temple Obstacles

Darksiders 2 To Move A Mountain Quest
In Darksiders 2, the hero must embark on the to move a mountain quest to find the lost temple and activate the sleeping warden. The warden is a gigantic construct which will help the hero find the Tree of Life. The hero must navigate the obstacles, puzzles, dangers and monsters in the Lost Temple. This will guide the hero on how to solve the obstacles and puzzles and defeat the main monsters in the Lost Temple and progress in this quest.
Darksiders 2 Find the Carven Stone
Before the hero can enter the Lost Temple, he must go through the Nook and then find the entrance to the Lost Temple.
The hero can also find the carven stone to complete the Shaman's Craft Quest within the Lost Temple. First the hero must go through the door of the lost temple and defeat some constructs. Next, the hero must activate and use a constuct nearby to smash through some crystalline structures. at the beginning of the lost temple area. The hero needs to dismount from the construct once he arrives at a door. Go through the door and be attacked by a construct sentinel and some other constructs. The constuct sentinel can be targeted and harmed by Redemption. Finish them off and get the carven stone from the construct sentinel. Return to Tri-stone by fast travel and hand over the carven stone to the shaman. Be rewarded with the Grim Talisman. The Grim Talisman can only be used at level 9 though.
Darksiders 2 The Lost Temple Obstacles
Return via fast travel to the lost temple. The hero will first encounter one of the more challenging series of obstacles in the lost temple at this stage of the game. The hero will arrive at a chamber with some corrupt crystalline structures blocking the way right and left. The hero needs to climb the walls and pass over the obstacles on the right first. Go pass the corridor and then arrive at a huge chasm filled with water and enemy constructs. Use the ledges on the left and transverse the wall and arrive at the other side. The hero must activate a maker's construct on this side of the chasm and use it to smash the crystalline structures lying on the other side of the chasm (use the mouse wheel whilst mounted on the maker's construct to do this) . This will reveal a lever trapped within the corrupt crystalline structures. Go to the lever (via climbing the wall) and activate this. A bridge will appear and allow the hero to cross the chasm. However, this will also activate lots of enemy constructs who will chase after the hero as he crosses the bridge. Remount onto the maker's construct and use it to destroy all the "mini-constructs" chasing after the hero.
More Obstacles to Overcome
With all the enemy constructs defeated, ride the maker's construct and cross the bridge. Return to the area with the chamber blocked by crystalline structures. Smash through all the crystalline structures and proceed to the left side of the chamber. The hero must then position the golem with the ball in a crater and use the golem's chains to attach to the other side. Jump onto the chain and continue moving to the next section.
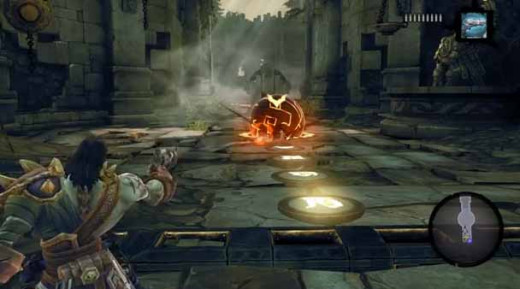
There will be a shadow bomb with a ball or orb high up on the walls at this point. Use Redemption to allow the shadow bomb to explode. The orb will drop onto the ground. Push the orb into a crater on the ground. This will cause one of the gates to be lowered. However, there are two gates here. The other gate or iron grating is still up and is blocking the hero's path. To overcome this obstacle, turn back and fire Redemption at the orb. This will cause the orb to be dislodged from the crater on the ground. The ball will jump up from the crater and the first gate will rise. The second gate will be lowered, allowing the hero access to the skeleton key within a chest.
With the skeleton key so obtained, the hero can climb some vines and bypass the first gate. Drop down from the vines. Go to the end point of the golem chain attachment and jump into the pit. Climb up onto the other side after opening the chest in the pit.
Now use the skeleton key to open the locked skeletal door. Beyond this door, climb some vines to the other side and defeat some constructs. Activate another lever to open another gate. Climb down and go remount the maker's construct. Ride it beyond the most recently opened gate. The hero needs to use the construct to destroy all the crystalline structures in the passsageway.
The hero will then arrive at an area with a crossroad. The left side and right side of the crossroad will lead to chests. The way straight ahead in the crossroad will allow the hero to progress in the to move a mountain quest. The hero can unlock the chest on the left to find the lost temple dungeon map. After looting the chest, go straight through the crossroad and unlock the gate straight ahead by putting the golem's orb into the crater.
A gate will be lowered allowing the hero to enter a large chamber, where the first titanic fight within the lost temple will begin.


