- HubPages»
- Arts and Design»
- Graphic Art & Design»
- Design Software
How to Liquidize Plastic Objects in Photoshop


You can manipulate images in Photoshop in numbers of ways. You can add people to a photo, turn a photo into a cartoon, apply makeup to a photo, liquidize plastic objects or create liquid effects.
This Photoshop tutorial includes:
How to liquidize plastic objects
How to liquidize any kind of objects
How to create liquid effects
How to create flowing liquid effects

How to Liquidize Plastic Objects in Photoshop
Follow these steps to liquidize plastic objects in Photoshop. You can also use this method to liquidize any kinds of objects.
Open the photo of an object you want to liquidize.
Select the object and copy it to a new layer. You can use any selection tool.
Scale the object to ensure you have some space on the bottom.
Create a new layer just below the object layer and fill it with white color. Name this layer as background. You can now delete the original background layer.
Merge object layer and background layer. The object you want to liquidize is in white background.

Select Eyedropper tool and pick the color from the bottom of the object.
Select Pen tool. Choose Shape layers mode. You can find options for Pen tool in the menu ribbon.
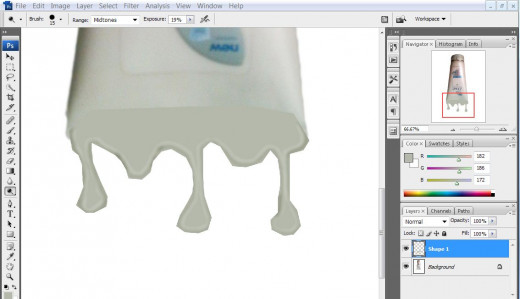
Draw falling drops on the bottom of the object. Since you have chosen shape layer mode, you can see your drawing filled with the color you picked from the bottom of the object.
Rasterize the layer. Go to Layer – Rasterize – Shape

Select burn tool with small brush size, and Exposure around 35 percent. Choose Highlight as the Range. Brush on the edge of the failing drops to create dark effects.
Select Dodge tool with small brush size; Exposure: 20-25 percent; Range: Midtones. Gently brush just above the burn effects on the falling drops.
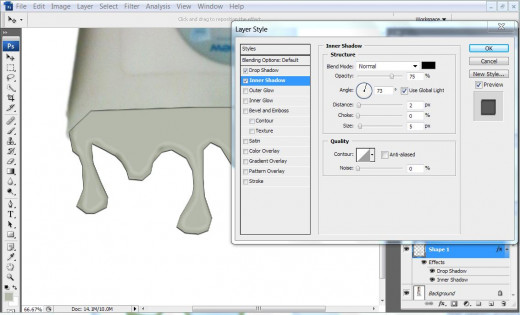
Go to Layer Style and choose Drop Shadow. Set blend mode to normal, angle around 30 degree, distance 3-4 pixels, size 1-2 pixels, and Spread 0 percent.
Go to Layer Style and choose Inner Shadow. Choose normal as blending mode, set angle around 70 degree, distance 0 percent, choke 0 percent, and size 3-4 pixels.
Create a new layer just above the background layer and merge this layer with Layer Styles layer.
Select Eraser tool with Opacity around 60 percent and erase visible borders.
Select blur tool with Strength around 70 percent and blur the area between failing drops and the object.
How often do you use Photoshop to manipulate picture?
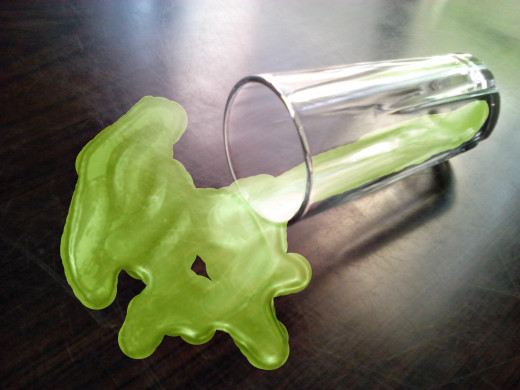
How to create flowing liquid effects
Follow these steps to create liquid effects or flowing liquid effects.
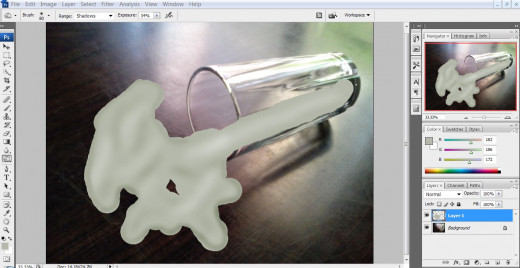
Open a photo that has over turned jar or a glass. You can also use picture of table surface.
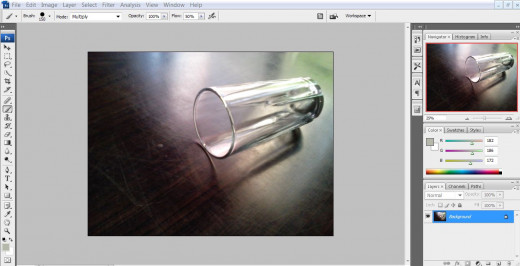
Create a new layer.
Choose grey color. Select hard edge brush and paint to create liquid shape.

Select Burn tool with soft edge brush, Choose Shadow as Range and set Exposure between 10 and 15 percent. Brush randomly over the painted part to give depth.
Select Dodge tool with soft edge brush. Choose Shadow as Range, and set Exposure around 20 percent. Brush randomly to create highlight effects.
Go to Filter – Artistic – Plastic Wrap. Play with the sliders until you think liquid effect is real.
If the result does not look good, undo the changes, and use dodge and burn tool again to create depth and highlight effect.

Change blending mode to Hard Light.
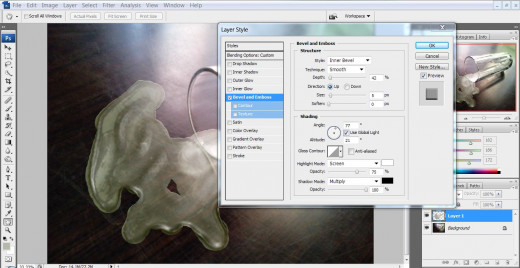
Go to Layer Style – Bevel and Emboss. Set Inner Bevel as style, Technique: Smooth; Depth: 30 percent; Highlight mode: Screen, Shadow mode: Multiply. While setting angle you have to note the original source of light. Play with the sliders until you get real-like liquid effect.
If you are creating liquid flowing out of a container, use blur tool and blur the liquid inside the container. If you have overdone coloring on the neck, you can use Erase tool to erase unnecessary coloring.
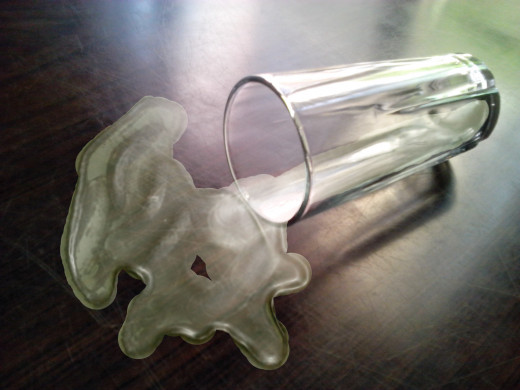
You can use Color Balance option or Hue/saturation to create different colored liquid effect.