How to Make Your Own Chandelier

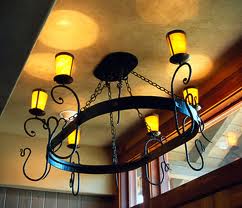
Chandeliers add sparkle and beauty to any dining room or kitchen. And they can really be used of any room in your house if they are decorated accordingly. Which might make you ask yourself if it’s time to get a new chandelier? This can be costly though, is it possible to make your own? Yes it is, in fact it is actually quite simple. You can either buy yourself an old chandelier at a garage sale or second hand store or you can use your old existing chandelier and spice it up. This is also a great way to recycle your unwanted lighting into something that you will love to have. Here are a few steps to help you make a beautiful chandelier either from an old ceiling fan fixture or from an old chandelier that’s been kicking around your home.
What You Need:
- Old chandelier or old ceiling fan fixture
- Latex or acrylic paint
- PVC Piping, if you want to make the chandelier from scratch
- Plumber’s putty or all-surface adhesive
- Sandpaper
- Primer
- Fabric or air dry clay
- Light bulb shells and sockets
- Chandelier chains-optional
- Wiring and lighting kit-optional
- Embellishments
Step 1: Plan
Plan where you are putting the chandelier that you are about to make. It could be for the dining room, living room, front entrance, children’s room, kitchen etc. Plan the colors that you will be using and purchase the materials needed from your local hardware store. Plan for any added embellishments as well. This may be dangling crystals or home made beaded flowers that can be bought at a craft store. Look for the appropriate looking pipe if you are using the light fixture.
Step 2: Affix the Piping
Join the piping to the light fixture using the plumber’s putty or all-surface adhesive. Try to be creative when gluing on the piping.


Step 3: Sand and Paint
Sand the piping and add a primer and allow time to dry. Or if you’d like to go for a different look you can glue on the desired fabric or you can also use air dry clay to paint, simply shape it over the pipes and allow time to air dry. Once the primer or clay has dried proceed to paint the chandelier with the desired color. Make sure that you leave the piping open for the wiring after you have painted.
Step 4: Thread the Wire
Step 5: Attach Light Bulb Shells and Sockets
Attach light bulb shells and sockets at the end of each of the arms.
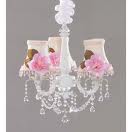
Step 6: Add Embellishments
You can now add any crystals, flowers, glass beads or anything else that may be an added characteristic of the room you are decorating for.
Step 7: Hang the Chandelier
Once you are finished decorating your chandelier, it is time to hang it up. You may need to use some chandelier chains, either existing ones that were with the chandelier to begin with or new ones that were purchased prior. These will be especially useful if the chandelier is heavy.
- Chandelier Lighting: How to Choose Guide
Until recently chandelier light fixtures were the decorative pieces belonging to the homes of only the rich and the elite. But modern manufacturing techniques and processes have made chandelier lights affordable even for the common man. Chandeliers a - Chandelier Shades
Replacing chandeliers can be a very expensive task. A worthwhile alternative which is also economically sound might be to purchase chandelier shades. They are available in many different styles and colors... - Beautiful Lighting: Brushed Nickel Chandelier
If you're shopping for new lighting fixtures, consider a brushed nickel chandelier. These lovely fixtures have a beautiful finish that compliments just about any dcor you might use. You can find...
Always be sure to take care around any kind of wiring. To use an old chandelier will require the least work, but can not be as altered to what you may desire in your chandelier. Either route you decide, it will be a delight for you to look at when using your new chandelier.
Is it worth your time to recycle your old chandelier to redesign it and make it new again?
Prestige Writing Services: Articles Provide a Cost Effective Solution to Advertise Your Business. Great rates, efficient, memorable work.