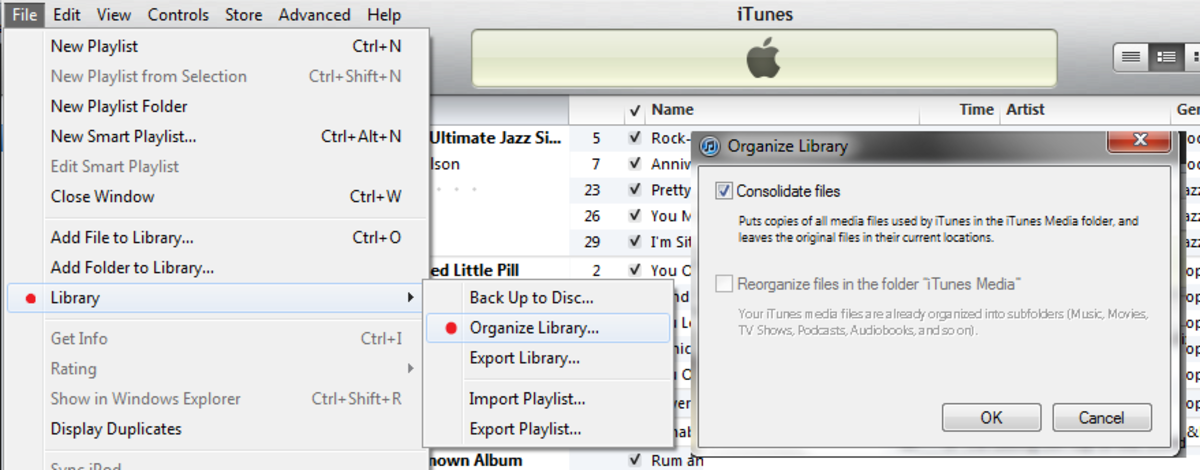
A Workaround for the iTunes Video Syncing Problem in Windows 7

Update: The video syncing problem has been fixed in iTunes version 10.5. This article may still be useful to you as it details a convenient way to manage files on your iPad without using iTunes.
--------------------------
If you're using iTunes on a Windows 7 PC and get the dreaded "iTunes has stopped working" message when you try to sync your iPad, iPod, or iPhone with "Include videos" checked, this workaround will offer relief. If you're familiar with the cause and symptoms of the problem, you can skip ahead to the solution below.
Note: Below I will refer to "iPad", but with the exception of references to iMovie, the instructions will work for iPod Touch and iPhone as well.
Update: I recently upgraded my iPad to iOS 5 and iUnarchive Lite no longer works. I will update this article when I find a good substitute.
A little trouble at first
I recently bought an iPad2 and wanted to use the iMovie app for editing vacation videos that I shot with my Canon digital camera. The videos all had to be converted first, and that is the subject of another article (see below). I had all of the converted videos in one folder on my PC and had trouble when I clicked "Include videos" in iTunes. I noticed that if I reduced the number of videos in the folder to five or six, it worked. I would sync the iPad, add five more videos and sync again. I didn't have to remove the previously synched videos because iTunes would only process the new ones. I proceeded in this fashion until all of the videos from the first part of my vacation were transferred to my iPad. I edited them in iMovie and was very happy with the results.
Big trouble
With the first part of my vacation movie done, I was preparing the remaining video files for transfer to the iPad. When iTunes started, it asked me if I wanted to upgrade iTunes to the latest version (10.4.1) and I clicked "Yes". BIG MISTAKE! The "iTunes has stopped working" error now happens every time, even if there is only one video in the folder. I Googled the problem and found many other people looking for answers to this problem. I signed into the Apple Support Forum and found an ongoing thread dedicated to the problem that is common and repeatable in iTunes for Windows version 10.4. Despite more than 17,000 reads and hundreds of comments, Apple has yet to acknowledge that a problem exists.
The forum contains several suggestions for workarounds, but none of them solves the problem of getting the videos onto the iPad2 so that they could be used in iMovie. I tried a few of the suggestions and spent a little money on software that failed to address all of the issues.
A real solution
Thanks to user "rraheja" on the Apple Support Forum, there is a solution that actually works.
You will need to download software called DiskAid. They offer a free trial version for Mac or Windows that is good for 14 days. After using it to solve my immediate problem, I think it's definitely worth the ten bucks that they charge for the full version, which is free for students, teachers, and academic personnel. DiskAid lets you manage files on your iPod, iPad, and iPhone without going through iTunes.
You will also need a free app for your device called iUnarchive Lite from the App Store.
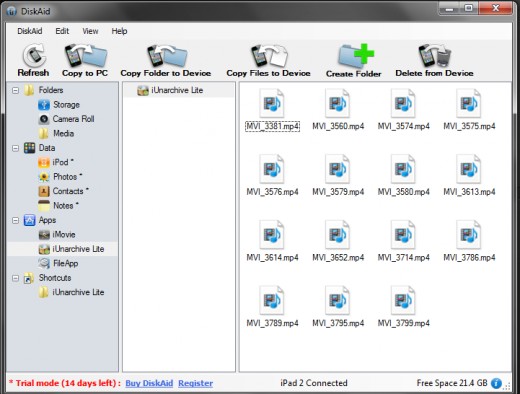
On the PC
After downloading and installing DiskAid on your computer and iUnarchive Lite on your iPad, Start DiskAid on your computer and connect your iPad as normal. You can close iTunes if it starts up. In the DiskAid window, navigate to the "iUnarchive Lite" folder on the left side of the window. Drag video files from Windows explorer to the "iUnarchive Lite" folder in the DiskAid window. Click "Copy Files to Device" at the top of the DiskAid window.
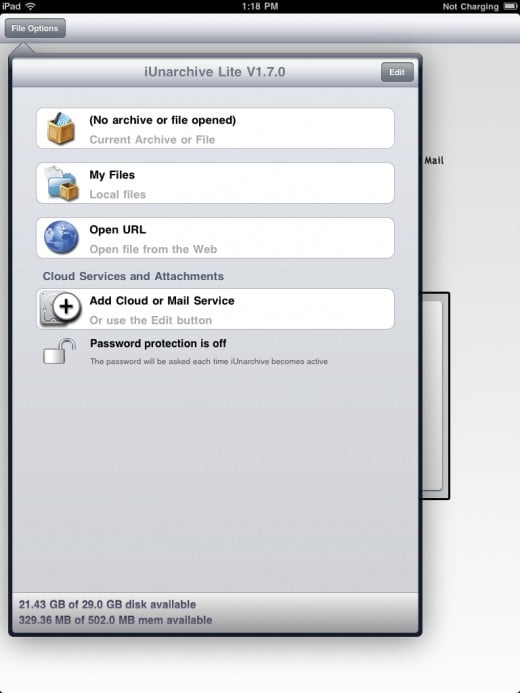
On the iPad
Start iUnarchive on your iPad.
Click "My Files"
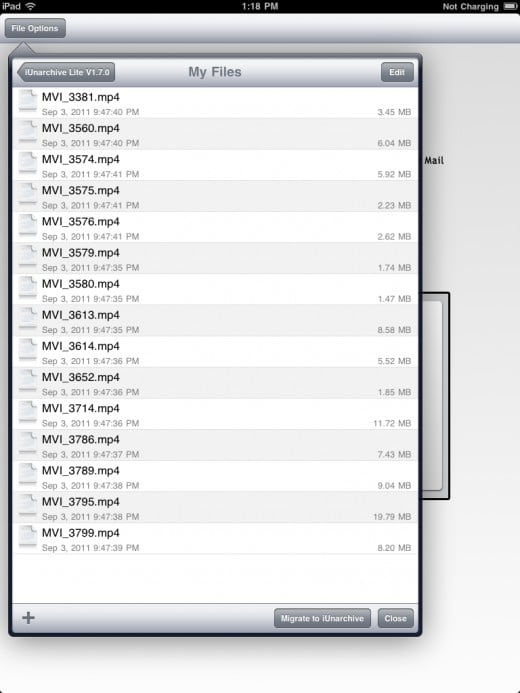
You will see a list of the files from your PC.
Click "Edit" at the top right.
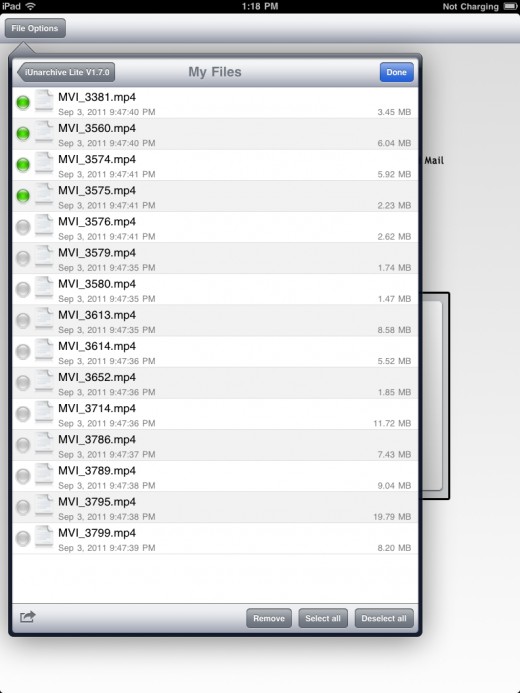
Check each file by touching the circle on the left of the file name. It will turn green.
If you have many files, I suggest you do the following steps for 5 or 6 files at a time.
Once you have checked at least one file, the options button will appear in the lower left corner of the screen (a box with an arrow pointing to the right).
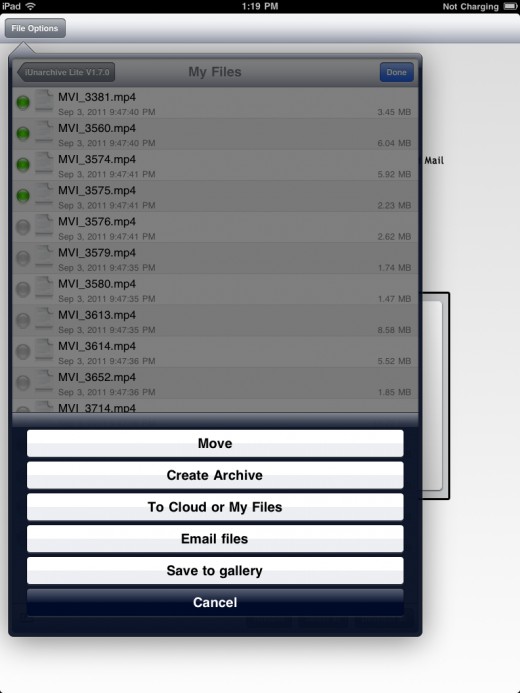
Save the files to the Camera Roll
Click the options button, then select "Save to gallery". This will move the checked items into your Camera Roll where iMovie can see them.
Continue checking and saving until all of your videos have been transferred.
Other articles that might be of interest:
Converting video files for use on iPad


